GINE AND MUFFLER TO COOL OFF
TO AMBIENT TEMPERATURE.
TEMPERATUUR HEBBEN BEREIKT,
OM MOGELIJKE BRANDWONDEN TE
VERMIJDEN.
•
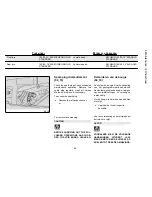
Disconnect the cap «
1
» of the
high voltage cable from the
spark plug.
•
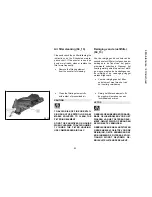
Clean off any trace of dirt from
the spark plug base. Then un-
screw it using the spanner sup-
plied in the tool kit and remove it
from its seat, being careful not to
let dust or any other substance
into the cylinder.
•
Check that the spark plug elec-
trode and centre porcelain are
free of carbon deposits or signs
of corrosion. If necessary, clean
using suitable spark plug clean-
ers, a wire and/or metal brush.
•
Blow with a strong air blast to
avoid removed dirt getting into
the engine. Replace the spark
plug if there are cracks on the
spark plug insulating material,
corroded electrodes or several
deposits.
•
Check the electrode gap with a
thickness gauge. It should be
0.7 - 0.8 mm; adjust it if neces-
sary by carefully bending the
earth electrode.
•
Make sure the washer is in good
conditions. Once the washer is
fitted, manually screw the spark
•
Maak het kapje «
1
» los van de
hoogspanningskabel van de
bougie.
•
Verwijder alle vuilresten van de
basis van de bougie, draai ze
daarna los met de in de gereed-
schapskit bijgevoegde sleutel
en verwijder ze uit haar zit, door
te zorgen dat er geen stof of an-
dere stoffen binnenin de cilinder
terecht komt.
•
Controleer of de elektrode en
het centrale porcelein van de
bougie geen koolstofafzettingen
of corrosietekens heeft, en rei-
nig eventueel met speciale rei-
nigingsmiddelen voor bougies,
met een ijzerdraad en/of met
een metalen borsteltje.
•
Blaas goed uit met een lucht-
straal, om te vermijden dat de
verwijderde resten in de motor
terecht komen. Wanneer de
bougie scheuren op de isole-
ring, verroeste elektroden of ex-
cessieve afzettingen vertoont,
moet ze worden vervangen.
•
Controleer de afstand tussen de
elektroden met een diktemeter.
Deze moet 0,7 - 0,8 mm bedra-
gen; regel de afstand eventueel,
door voorzichtig de massaelek-
trode te buigen.
90
4 Maintenance / 4 Onderhoud
Содержание ATLANTIC 500 sprint
Страница 4: ...4 ...
Страница 7: ...ATLANTIC 400 SPRINT ATLANTIC 500 SPRINT Chap 01 General rules Hst 01 Norme generali 7 ...
Страница 8: ...8 1 General rules 1 Norme generali ...
Страница 9: ...ATLANTIC 400 SPRINT ATLANTIC 500 SPRINT Chap 02 Vehicle Hst 02 Voertuing 9 ...
Страница 10: ...02_01 10 2 Vehicle 2 Voertuing ...
Страница 11: ...02_02 11 2 Vehicle 2 Voertuing ...
Страница 35: ...ATLANTIC 400 SPRINT ATLANTIC 500 SPRINT Chap 03 Use Hst 03 Gebruik 35 ...
Страница 71: ...ATLANTIC 400 SPRINT ATLANTIC 500 SPRINT Chap 04 Maintenance Hst 04 Onderhoud 71 ...
Страница 139: ...ATLANTIC 400 SPRINT ATLANTIC 500 SPRINT Chap 05 Technical data Hst 05 Technische gegevens 139 ...
Страница 145: ...ATLANTIC 400 SPRINT ATLANTIC 500 SPRINT Chap 06 Spare parts and accessories Hst 06 Onderdelen en accessoires 145 ...
Страница 146: ...146 6 Spare parts and accessories 6 Onderdelen en accessoires ...
Страница 147: ...ATLANTIC 400 SPRINT ATLANTIC 500 SPRINT Chap 07 Programmed maintenance Hst 07 Gepland onderhoud 147 ...
Страница 156: ...156 7 Programmed maintenance 7 Gepland onderhoud ...
Страница 158: ...158 ...


