


Once the installation has completed, start the ANT
labs
Cert Generator
application.
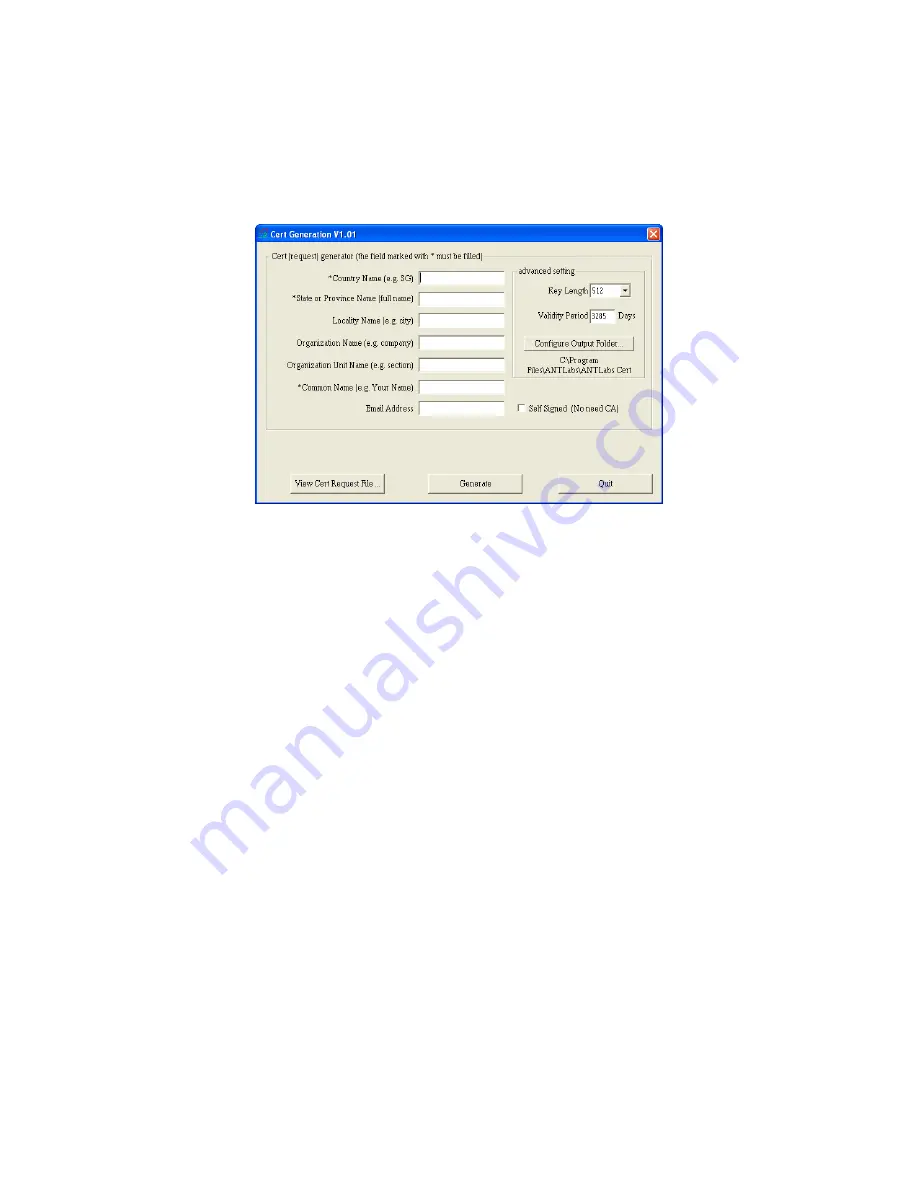
Fill in the CSR fields in the certificate generator interface as shown in Figure
E-2.
Figure E-2 Cert Generator Interface
Compulsory fields are marked with an asterisk “ * ” and are briefly described
as follows:
1.
Country Name – The two-letter ISO abbreviation for your country.
2.
State or Province Name – The state or province where your
organization is legally located. Cannot be abbreviated.
3.
Common Name – This is the FQDN (Fully Qualified Domain Name) for
which you plan to use your Certificate. For example, a certificate
generated for antlabs.com will not be valid for secure.antlabs.com. If
the web address to be used for SSL is secure.antlabs.com, ensure that
the common name submitted in the CSR is secure.antlabs.com.
Click on the Generate button to generate the CSR and private key. If you
want to generate a self-signed key, enable the “self signed” check box.
By default, the CSR and private key will be saved under the same installation
directory as the software. You can change the default save folder by selecting
the Configure Output Folder... button.
The CSR filename will be “<yourdomain>.csr”. The private key filename will
be “<yourdomain>.key”.
Содержание InnGate 3 E-series
Страница 1: ...INNGATE 3 ADMINISTRATOR S MANUAL DOCUMENT RELEASE 1 01 ...
Страница 49: ...Connectivity Made Easy Page 49 of 164 Figure 2 22 Auto Logout ...
Страница 91: ...Connectivity Made Easy Page 91 of 164 Figure 6 7 Test Posting Log Click button to clear the log ...
Страница 132: ...Connectivity Made Easy Page 132 of 164 Figure 8 28 Change of Telnet Console Password ...


