


Communications and File Transfers
41
IREdit IR Library Management
4.
Enter the address information for
Device
,
Port
and
System
.
5.
Click
Start
to begin the transfer operation.
Virtual NetLinx Master Transfers
IREdit supports direct connection to G4 panels (via USB), for situations where the target panel is not
connected to a NetLinx Master. In this situation, you can use your PC's USB connection to connect directly to
the panel, using your PC as a
Virtual NetLinx Master
.
There are three basic steps to Virtual NetLinx Master file transfers:
1.
Configuring the Touch Panel for Virtual NetLinx Master Transfers
2.
Configure IREdit for Virtual NetLinx Master transfers
3.
Transfer the Files Using a Virtual NetLinx Master connection
Configure the Touch Panel for Virtual NetLinx Master Transfers
If it is not already powered up and connected, apply power to the touch panel and verify that it is connected to
USB connector on the panel. To configure the panel for Virtual NetLinx Master transfers:
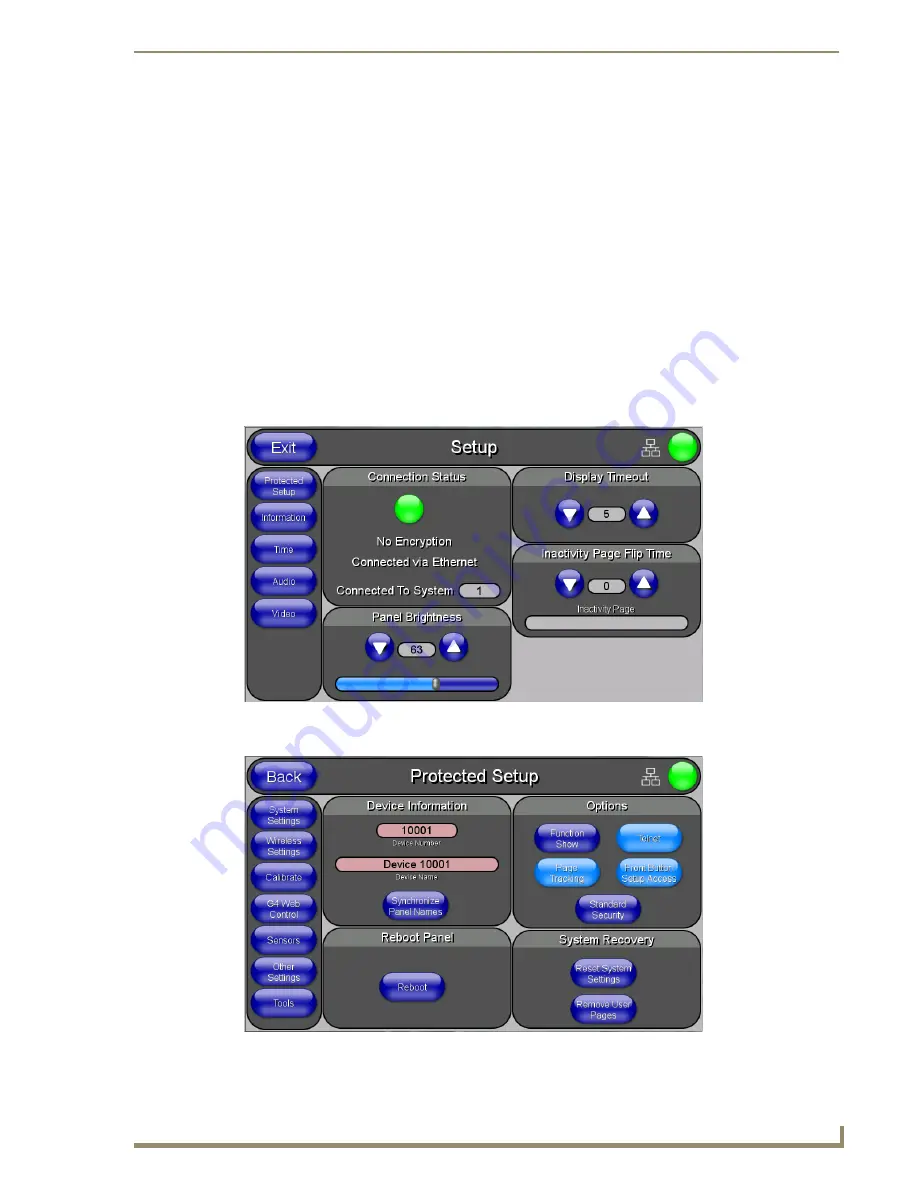
1.
Press and hold the Front Setup Access button (below the touch screen) for 3 seconds to access the Setup
page (FIG. 58):
2.
Press the
Protected Setup
button to access the
Protected Setup
page (FIG. 59):
3.
Use the on-screen keyboard to enter the password (default password =
1988
).
FIG. 58
Touch Panel Setup Page
FIG. 59
Touch Panel Protected Setup Page
Содержание IREdit
Страница 1: ...Operation Reference Guide Development Tools IREdit IR Library Management Last Revised 1 23 2012...
Страница 6: ...iv IREdit IR Library Management Table of Contents...
Страница 42: ...Advanced Operations 36 IREdit IR Library Management...
Страница 57: ...Setting Program Preferences 51 IREdit IR Library Management...


