background image

Designing Touch Panel Pages

16

5.5" Color Passive Mini-Touch Panels

2.

Enter 1, 2, 3, or 4 in the keypad. The programming software uses device codes 1 - 4 to identify 

the touch panel. Refer to the 

G3 Firmware Design and Reference

 instruction manual for more 

information. 

3.

Press 

ENTER

 to save the device number, close the keypad, and return to the Button Properties 

page.

4.

Press 

CHAN

 to open the keypad and enter a channel value of 1 - 255. The source code uses the 

channel code number to identify the button and its programmed operations. The channel code 

for non-active buttons is 0.

5.

Press 

ENTER

 to save the channel number, close the keypad, and return to the Button Properties 

page.

Setting the variable text code

The variable text buttons set the device and button channel codes for the buttons.

1.

Press 

DEV

 to open the keypad and set the device number.

2.

Enter 1, 2, 3, or 4 in the keypad. The source code uses device codes 1 - 4 to identify the touch 

panel. 

3.

Press 

ENTER

 to save, close the keypad, and return to the Button Properties page.

4.

Press 

CHAN

 to open a keypad and set the channel number.

5.

Enter a channel value of 1 - 255 in the keypad. The source code uses the channel code number 

to identify the button and its operations.

6.

Press 

ENTER

 to save the channel number, close the keypad, and return to the Button Properties 

page.

Setting the page flip

1.

Press the Page 

FLIP STANDARD

 type button (FIG. 16) in the Button Properties page to open 

the 

P

AGE

 F

LIP

 T

YPE

 menu.

2.

Select a Page Flip type. If you select 

FLIP PREVIOUS

 in the 

P

AGE

 FLIP T

YPE

 menu, the 

FLIP 

TO


P

AGE

 button appears.

3.

Press the 

FLIP 

TO

 P

AGE


button (FIG. 16) to open a list of all the saved touch panel pages. If the 

desired page is not present in the menu, check to verify the page has been saved.

4.

Select the target page for the page flip.

If DEVICE USED is set to 4 and Base Device Number is 128, the Controller recognizes 
bus devices 128 - 131. 
The panel will not allow you to enter a device number greater than the DEVICE USED 
without first displaying a decision box asking if you accept the new selection or not.

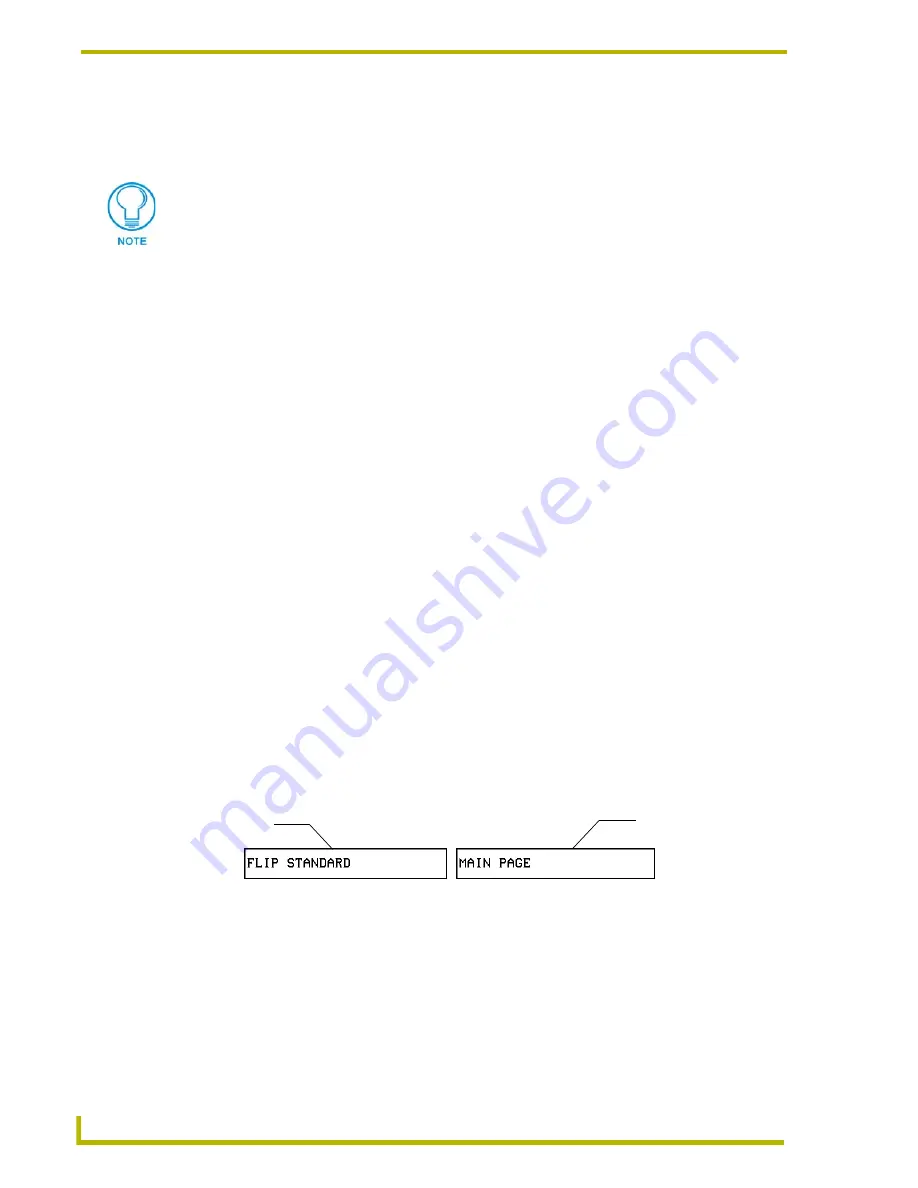
FIG. 16  

Page FLIP Type button

Flip to Page button

Page FLIP

type button


Содержание AXD-MCP

Страница 1: ...instruction manual Touch Panels and Accessories 5 5 Color Passive Mini Touch Panels Firmware version G3...

Страница 2: ...RMA is cancelled will be refused AMX is not responsible for products returned without a valid RMA number AMX Corporation is not liable for any damages caused by its products or for the failure of its...

Страница 3: ...DC power supply AXT MCP 9 Using AXlink for data and power AXD MCP and AXM MCP 10 Using AXlink for data with an external 12 VDC power supply 10 Designing Touch Panel Pages 11 Buttons 11 Activating Edit...

Страница 4: ...ers 30 Shorthand Send_Commands 31 Color Send_Commands 35 Variable Text Send_Commands 37 Shorthand Variable Text Commands 39 Button String Commands 42 Upgrading the Firmware 45 Configuration 45 Downloa...

Страница 5: ...or style AXD MCP AXD MCP PB Rack mount AXM MCP AXM MCP PB TiltScreen AXT MCP AXT MCP PB Specifications Dimensions HWD AXD MCP 5 00 x 6 98 x 2 17 12 7 cm x 17 73 cm x 5 51 cm low profile Back Box 4 17...

Страница 6: ...mount metal with black matte finish 3 rack units high Pushbuttons 12 programmable pushbuttons 6 on each side Character Support Unicode character support for far eastern languages Programming On panel...

Страница 7: ...se slot located at the bottom 1 Cut out the surface using the dimensions shown in FIG 1 2 Carefully insert a flat blade screwdriver into the release slot on the touch panel s faceplate and remove the...

Страница 8: ...ated on the front of the panel press the engraved overlay onto the faceplate 12 Reconnect the AXlink wiring to the Central Controller The touch panel beeps when power is applied Installing touch panel...

Страница 9: ...connecting the AXlink connector to the Central Controller The panel beeps on power up Before continuing disconnect all connections until panel installation is complete 12 Place the Decor style facepla...

Страница 10: ...nnector from the Central Controller 7 Remove one or more knockouts to accommodate the wiring as required 8 Thread the incoming AXlink wiring through the CB MTP knockouts Refer to the Wiring the Mini T...

Страница 11: ...MCP PB 1 Thread the incoming AXlink wiring through the opening in the equipment rack 2 Disconnect the AXlink connector from the Central Controller 3 Insert the touch panel into the equipment rack Line...

Страница 12: ...elines The touch panels require 12 VDC power to operate properly The touch panel can use either a PS N 2 8 if the power is being supplied only to the touch panel or a PS N 6 5 power supply if the powe...

Страница 13: ...r and external 12 VDC power supply AXT MCP Connect the Central Controller s AXlink connector to the mini XLR connector and external 12 VDC power supply to the rear panel of the AXT MCP as shown in FIG...

Страница 14: ...n for GND on the touch panel AXlink connector 3 Tighten the clamp and secure the two GND wires Use an auxiliary 12 VDC power supply when the distance between the Central Controller and touch panel exc...

Страница 15: ...nnot be changed General buttons create or revise pages and specify panel communication parameters The general button categories are described in the table below General Button Categories Selection but...

Страница 16: ...pad General Button Categories Cont Status buttons Status buttons always have a dark fill with light letters and have no functionality except to display information Operation bars Operation bars appear...

Страница 17: ...it bar The BUTTON and PAGE options in the Edit bar FIG 15 are used to design and modify button and page settings FIG 13 Setup page Contrast levels may have to be adjusted due in part to variances in t...

Страница 18: ...o 255 programmable channel codes The multiple device settings allow you to create up to four unique touch panel buttons and or pages This value is used to determine the current device being used by th...

Страница 19: ...o assignments Although the Border and Color sections of this page appear they are of no use to external pushbuttons since they do not appear on screen To set button properties 1 Press BUTTON on the Ed...

Страница 20: ...close the keypad and return to the Button Properties page 4 Press CHAN to open a keypad and set the channel number 5 Enter a channel value of 1 255 in the keypad The source code uses the channel code...

Страница 21: ...AS OFF sets the On and Off properties the same 5 Press EXIT SAVE CHANGE to close the Text Image page and return to the Main page Using TPDesign3 to Download Bitmaps Icons and Fonts TPDesign3 allows yo...

Страница 22: ...t work properly Adding a bargraph or joystick button Create a new button using the Add operation bar in the BUTTON menu 1 Press BUTTON in the Edit bar to open the BUTTON menu 2 Press PROPERTIES in the...

Страница 23: ...anels 4 Press NUM to open a keypad and set the level number assigned to the device 5 Enter a number 1 8 Each device can have from 1 8 levels except joysticks where the range is 1 7 6 Press ENTER to sa...

Страница 24: ...Designing Touch Panel Pages 20 5 5 Color Passive Mini Touch Panels...

Страница 25: ...ormation SC Sends a serial port send_command within a panel as if sent from Axcess Syntax SC device offset send_command variable text data Variables device offset Device number variable text The varia...

Страница 26: ...her touch devices Syntax MOUSE mouse type Variables mouse type 00 Mouse cursor Off 01 Microsoft serial mouse cursor On Example MOUSE 01 Turns on Microsoft compatible serial mouse Refer to the MOU on p...

Страница 27: ...n Page Responding touch panel turns its Main page the color white This command verifies serial communication The TPI 3 must have a page named Main Page for this command to work properly ZAP Clears all...

Страница 28: ...ouble beep value is set to 0 in the Setup page Syntax ADBEEP Example SEND_COMMAND TP ADBEEP Double beeps the panel AKEYB Opens the touch panel keyboard and initializes the text string entry The keyboa...

Страница 29: ...1 minimum 8 maximum Example SEND_COMMAND TP BRIT 8 Sets to highest brightness level CALIBRATE Starts the touch panel calibration sequence Syntax CALIBRATE Example SEND_COMMAND TP CALIBRATE Starts the...

Страница 30: ...Protected Setup page is set to On Syntax DBEEP Example SEND_COMMAND TP DBEEP Double beeps the panel ILEV Inverts the joystick axis Syntax ILEV joystick axis to invert Variables joystick axis to invert...

Страница 31: ...ys the touch panel keypad with instead of 1988 PPOF Closes a specific popup page Syntax PPOF page name Variable page name 1 50 ASCII characters Example SEND_COMMAND TP PPOF Popup Page 1 Closes Popup P...

Страница 32: ...ND TP WAKE Deactivates the touch panel screen saver mode and resets the sleep timer XMRT Sets the new net work communica tion retry value for the panel and SoftROM Syntax XMRT number Variable number 1...

Страница 33: ...TP2 PAGE TP1_BUFFER CLEAR_BUFFER TP1_BUFFER IF FIND_STRING TP1_BUFFER PPON 1 OR FIND_STRING TP1_BUFFER PPOF 1 SEND_COMMAND TP2 TP1_BUFFER CLEAR_BUFFER TP1_BUFFER IF LENGTH_STRING TP2_BUFFER IF FIND_S...

Страница 34: ...78 83 Aqua 30 35 More Grey 84 86 Cyan 36 41 Black 87 Royal 42 47 Transparent 255 Font Styles and Programming Numbers No Font styles No Font styles 1 Extra small 5 Extra large 2 Small 6 Hollow medium...

Страница 35: ...specified color This works only if the specified background color is not the same as the current color Syntax CBN variable text address color_number Variables variable text address 1 255 color number...

Страница 36: ...PP 54 Audio Page Sets the popup page title to Audio Page and the color to Purple CTF Sets the OFF feedback text color to the speci fied color This only works if the specified background color is not t...

Страница 37: ...es on Main Page that are active sending the previous command would remove them all from that page PPF Deactivates a popup page on a touch panel page If a page name is empty the current page is used If...

Страница 38: ...pages in the panel PWD Sets the password for the Page Flip on the touch panel Syntax PWD page flip password Variable page flip password 0 9999 Example SEND_COMMAND TP PWD 1988 Sets the page flip pass...

Страница 39: ...see the Colors and Programming Numbers table on page 30 Syntax CALL variable text address data Variables variable text address 1 255 data 6 color number series for FILL COLOR ON FILL COLOR OFF BORDER...

Страница 40: ...l color to the specified color Syntax CFON variable text address color_number Variables variable text address 1 255 color number See the Colors and Programming Numbers table on page 30 Example SEND_CO...

Страница 41: ...back text color to White for variable text button 1 Variable Text Send_Commands B Sets a specific button to On or Off Syntax B variable text address ON OFF Variables variable text address 1 255 ON 0 O...

Страница 42: ...ress 1 255 font size See the Font Styles and Programming Numbers table on page 30 Example SEND_COMMAND TP F 1 6 Changes the font on the variable text button one to hollow medium FONT Changes the font...

Страница 43: ...Variables variable text address 1 255 new button text 1 60 characters Example SEND_COMMAND TP T 1 VCR PLAY Changes the title on variable text button one to VCR PLAY TEXT Enters text on a button Use t...

Страница 44: ...I icon 1 255 icon numbers are assigned in TPDesign3 project file J text alignment 1 9 as shown the following alignment chart For C1 C6 see the Colors and Programming Numbers table on page 30 C1 on sta...

Страница 45: ...the button It must be sent an Enable command once it has been disabled FON Sets the text font on a button Syntax FON variable text address font style Variables variable text address 1 255 font style...

Страница 46: ...Syntax TXT variable text address text Variables variable text address 1 255 text Enter button text to appear on the button Example SEND_COMMAND TP TXT 2 VCR PLAY Sets the VCR and PLAY text on variabl...

Страница 47: ...touch panel This command does not set the panel to sleep but actually puts a wavepack to sleep Syntax SL Example SL Activates sleep mode on a wireless touch panel ViewPoint or other panel using a Smar...

Страница 48: ...touch panel to change its Main page to the color white Syntax WORKING Example MCP panel serial port is connected to TPI program port MCP panel wants to verify communication between the TPI and itself...

Страница 49: ...ure the BAUD RATE selections match the setting on the Controller 4 Press F10 to save the communication settings and exit the Configure screen Downloading the Firmware 1 Press F5 to acquire the list of...

Страница 50: ...Touch Panels Firmware can be downloaded to multiple device numbers automatically If multiple devices are selected the bottom half of the loading bar indicates the percentage complete for the selected...

Страница 51: ...tool into the release slot on the rack mount backing plate and remove the engraved overlay or unscrew the Decor faceplate 3 Remove the four 6 32 mounting screws and carefully lean the touch panel bac...

Страница 52: ...n power or AXlink connector back into the touch panel for approximately 1 minute Then remove the connector from the panel again 8 Gently tilt the circuit card down toward the connector side and pull b...

Страница 53: ...Replacing the Batteries 49 5 5 Color Passive Mini Touch Panels...

Страница 54: ...doing business as Panja Inc ARGENTINA AUSTRALIA BELGIUM BRAZIL CANADA CHINA ENGLAND FRANCE GERMANY GREECE HONG KONG INDIA INDONESIA ITALY JAPAN LEBANON MALAYSIA MEXICO NETHERLANDS NEW ZEALAND PHILIPP...

Отзывы: