- 12 -
Z5
DT
User’s Guide
3.4 Sensor position adjustment
A.
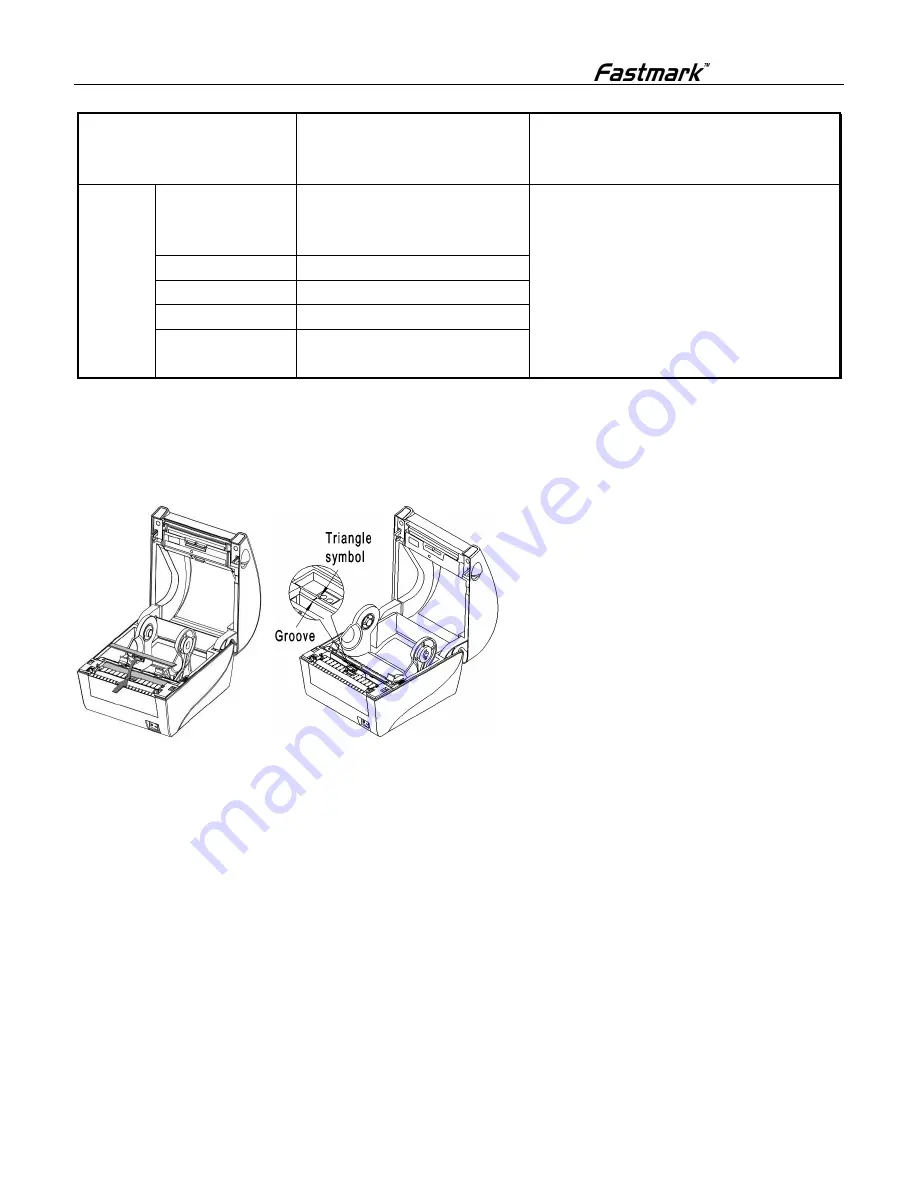
When using label, the sensor position can be adjusted according to the following steps:
1)
Push the part with arrow on the sensor cover board in the direction of the arrow, and turn the sensor
cover board upward to take it off (see figure 3.4-1);
Figure 3.4-1 Figure 3.4-2
2)
Pull or push the sensor base to align the triangle symbol on the sensor base with the groove on the
upper path (see figure 3.4-2);
3)
Press down the part with arrow to install the sensor cover board.
B.
When using label media or changing the width setting, follow the steps below to adjust the sensor position:
1)
Measure the required sensor position in advance based on the mark position of media;
2)
Push the part with arrow on the sensor cover board in the direction of the arrow, and turn the sensor
cover board upward to take it off (see figure 3.4-1);
3)
Pull or push the sensor to the required position (as shown in the figure);
4)
Press down the part with arrow to install the sensor cover board.
Calibration
None
The printer feeds media and at the same time
rectifies the sensor parameters in order to adapt
to the paper.
Se
ri
a
l p
o
rt
c
o
n
fi
g
u
ra
ti
o
n
Baud rate
110, 300, 600, 1200, 2400, 4800,
9600, 19200, 38400, 57600,
115200
Data bit (unit: bit)
7 bit, 8 bit
Stop bit (unit: bit)
1 bit, 2 bit
Parity
NONE, ODD, EVEN
Handshake signal
Hardware handshake, software
handshake


