


PORT FORWARDING GUIDE END.
TESTING FROM INTERNAL NETWORK (LAN)
ISSUE DEVICE A
LOCATION
G1
FATBOX
17
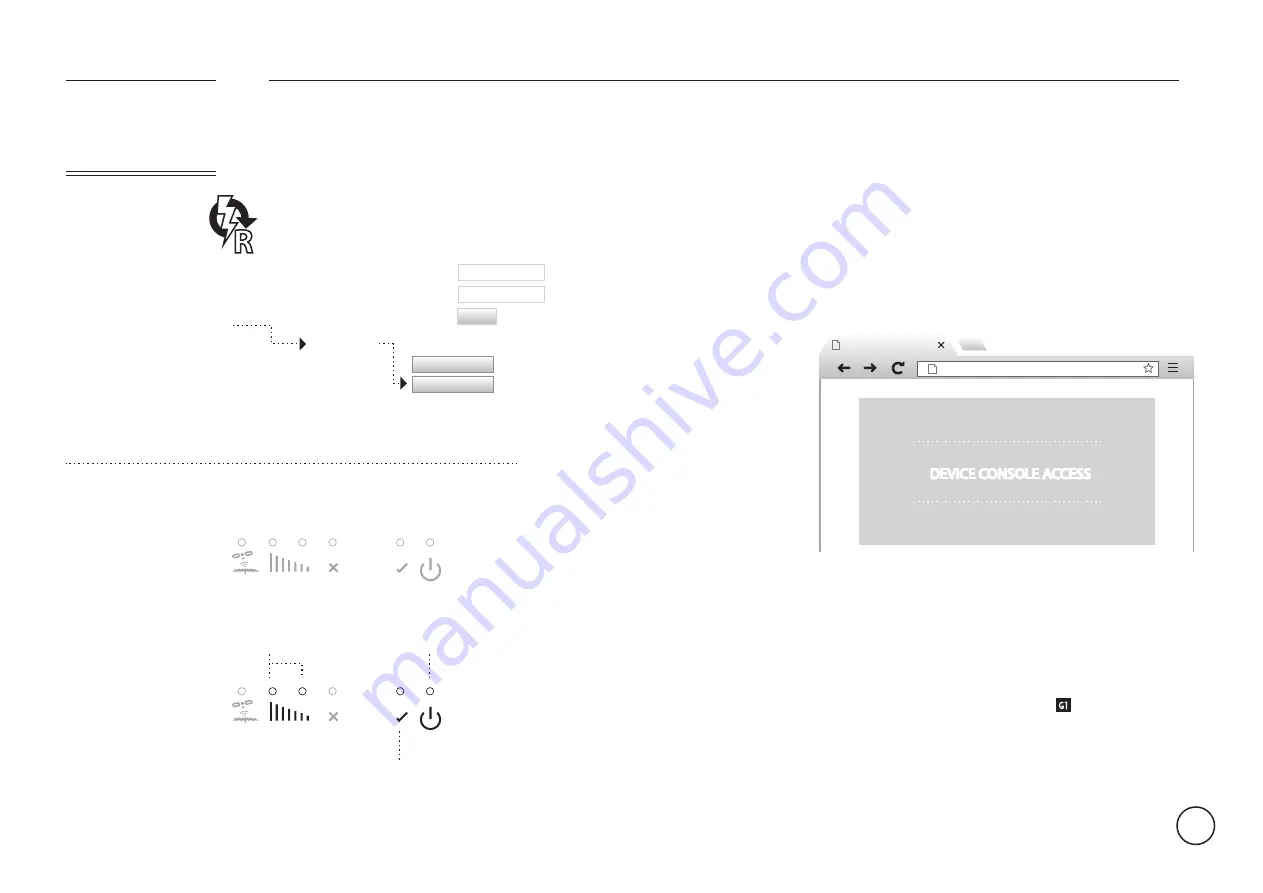
DEVICE CONSOLE
192.168.168.50:81
Open your internet browser
and enter the IP address that
you assigned to your
product. You should be
looking at the login or
default screen for your
product. Make sure to
include the web server port
(If something other than
port 80) you have assigned
to you have your product.
For example, if your product
uses port 81 for its web
server and has an IP address
of 192.168.168.50, you would
browse to
http://192.168.168.50:81.
DEVICE CONSOLE ACCESS
Now that your device can be located within
your network, the next thing to ensure is that it
can be found on the World Wide Web (www).
Unless you have a Public
and
Static IP address
from your service provider you will need to use
a Dynamic DNS service found in the next page.
REBOOT ROUTER
To save and implement your
Port Forwarding settings you
must restart the network. Go
to the
Management
tab and
click on the
Reboot Router
button.
Your connection will drop
and reset again with your
new settings in place.
MENU OPTIONS
System settings
Username
Password
Quick Start
LAN
3G
Port Forwarding
Dynamic DNS
Management
System Status
Logout
Update
Factory Reset
Reboot Router
XXX
XXXX
Your connection will
drop and reset. You
should see your
FATBOX power down.
As your connection
resets The power LED
will come on and your
‘YES’ Indicator will
blink first and then
flash steadily. Your
signal indicators will
also be on to indicate
the strength of your
signal.
YOU SHOULD SEE
steady
blink > steady
signal indicatior on
STEP 2 OF 3
STEP 3 OF 3


