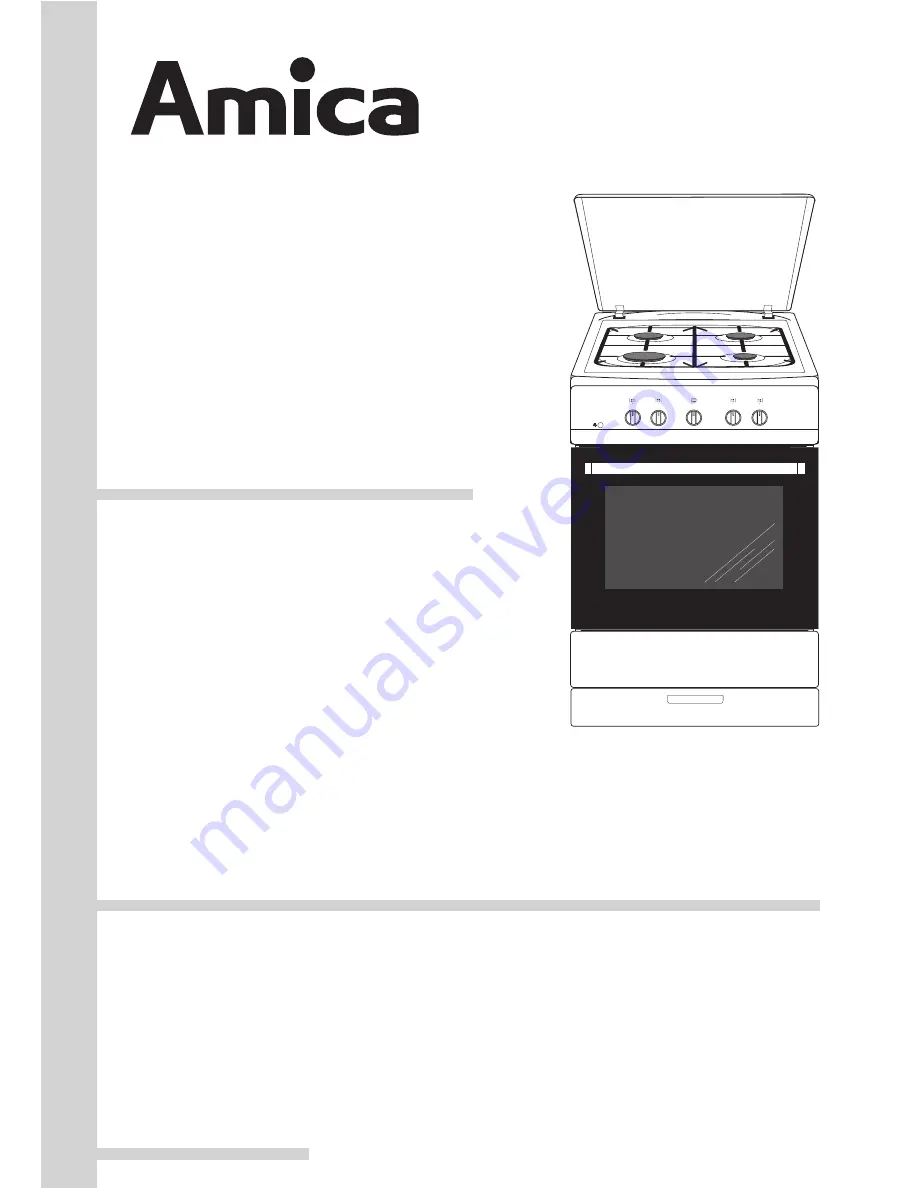
manualshive.com logo in svg
background image

IOAK-3245 / 8061178

(04.2015./1)

6020GG4.23ZpQW

6020GG4.23ZpNQXv

6020GG4.23ZpNQWXw

(ES) MANUAL DE INSTRUCCIONES..............................2

(EN) INSTRUCTION MANUAL.......................................34

Содержание 6020GG4.23ZpNQWXw

Страница 1: ...IOAK 3245 8061178 04 2015 1 6020GG4 23ZpQW 6020GG4 23ZpNQXv 6020GG4 23ZpNQWXw ES MANUAL DE INSTRUCCIONES 2 EN INSTRUCTION MANUAL 34...

Страница 2: ...ces Despu s de leer el manual el uso de la cocina de gas le resultar muy sencillo Antes de abandonar la f brica y ser embalada la seguridad y la funcionalidad de la cocina de gas fueron minuciosamente...

Страница 3: ...3 CONTENIDO Informaci n b sica 2 Seguridad 4 Descripci n de producto 10 Instalaci n 13 Funcionamiento 22 Limpieza y conservaci n 26 Situaciones de emergencia 30 Consejos pr cticos 31 Datos t cnicos 33...

Страница 4: ...eligroso por lo que se recomienda lo hagan bajo vigilancia o sigan las instrucciones de uso del aparato bajo la supervisi n de la persona responsable de su seguridad Evite que los ni os jueguen con el...

Страница 5: ...perficie y provocar roturas del vidrio Advertencia Para evitar riesgos el ctricos antes de reem plazar la bombilla aseg rese de que el equipo est apagado Se recomienda limpiar la tapa de toda impureza...

Страница 6: ...cionada la aver a por un t cnico especializado l No abra la llave de alimentaci n de gas o la v lvula de la bombona sin comprobar que todos los mandos de control est n cerrados l No permita que se der...

Страница 7: ...rillos conectar o desconectar receptores el ctricos timbre o interruptor de luz ni utilizar otros aparatos el ctricos y mec nicos que generen chispa el ctrica o de percusi n En tal caso hay que cerrar...

Страница 8: ...edio ambiente Es muy importante mantener limpios los orificios de la llama bajo la tapa del quemador y los de los inyectores del quemador l Evite mirar el recipiente innecesari amente mientras se coci...

Страница 9: ...ea 2012 19 UE para desechos tachado seg n CE y la ley espa ola sobre aparatos el ctricos y electr nicos usados Este s mbolo informa que este aparato pasado su periodo de uso no debe ser desechado junt...

Страница 10: ...e Quemador mediano Quemador mediano Quemador auxiliar Perilla del regulador de temperatura Perillas de control de los calefactores de gas Perillas de control de los calefactores de gas Encen dedor de...

Страница 11: ...ta de horno Caj n Quemador grande Quemador mediano Quemador mediano Quemador auxiliar Perilla del regulador de temperatura Perillas de control de los calefactores de gas Perillas de control de los cal...

Страница 12: ...12 CARACTER STICA DEL PRODUCTO Accesorios Bandeja est ndar Parrilla est ndar rejilla para secar Bandeja profunda en modelos seleccionados...

Страница 13: ...aran tizar el libre acceso a todos los elementos de control l La habitaci n tambi n debe posibilitar el flujo de aire indispensable para la correcta combusti n de gas El flujo no debe ser no inferior...

Страница 14: ...tar que la placa se caiga al suelo Gracias al bloqueo que protege del vuelco de la cocina el dispositivo no se caer si por ejemplo un ni o intenta subirse a la puerta del horno Cocina altura 850 mm A...

Страница 15: ...vo se utiliza intensivamente y por largo tiempo puede ser necesario abrir las ventanas para mejorar la venti laci n l El revestimiento y el pegamento de los muebles para empotrar deben resistir temper...

Страница 16: ...for maci n con las condiciones de suministro de gas en el lugar de la instalaci n l Verificar La eficacia de la ventilaci n es decir del intercambio del aire en el local La estanqueidad de las conexio...

Страница 17: ...ra realizar la conexi n se debe usar la manguera de gas que especifique la norma nacional correspondiente Si la cocina est conectada a la instalaci n de gas licuado utilice un regulador de presi n que...

Страница 18: ...ormaci n incluida en la placa de datos y en el esquema de conexi n Advertencia El instalador est obligado a entregarle al usuario el certificado de cone xi n de la cocina a la instalaci n el ctrica el...

Страница 19: ...G30 31 3 ser necesario sustituir los inyectores del quemador y realizar un ajuste de la llama Para adaptar la cocina a la combusti n de otro tipo de gas ser necesario l Sustituir los inyectores v ase...

Страница 20: ...tuir el inyector del que mador por otro acorde con la tabla de inyectores 1 Sustituir el inyector del quemador por otro acorde con la tabla de inyectores 2 Desatornillar ligeramente el tornillo de aju...

Страница 21: ...isibles indican que el gas en la instalaci n es de mala calidad o que el quemador est da ado o sucio Para comprobar la llama se debe usar el quemador con la llama completa durante aprox 10 min y despu...

Страница 22: ...los accesorios del horno y l velos en agua templada con lavavajillas l Encienda la ventilaci n de la cocina o abra la ventana l Caliente el horno a una temperatura de 250 C durante 30 minutos aproxima...

Страница 23: ...derecha posici n apagado l Encendido de los quemadores con un encendedor en el mando l Apretar el mando del quemador seleccio nado hasta sentir resistencia y girar a la izquierda a la posici n llama...

Страница 24: ...dvertencia Todos los hornos est n provistos de llaves de gas con un controla dor de temperatura y de protecci n contra escapes En el momento de encender el horno como se describe a continuaci n manten...

Страница 25: ...tura del horno se controla y se mantiene autom ticamente l Una vez encendido el quemador fun ciona a plena potencia hasta alcanzar la temperatura fijada despu s el termostato reduce la llama para mant...

Страница 26: ...ctores deben limpiarse destap ndolos con un fino alambre de cobre No se debe usar alambre de acero ni escariar los orificios l Para lavar las superficies esmaltadas se deben usar l quidos de suave acc...

Страница 27: ...gan abrasivos Reemplazo de la bombilla de iluminaci n del horno Para evitar una descarga el ctri ca antes de reemplazar la bombi lla aseg rese que el equipo est apagado l Todos los mandos de control d...

Страница 28: ...rta lev ntela y s quela hacia adelante Para montar la puerta en el horno debe hacer lo contrario Cuando la coloque cerci rese que sit a correcta mente el corte de bisagra en la ranura de sta Despu s b...

Страница 29: ...nte servicio de mantenimiento o por el instalador autorizado Desmontaje del cristal interno 3 cristales 3 Extraer el cristal interno de la fijaci n en la situada en la parte inferior de la puerta Fig...

Страница 30: ...ministro de gas El encendedor de gas tiene grasa El mando del quemador no ha sido presionado sufi cientemente Se ha soltado el mango del quemador muy r pidamente Interrupci n en la aliment aci n de en...

Страница 31: ...ecomienda dejar el pastel en el horno despu s de apagarlo durante unos 5 minutos l Los par metros de la tabla 1 son aproximados y deben ser corregidos en funci n de sus propias experiencias y gustos c...

Страница 32: ...as encendido l o s d a t o s p r e s e n t a d o s e n l a t a b l a s e r e f i e r e n a l a p o r c i n d e 1 k g en el caso de las porciones m s grandes hay que a adir otros 30 40 minutos por cada...

Страница 33: ...eclaraci n del fabricante El fabricante declara que el producto cumple los requisitos esenciales de las siguientes directivas europeas l Directiva de baja tensi n 2006 95 CE l Directiva de compatibili...

Страница 34: ...y following these instructions carefully you will be able to avoid any problems in using the appliance It is important to keep the instruction manual and store it in a safe place so that it can be con...

Страница 35: ...35 TABLE OF CONTENTS Safety instructions 36 Description of the appliance 42 Installation 45 Operation 52 Cleaning and maintenance 56 Baking in the oven practical hints 61 Technical data 63...

Страница 36: ...e of the appliance in a safe way and understand the ha zards involved Children shall not play with the appliance Cleaning and user maintenance shall not be made by chil dren without supervision Warnin...

Страница 37: ...id the possibillity of electric shock Before opening the cover cleaning it of any dirt is recom mended The cooker hob surface should be cooled down before closing the cover You should not use steam cl...

Страница 38: ...the fault has been fixed by a specialist Do not open the tap on the gas connection or cylinder valve before checking that all burner knobs are closed Do not allow the burners to be soiled or liquids...

Страница 39: ...fault to the service centre to be repaired Do not attach any antenna cords e g radio to the gas supply In a case of gas escaping from leaky piping and catching fire close gas supply immediately using...

Страница 40: ...he rings under caps and openings of burner nozzles are clean Do not uncover the pan too often a watched pot never boils Do not open the oven door unnecessarily often Only use the oven when cooking lar...

Страница 41: ...ch of children UNPACKING DISPOSAL OF THE APPLIANCE Old appliances should not sim ply be disposed of with normal household waste but should be delivered to a collection and recycling centre for electri...

Страница 42: ...ANCE Spark ignitor Burner safety valve Cover Oven door handle Drawer Large burner Medium burner Medium burner Auxiliary burner Temperature regulator knob Gas burner control knobs Gas burner control kn...

Страница 43: ...TION OF THE APPLIANCE Cover Oven door handle Drawer Large burner Medium burner Medium burner Auxiliary burner Temperature regulator knob Gas burner control knobs Gas burner control knobs Push button o...

Страница 44: ...44 optional SPECIFICATIONS OF THE APPLIANCE Baking tray Grill grate drying rack Roasting tray Cooker fittings...

Страница 45: ...stion Air supply should be not less than 2m3 h per 1 kW of burner heat The air can be delivered from outside by a duct with a section of at least 100cm2 or indirectly from adjoining rooms which are fi...

Страница 46: ...ng a washer washers on the valve pin once adjusted protect the system with a clamping washer and replace the knob l provide the user with the gas hob instal lation certificate and give instructions on...

Страница 47: ...ly must be done in a manner that excludes stresses in any point of the pipework or parts of the appliance Make sure you do not exceed the torque when making the connection maximum torque is 20 Nm Othe...

Страница 48: ...re connecting the cooker to the power supply it is important to read the information on the data plate and the connection diagram Caution The installer is obliged to provide the user with appliance el...

Страница 49: ...ker by the manufacturer that is G30 31 3 burner nozzles must be exchanged and the flame needs to be adjusted In order to adapt the cooker to burn a different type of gas you should exchange nozzles se...

Страница 50: ...erature in the oven should be 150 O C 1 Replace burner nozzle with the appropriate nozzle according to the table 2 Gently tighten the adju sting screw and adjust the flame The temperature in the oven...

Страница 51: ...valve knob to the economical flame position The flame should not go out or jump onto the nozzles INSTALLATION In cookers with a safety device a knob with a surface burner safety valve is used fig Knob...

Страница 52: ...mpty the drawer clean off factory pre servatives from the oven chamber take out and wash the oven fittings with warm water and a little washing up liq uid switch on the ventilation in the room or open...

Страница 53: ...5 to 3 times larger than the burner diameter that is for an auxiliary burner a pan with a diameter of 90 to 150 mm a medium burner a pan with a diameter of 160 to 220 mm a large burner a pan with a d...

Страница 54: ...ls equipped with a surface burner safety valve hold the knob pressed down to the end when igniting for 10 seconds at the large flame position to activate the safety device Caution Do not adjust the fl...

Страница 55: ...ectric grill The oven function is controlled by one knob which contains a digital scale corresponding to thermoregula tor settings To ignite the oven lstrike a match lpress down the knob to the stop a...

Страница 56: ...s are clean see the figure below Do not use steel wire or drill holes Wash enamel elements of the cooker with light washing products When cleaning do not use cleaning agents with a strong abbrasive ef...

Страница 57: ...ensure that the appliance is switched off before replacing the bulb Set all control knobs to the position 0 and disconnect the mains plug unscrew and wash the lamp cover and then wipe it dry unscrew t...

Страница 58: ...cooker do the inverse When fitting ensure that the notch of the hinge is correctly placed on the protrusion of the hinge holder After the door is fitted to the oven the safety catch should be carefull...

Страница 59: ...tter CLEANING AND MAINTENANCE CLEANING AND MAINTENANCE 3 Pull the inner glass panel from its seat in the lower section of the door Fig D D1 4 Clean the panel with warm water with some cleaning agent a...

Страница 60: ...work REASON flame openings soiled break in power supply break in gas supply soiled greasy gas ignitor knob not pressed in long enough knob released too quickly break in power supply the bulb is loose...

Страница 61: ...out 5 min the baking parameters given in Tables are approximate and can be corrected based on your own experience and cooking preferences if information given in recipe books is significantly differen...

Страница 62: ...its juices or with hot salty water do not pour cold water over the meat BEEF Roast beef or fillet rare oven warmed up juicy medium oven warmed up well done oven warmed up Roast joint PORK Roast joint...

Страница 63: ...this product complies with the general requirements pursuant to the following European Directives l The Low Voltage Directive 2006 95 EC l Electromagnetic Compatibility Directive 2004 108 EC l Direct...

Страница 64: ......

Отзывы: