16
Control Specification and Navigation
Equipment Operation and Controls Overview
CONDENSER PROTECTION (optional)
In some conditions specifically in corrosive environments
a cathodic, epoxy-type electrodeposition coating may
have been applied to the microchannel coil. Such coating
provides excellent resistance and durability in potentially
corrosive environments due to alkalies, acids, alcohols,
petroleum, seawater, salty air, etc. To confirm, refer to
the equipment model number and reference the 15th digit
regarding the model nomenclature on page 6 of this
manual.
COMPERSSOR ANTI-SHORT CYCLE TIMER
Under all normal running conditions, a 3–minute
minimum ON timer is maintained for the first compressor
and a 5 second delay for every compressor thereafter.
Once a compressor is turned OFF via. the thermostat or
alarm conditions, it will remain OFF for a minimum of 3-
minutes unless the alarm warrants a system locked out.
System overrides that require immediate shutdown of the
equipment, test modes, and compressor diagnostics/
protection functions can override these 3–minute timers.
However for normal temperature and thermostatic-based
control, these minimum ON timers are maintained.
EQUIPMENT PROTECTION DEVICES
WARNING -
AT NO POINT SHOULD ANY OF THE
FOLLOWING SWITCHES OR SENSORS BE JUMPERED,
REMOVED, OR TAMPERED WITH IN ANY WAY.
FAILING TO IGNORE THIS WARNING COULD RESULT
IN EQUIPMENT DAMAGE, SERIOUS INJUSRY, OR
DEATH.
a.
Tank/ Fluid In Temperature Sensor
- This sensor
serves as a critical function device and can be
installed one of two ways. It is imperative that the
installer and startup personnel comply with the
following instructions and warning regarding the
tank/fluid in temperature sensor. Failing to do so
could result in equipment damage and loss of the
factory warranty.
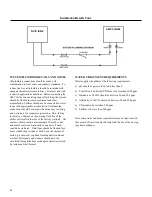
1.
Installed as a Tank Sensor -
All equipment is
supplied with a 50 ft cable and a 12”
thermowell/sensor assembly. The thermowell
contains a 1/2” MNPT connection where the
sensor can be installed directly into a tank
fitting, this assembly is shipped loosely in the
electrical control box. Start up personnel must
extend the sensor cable from the bulk head
connector mounted on the chiller to the tank (refer to
the “Electrical Installation” of this manual for more
information regarding the location of the bulk head
connector.) Under no circumstances should the tank
temperature sensor be removed during operation, this
will result in compressor short cycling and could,
damage critical components of the chiller - the factory
warranty will be nullified as a result.
2.
Installed as a Fluid In Sensor
- In some cases,
installing the chiller sensor into the tank is either less
ideal or, simply impossible. The chiller sensor can be
installed into the “Fluid In” line coming from the tank.
The installer must contact the factory for a new fluid in
sensor assembly as the supplied 12” thermowell will
not fit the installation application. Contact the factory
for assistance on installation and control set up. The
chiller circulation pump MUST be activated as
“continuous operation” for the system to operate
correctly. WARNING - Never strap the fluid in sensor
to the outside of a pipe. The fluid in sensor must be
installed with a thermowell assembly containing
minimum length of, 0.70 x the outside diameter of the
pipe to ensure the dynamic accuracy. Ignoring this
waring will result in compressor short cycle due to
inconsistent and inaccurate fluid in readings - the
factory warranty will not cover damages due to
incorrect fluid in or tank sensor installation.
a.
Loss of Charge Pressure Switch
- designed to cut out at
20 psig. and reopen at 40 psig. However, a loss of charge
condition will result in a system lockout
(Low Lockout A
Alarm)
and requires the user to physically reset the alarm by
pressing and holding the caution symbol on the c.pco
control for 3 seconds. If repetitive high pressure conditions
occur, refer to the “trouble shooting” guide in this manual.
b.
High Pressure Switch
- designed to cut out at 650 psig.
and reopen at 550 psig. This switch also locks the
compressor out
(High PSI Switch A Alarm)
and requires
the user to physically reset the alarm by pressing and
holding the caution symbol on the c.pco control for 3
seconds. If repetitive high pressure conditions occur, refer
to the trouble shooting guide in this manual.
c. Suction Pressure Ratiometric Transducer (0-250 psig
range)
This pressure transducer is designed to measure and
display dynamic conditions of the compressors suction line
and can serve as a level of protection for the compressor. In
addition, this senor combined with other dynamic
conditions calculates the Super Heat reading on the display.
Default cut in/out values are 60/55 psig. respectively and
will lock the compressor our immediately. A “Suction
Содержание CHILLBATCH AMC-20
Страница 7: ...6 Product Information Table 1 Physical Data 20 60 Ton Units...
Страница 8: ...7 Product Information Table 2 Physical Data 70 120 Ton Units...
Страница 9: ...8 Physical Dimensions 20 30 Ton Units...
Страница 10: ...9 Fig 1 ECM 10 12 xxxxxA 10 12 5 Ton Units Physical Dimensions 40 50 60 Ton Units...
Страница 11: ...10 Physical Dimensions 70 80 90 Ton Units...
Страница 12: ...11 Physical Dimensions 100 110 120 Ton Units...
Страница 13: ...12 Fork Lifting...
Страница 14: ...13 Lifting Via Crane...
Страница 15: ...14 Lifting Via Crane Cont...
Страница 16: ...15 Chiller Installation and Clearances...
Страница 25: ...24 System Service and Maintenance Periods Cont...
Страница 27: ...26 Winterizing Freeze Protection Cont...
Страница 28: ...27 Module Wiring Diagram...
Страница 29: ...28 Module Panel Layout...
Страница 31: ......
Страница 32: ...1037 Old Salem Road Murfreesboro TN 37127 Phone 615 890 6985 info amgeo com www amgeo com...


