96
•
The
Playback Download
field allows the user to select where to save playback video downloads to. Click the
Browse button to select a different destination folder.
•
The
Video Clips
field allows the user to select where to save video clips to. Click the Browse button to select a
different destination folder.
To reset to default settings, click the Reset Defaults button. To save the settings, click the Save button.
5.5.3. Audio
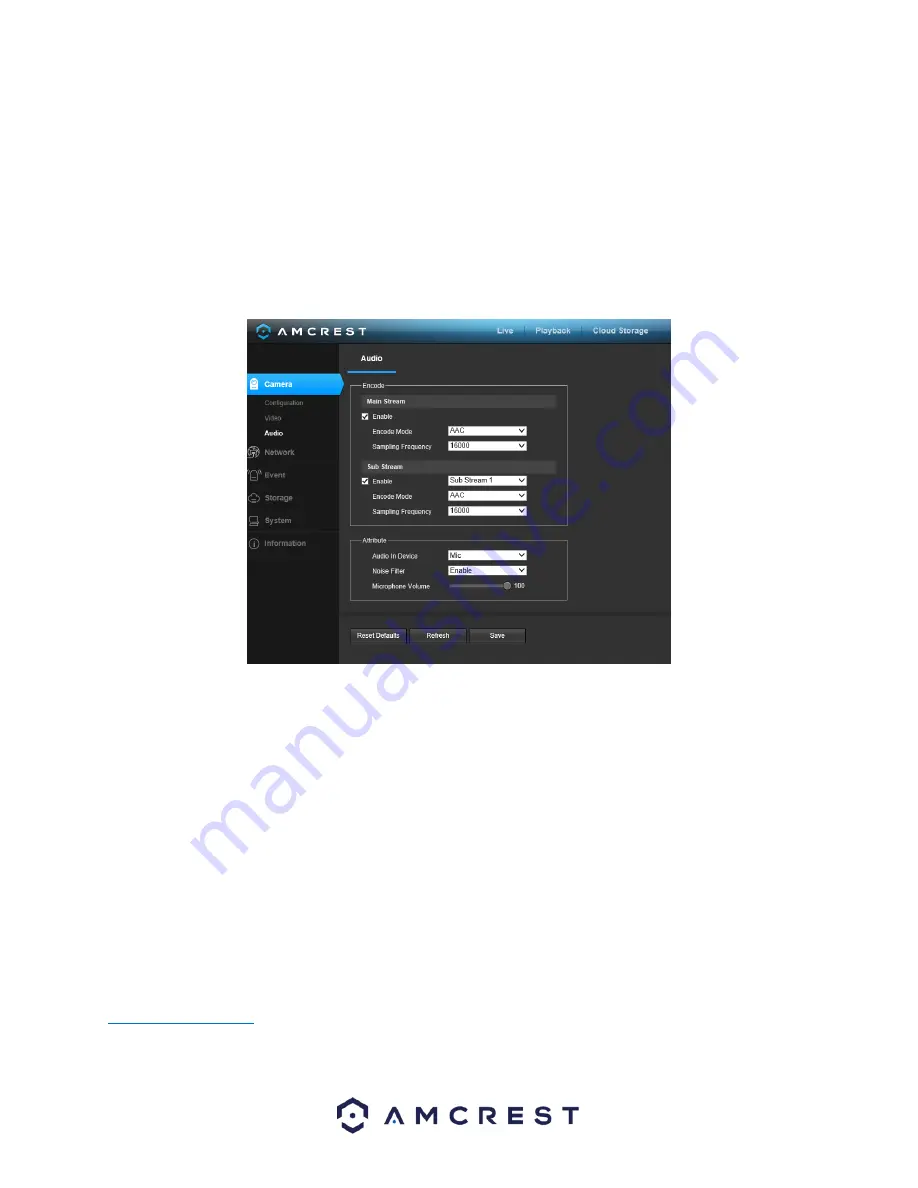
This menu allows the user to modify audio settings for the camera. Below is a screenshot that shows the Audio
menu item under the Camera menu section:
Below is an explanation for each of the fields on the Audio menu:
Enable
: This checkbox allows the user to enable audio recording.
•
Encode Mode
: This dropdown box allows the user to select what audio format the audio should be recorded in.
•
Sampling Frequency
: This dropdown box allows the user to select a sampling frequency for the audio. The options
are 8k and 16k. 16k audio sampling allows for higher sound quality.
•
Audio in Device
: This field allows the user to select what source
to get audio from. The default is the camera’s
built-in mic. Alternatively, the line in mic can be selected.
•
Noise Filter
: This dropdown box allows the user to enable or disable the audio noise filter function. This function
provides cleaner audio quality when enabled.
•
Microphone Volume
: This slider allows the user to select the microphone volume. The value ranges from 0 to 100.
The default value is 50.
To reset to default settings, click the Reset Defaults button. To refresh the page, click the Refresh button. To save
the settings, click the Save button.
5.6. Network
This menu section allows the user to change network settings for the camera.


