TAS12-AS1 & TAS12P-AS1 Installation Instructions
Page 12
For Assistance: [email protected] +1 (909) 591-8431 PUD3677R1-0
Perform Device Tests
The use of a stylus is recommended for all touch screen
operations.
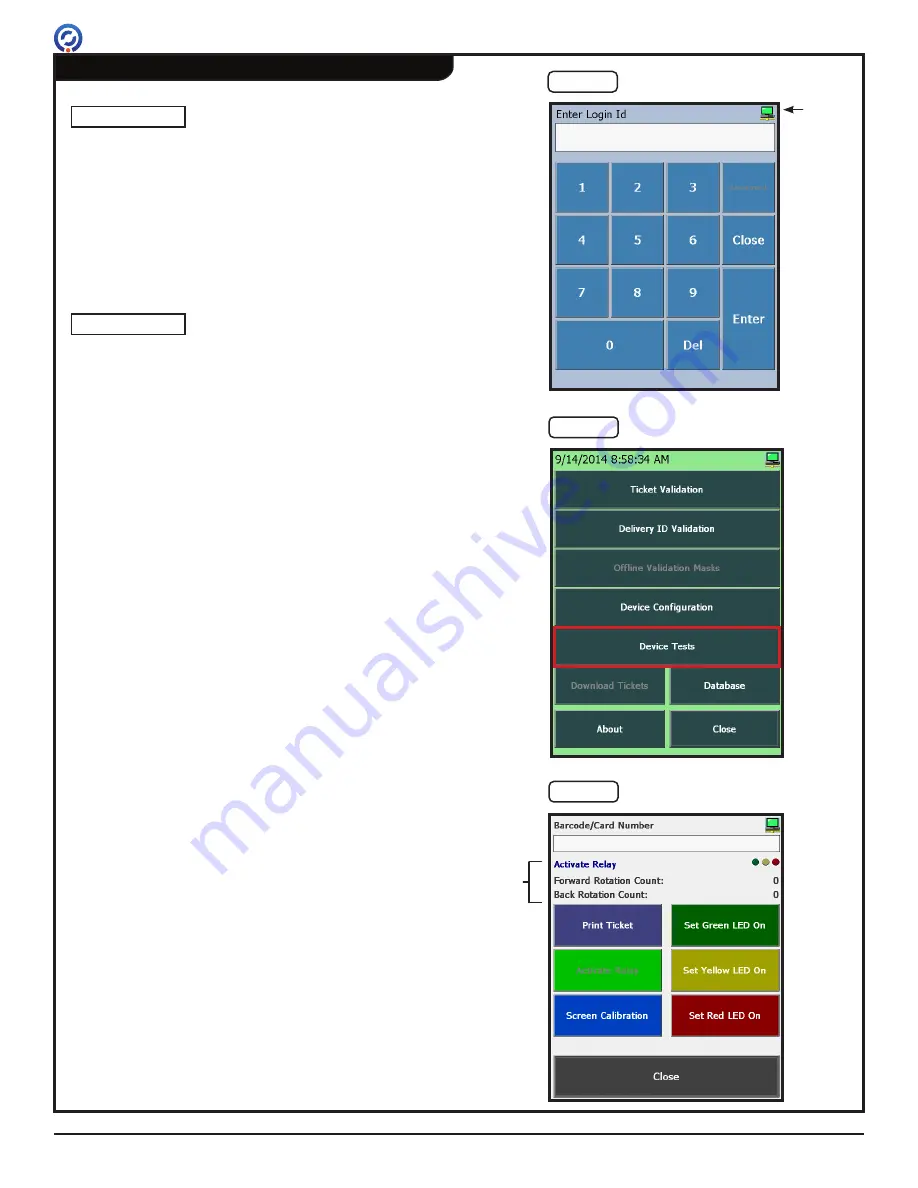
1. Tap the TAS12 screen to bring up the Login Screen
[Figure 15]. To confirm the TAS12 is connected to the
network, verify the online status icon in the top-right
corner is GREEN [Figure 15].
2. Using the onscreen number pad, enter the numeric Login
ID. Press the
ENTER
key. This will bring up the TAS12
Functions Menu.
The factory default Login ID is
123
. If Login IDs have been
configured in Gatelink 10, contact your system administrator
to obtain your Login ID.
3. From the TAS12 Functions Menu, press the
DEVICE
TESTS
button [Figure 16]. This will bring up the
Device
Tests
menu.
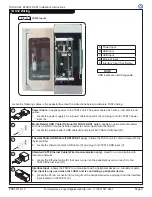
4. Perform the following Device Tests [Figure 17]:
• Set Green LED On
- Press this button to test the
green attendant notification LED. Press the button a
second time to turn the LED off.
• Set Yellow LED On
- Press this button to test the
yellow attendant notification LED. Press the button a
second time to turn the LED off.
• Set Red LED On
- Press this button to test the red
attendant notification LED. Press the button a second
time to turn the LED off.
• Print Ticket
(TAS12P-AS1 only)
- Press this button
to print a test ticket from the integrated printer.
• Activate Relay
- If the TAS12 unit is being used
to control a peripheral device such as a turnstile or
gate, this test button will send a test activation signal
to the peripheral device.
5. Press the
CLOSE
button on each screen until the
"PLEASE SCAN TICKET" message is displayed on the
TAS12 screen.
NOTE
NOTE
Not
Used
Fig. 16
TAS12 Functions Menu
(TAS12P-AS1 shown)
Fig. 17
Device Tests Screen
Fig. 15
Login Screen
Online
Status
Icon


