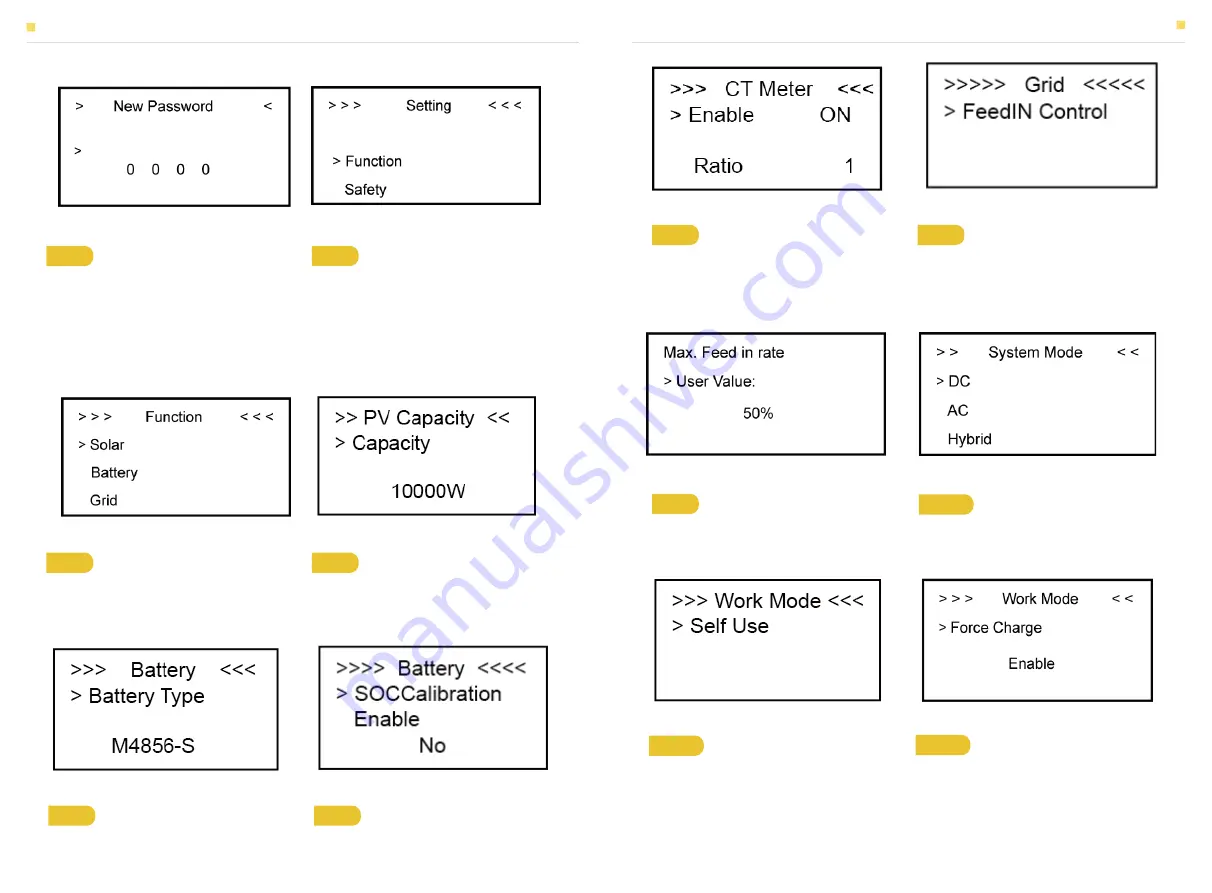
Figure 43 Password Interface
Figure 45 Function Interface
Figure 46 Solar Setting Interface
Figure 44 Setting Menu
Figure 47 Battery Model Interface
Figure 48 SOC Calibration Interface
4.2 Setting
Step 1
Click setting and enter the
password.
The installation's password is four-digit
password: 1111, after the password is
correctly entered, you shall be at the main
Setting interface (administrator
permissions).
Step 3
Click Solar to set the Solar relevant
information.
Step 4
Set PV capacity, the total capacity
of PV capacity of T10-INV and PV inverter
(if it is installed).
Step 2
Click Function to enter function
setting.
Step 5
Click the Battery Function and
check battery type M4856-S.
Step 6
Check SOC Calibration function set
No.
Figure 49 CT Meter Option Interface
Figure 50 Grid Setting InterfaceInterface
Step 7
Choose CT Meter. If you use CT,
please enter the relevant CT ratio. If you
don’t use CT, please enter the ratio as 1.
Step 8
Click the Grid Function to set up
relevant parameters about the grid.
Figure 51 Max. Feed in rate Setting
InterfaceInterface
Figure 52 System Mode Setting
Interfaceterface
Step 9
Set the Max. Feed in rate value.
Step 10
Click Function-System Mode to
set system mode: DC, AC, Hybrid.
Figure 53 Work Mode Setting
Interface
Figure 54 Force Charge Setting Interface
Step 11
Click the mode then set up work
mode.(self-use or force time charge)
Step 12
If you want to use force charge,
set Enable here.
EMS INTRODUCTION AND SET UP
EMS INTRODUCTION AND SET UP
33
34


