x310 Series Installation Guide for Stand-alone Switches
91
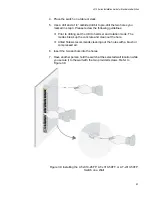
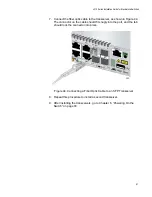
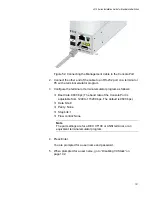
7. Connect the fiber optic cable to the transceiver, as shown in Figure 44.
The connector on the cable should fit snugly into the port, and the tab
should lock the connector into place.
Figure 44. Connecting a Fiber Optic Cable to an SFP Transceiver
8. Repeat this procedure to install a second transceiver.
9. After installing the transceivers, go to Chapter 6, “Powering On the
Switch” on page 93.
Содержание AT-x310-26FP
Страница 10: ...Tables 10 ...
Страница 14: ...Preface 14 ...
Страница 46: ...Chapter 1 Overview 46 ...
Страница 56: ...Chapter 2 Beginning the Installation 56 ...
Страница 92: ...Chapter 5 Cabling the Networking Ports 92 ...
Страница 106: ...Chapter 6 Powering On the Switch 106 ...
Страница 116: ...Appendix A Technical Specifications 116 ...


