Qu-Pac
Getting Started Guide
8
AP9815 iss2
5.
Rear Panel
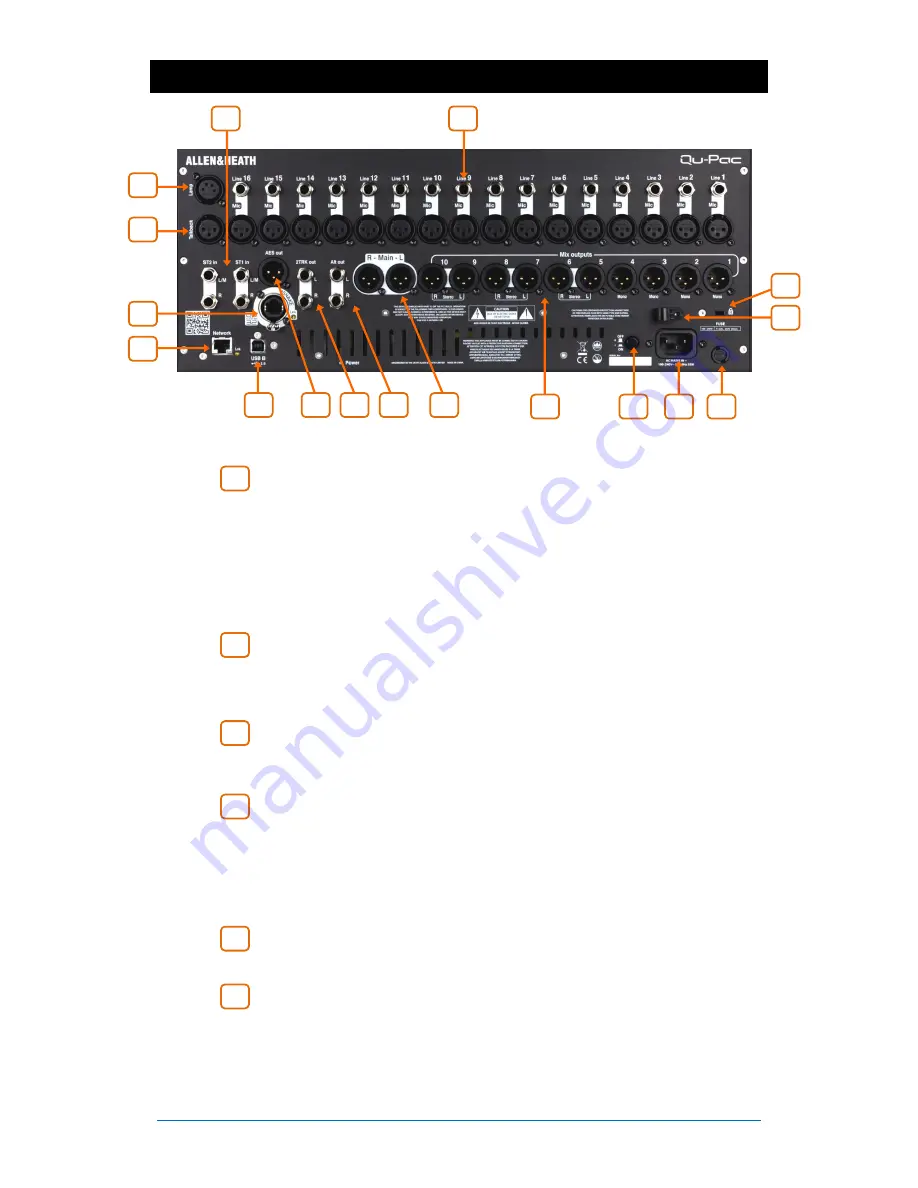
Local Mic/Line inputs 1-16
- Plug into either the XLR Microphone or
TRS jack Line socket, not both. The Line input adds a 10dB pad to attenuate very
hot signals.
Mic/Line inputs 17-32 can be accessed using an optional AudioRack connected via
dSNAKE. You can choose the source to Qu-Pac channels from these local inputs,
remote dSNAKE inputs, Qu-Drive USB playback or USB streaming from a computer.
Note
- To avoid loud thumps, mute the channel before plugging in mic cables or
equipment while 48V phantom power is turned on.
Local Stereo inputs ST1, ST2
- The L input normals (switches)
through the R input jack so that you can work with a mono source by plugging into
just the L/M input. To work with RCA phono connections use jack to RCA converter
plugs.
Talkback input
- Dedicated input for plugging in a microphone for the
engineer to talk to stage monitors or house. Use the
Setup / Audio / Talkback
screen to set its gain, HPF, 48V and route to the various mixes.
Local Mix outputs
- These are dedicated XLR outputs for mono Mix 1-4
and stereo Mix 5-6, 7-8 and 9-10. These mixes can also be patched to other sockets
and dSNAKE.
Dedicated Group and Matrix outputs are not available locally. However, these can be
patched locally to the Alt Out and AES outputs, and via dSNAKE to remote
AudioRack sockets.
Local LR outputs
- Left and Right XLR output of the main stereo mix. LR
can also be patched to other sockets and dSNAKE.
Alt output
- Stereo ‘alternative’ jack output with dedicated front panel level
control. Use the
Setup / Output Patch / Surface
screen to patch an output pair. For
example, you could patch a stereo Group, Matrix or local PAFL monitor speakers.
6
5
4
3
2
1
9
8
7
6
5
4
13
14
16
17
3
15
12
3
10
11
2
1
Содержание QU-PAC
Страница 27: ...Qu Pac Getting Started Guide 27 AP9815 iss2 ...


