


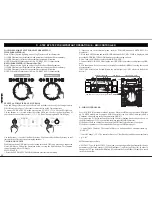


JOG WHEEL FOR EFFECT PARAMETERS SETTING
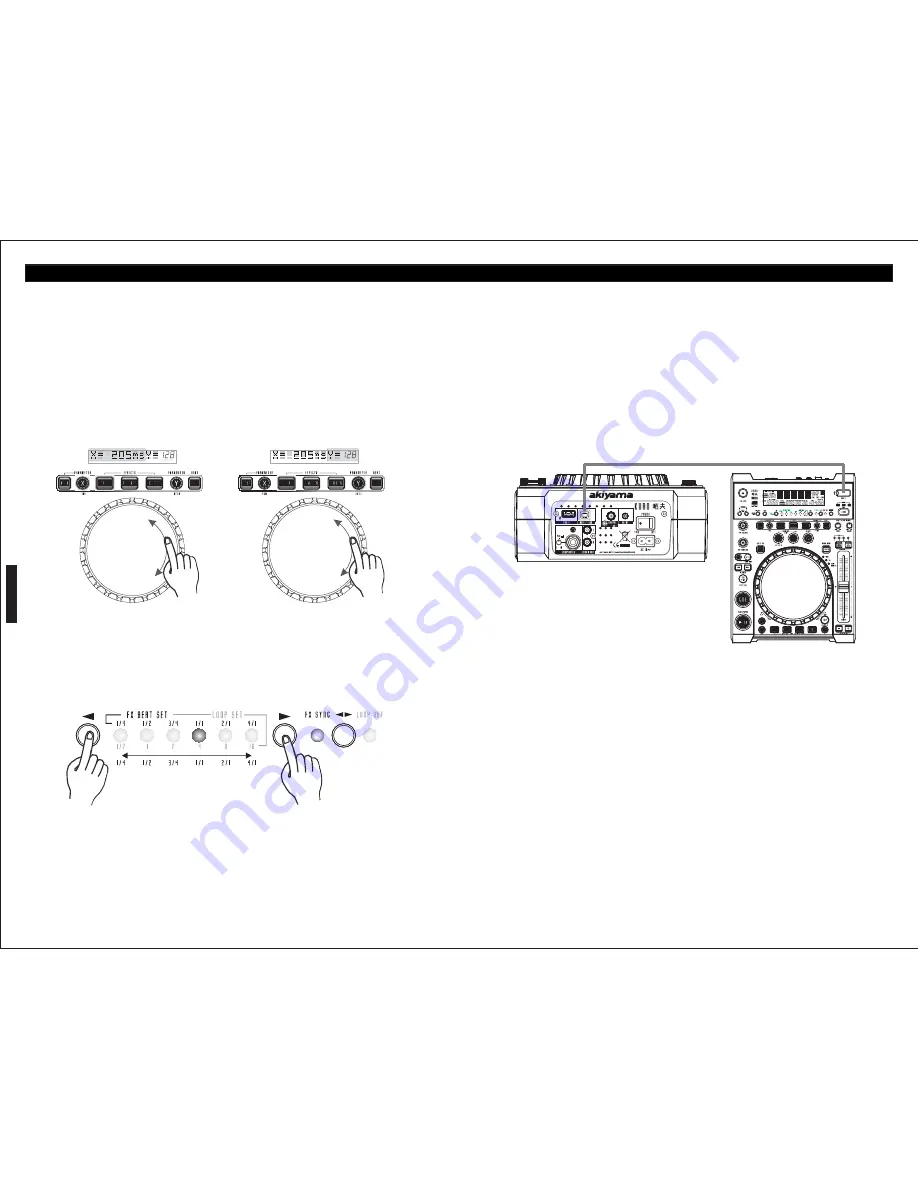
2. Once you are in the internal menu, turn the FOLDER knob until MIDI SETUP is
TIME PARAMETER (X)
displayed.
Press X (Time) button lights up and use Jog Wheel to set Time Parameter.
3. Press the SHIFT button and turn TRACK knob until the USB = LINK is displayed, and
1) If HOLD button is not lit (disabled) any parameter variation will be momentary.
press the ENTER (SETUP MODE) button to save the setting and exit.
2) If HOLD button is lit (active) any parameter variation will remain
4. Now load your USB1 device into the MAIN PLAYER.
NOTE: When HOLD button is active (lit), FX BEAT SYNC is deactivated.
5. Connect the MAIN PLAYER using the rear USB MIDI port to the second player top USB
RATIO PARAMETER (Y) “Balance Dry/Wet”
port.
Press Y (Ratio) button lights up and use Jog Wheel to set Ratio Parameter.
6. You should now be able to access the main player loaded USB device using the second
1) If HOLD button is not lit (disabled) any parameter variation will be momentary.
player controls.
2) If HOLD button is lit (active) any parameter variation will remain
(The USB1 device must be read first on the main player top USB1 whenever loaded the
NOTE: When HOLD button is active (lit), FX BEAT SYNC is deactivated.
device.)
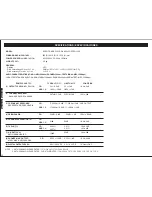
EFFECT AUTOMATIC BEAT SYNCRONY
Echo and Flange effects are “space effects” and its behaviour is set by the Time parameter.
E - MIDI CONTROLLER
Filter effect is not s “space” effect but is can be set also by the Time parameter.
To activate FX BEAT SYNC mode press button FX SYNC (31), a Green LED lights up.
Press SOURCE (2) button more than 2 seconds. We enter MIDI mode, the three LEDs light
Use the buttons (</>) placed at the sides of the LEDs row to select the Beat Syncrony of
up. In MIDI mode Kuro becomes a MIDI Controller tied to a DJ Software install on a
your choice between values entre ¼, ½, ¾, 1, 2, 4 Beat. The appropriate LED will light.
Computer. Connect Kuro to the Computer with USB (37).
We must assign DJ Software functions to the Controls (buttons, knobs and encoders). At
the MIDI map page (31-32) you can find the Kuro controls MIDI adressess.
DJ Softwares have an editing function to assign MIDI controls to Software functions.
DJ Software functions are to be controlled by two types of MIDI messages:
- “Control Note” (Switch): The control at Kuro is a button and have a nomenclatura e.g.
“NOTE C2”
- “Control Change” (CC): The control at Kuro is a VR or Encoder and have a nomenclatura
e.g. “Cc53”.
Use the buttons </> to select the Beat Syncrony. You can modify the Beat Syncrony in real
time while the effect is active pressing the buttons </>.
MIDI control types at Kuro:
7- LINK KURO UNITS
With this function a USB device can be loaded into one KURO, and played by a connected
a- MIDI CC Type: In the MIDI CC Type menu you can assign individual control & change
Host USB Player. Follow the directions below to setup the link function. This function
parameters to the Track encoder (20), the Pitchfader (7) and the Jog Wheel (8). In order to
cannot be used with the CD Player.
change the CC Type hold the Shift Button (32) and turn the Track Wheel (20) until you reach
MAIN PLAYER:
the desired position.
1. Press the ENTER (SETUP MODE) button to enter the internal menu.
LED: Green
ENGLISH
29
D - STEP BY STEP FOR IMPORTANT OPERATION / E - MIDI CONTROLLER
MAIN UNIT “MASTER”
LINKED UNIT “HOST”
USB CABLE
USB CABLE: max. Length 1 meter. Min. Diameter 28
mm