Air King K52 Скачать руководство пользователя страница 12

 July, 2016 


12 

REPLACEMENT  OF  PARTS 


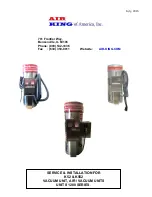
Dome Removal 1200 Series Vacuums 
     
     1. The dome is held on with four allen head screws.  When the screws are   
          removed the dome may be lifted straight upward and off the unit. 
     2. Under the dome is where the vacuum motors, fuses and the compressor will be. 
 
 Vacuum Motor replacement of the 1200 Series Vacuums 
      1.  Turn power off the unit.  
      2.  If unit is K552-750 the air compressor must be removed first.  (See instructions             
below for compressor removal).             
      3.  Disconnect the wires from the vac motors.  Remove the six bolts holding       down 

the exhaust manifold.  Remove the four screws (two per motor) holding the vacuum 
motors to the exhaust manifold.  Lift manifold up and out of the unit.  The motors 
may    have to be rotated 
to be removed.  Be sure to check motor gasket and screen to se that they      are 
fastened tight 

     4.  If you ordered new gaskets and screens with motor remove old gasket and   
          adhesive strip off of gasket place screen on gasket over hole.  Take gasket  
          and screen and press adhesive side down onto where the old gasket and  
          screen were. 
     5.  To install motors follow in reverse the above procedure.   
 
Air Compressor Replacement for 1200 Series Vacuums.  
     1. Turn Power off to unit. 
     2. Remove Air hose. 
     3. Disconnect wires to compressor 
     4. Remove bolts holding bracket. 
     5. Lift compressor and bracket together as a unit up from unit. (Compressor  
         weights 26 pounds) 
     6. Remove four bolts holding compressor to bracket and take old compressor  
         off of bracket 
     7. To install new compressor follow the procedures above in reverse order. 
 
Fuse Replacement for 1200 Series Vacuums  
     1. Turn power off to unit. 
     2. The fuses are located under the dome mounted on the control box. 
     3. Only use 3AB 20 amp 250 volt fuses. 
 
Electrical Plate for 1200 Series Vacuums. 
     1. Turn power off to unit 
     2. The electrical plate is located in the control box of the vacuum directly behind the coin 
acceptors. To get to the electrical plate use the round key you received with your unit, open 
the coin op face plate. You will see the coin acceptor or acceptors are connected to the 
timer or timers. The electrical plate is what the timers, ground faults or terminal blocks are 
attached to.   
    

Содержание K52

Страница 1: ...July 2016 1 701 Frontier Way Bensenville IL 60106 Phone 800 542 3336 Fax 630 350 8011 Website AIR KING COM SERVICE INSTALLATION FOR K52 K552 VACUUM UNIT AIR VACUUM UNITS UNITS 1200 SERIES...

Страница 2: ...5 4 General Specifications Page 6 5 Electrical Requirements Page 7 6 Mounting Instructions Page 8 7 Operating Instructions Page 9 8 Basic Maintenance Page 10 9 Replacement of Parts Page 11 12 10 Trou...

Страница 3: ...s may be present WARNING VACUUMS EQUIPPED WITH AIR COMPRESSORS K552 750 OR VACUUMS EQUIPPED WITH REMOTE AIR SOLENOIDS K52 9 1 Over inflation of tires may be dangerous Please consult your vehicle owner...

Страница 4: ...dels comes with a variety of optional features 1 Models can be set up for free operation or coin operation 2 Cut resistant hose Air Vacuum Air Vacuum Remote units only 3 Single hose reel assemblies Ai...

Страница 5: ...er parts of the unit are warranted for ninety days 5 Warranty covers parts and materials only warranty does not include labor or transportation costs of any kind 6 If unit or parts are returned to the...

Страница 6: ...r coated with a clear coat finish 5 Separate timer for each function vacuum or air 6 Money box secured with two medco plug locks on the 1200 series vacuum AIR KING MODEL K552 1 High quality H P Indust...

Страница 7: ...Breaker C 60 HZ Single Phase The use of the recommended wire size is required for proper operation of all models See wire size guide below If using aluminum wire increase gauge on size Building Vacuum...

Страница 8: ...ND MORE THAN 1 INCH ABOVE CONCRETE BECAUSE FLOOR OF VACUUM IS ONLY 2 INCHES ABOVE THE CONCRETE ELECTRICAL REQUIREMENTS K52 K52 9 120 VAC 20 AMP CIRCUIT BREAKER K552 750 120 VAC 40 AMP CIRCUIT BREAKER...

Страница 9: ...K552 or a K52 9 Air Vacuum and Air Vac remote follow these instructions A To operate the Vacuum side insert the correct amount of coin or coins into the money slot on the right hand side of the vacuu...

Страница 10: ...deco plug locks Turn locks clockwise half of turn until they click Remove keys unit is now secured 3 Cleaning Out Refuse Area 1200 Series Vacuums A Refuse area must be cleaned periodically Refuse area...

Страница 11: ...coin boxes bolts are located behind the coin boxes Refer to Basic Maintenance for lock removal 3 Run the power wire from the stub up through the hold provided at the bottom of the unit See wire size...

Страница 12: ...d screen and press adhesive side down onto where the old gasket and screen were 5 To install motors follow in reverse the above procedure Air Compressor Replacement for 1200 Series Vacuums 1 Turn Powe...

Страница 13: ...bags A Remove A ring from top of the old bag by rotating the A ring counter clockwise until the ring is out of the bag B Remove bottom B ring from the bottom of the bag by rotating the ring out of th...

Страница 14: ...If machine still does not start and ground fault kicks out then check fuse underneath the dome See parts identification section for location of fuse See page 8 for fuse replacement Replace fuse push r...

Страница 15: ...r clogged or broken hose Check for open door or damaged door gasket if gasket is damaged replace it Problem Vacuum has low suction 1 Check for plugged filter bags Clean out bags if plugged Check for h...

Страница 16: ...s 1 thru 7 Are Time setting switches Combine number of seconds to set the time Here Switch 3 20 Seconds Switch 6 160 Seconds are ON for a total run time 20 160 180 Seconds 3 minutes Coin setting Switc...

Страница 17: ...540 To adjust time and coins follow directions below Combine Open Switches to select Time Switches must lie flat towards the number in seconds and toward the open Combine Closed Switches to Select Si...

Отзывы: