background image

8

                                  General power tool safety warnings 


 WARNING  Read  all  safety  warnings,  instructions,  illustrations  and  specifications provided  

with  this  power  tool.  

Failure  to  follow  all  instructions  listed  below  may  result  in electric shock, 

fire and/or serious injury.


Save all warnings and instructions for future reference. 

The  term  "power  tool"  in  the  warnings  refers  to  your  mains-operated  (corded)  power  tool or battery-
operated (cordless) power tool.   

1)  Work area safety 

a. 

Keep work area clean and well lit

. Cluttered or dark areas invite accidents. 

b.  Do not operate power tools in explosive atmospheres, such as in the presence of flammable 

liquids, gases or dust.

 Power tools create sparks which may ignite the dust or fumes. 

c. 

Keep children and bystanders away while operating a power tool.

 Distractions can cause you to lose 

control. 

2)  Electrical safety 

a. 

Power tool plugs must match the outlet. Never modify the plug in any way. Do not use any adapter 
plugs with earthed (grounded) power tools.

 Unmodified plugs and matching outlets will reduce risk 

of electric shock. 

b.  Avoid body contact with earthed or grounded surfaces, such as pipes, radiators, ranges and 

refrigerators.

 There is an increased risk of electric shock if your body is earthed or grounded. 

c. 

Do  not  expose  power  tools  to  rain  or  wet  conditions.

 Water entering a power tool will increase 

the risk of electric shock. 

d.  Do not abuse the cord. Never use the cord for carrying, pulling or unplugging the power tool. Keep 

cord away from heat, oil, sharp edges or moving parts

. Damaged or entangled cords increase the risk 

of electric shock. 

e. 

When  operating  a  power  tool  outdoors,  use  an  extension  cord  suitable  for outdoor use.


Use of 

a cord suitable for outdoor use reduces the risk of electric shock. 

f. 

If operating a power tool in a damp location is unavoidable, use a residual current device (RCD) 
protected suppl

y. Use of an RCD reduces the risk of electric shock. 

3)  Personal safety 

a. 

Stay  alert,  watch  what  you  are  doing  and  use  common  sense  when  operating a power tool. 
Do not use a power tool while you are tired or under the influence of drugs, alcohol or medication.


A moment of inattention while operating power tools may result in serious personal injury. 

b.  Use personal protective equipment.  Always wear eye protection.

 Protective equipment such as a 

dust mask, non-skid safety shoes, hard hat or hearing protection used for appropriate conditions will 
reduce personal injuries. 

c. 

Prevent unintentional starting.  Ensure the switch is in the off-position before connecting to power 
source and/or battery pack, picking up or carrying the tool.

 Carrying power tools with your finger on 

the switch or energising power tools that have the switch on invites accidents. 

d.  Remove any adjusting key or wrench before turning the power tool on.

 A wrench or a key left 

Содержание MD120/4

Страница 1: ...always run machine with no load for at least 3 minutes to reduce temperature before returning to operation to avoid burn out of the motor 1 Speed Drilling System 1 Speed Drilling System N Semi Auto Feed Drilling System Semi Auto Feed Drilling System N 2 Speed Drilling System 4 Speed Drilling System 4 Speed Swivel Base Drilling System 4 Speed Variable Motor Speed Drilling System ...

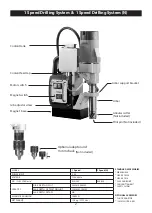
Страница 2: ...stem 1 Speed Drilling System N STANDARD ACCESSORIES WRENCH M8 HEX KEY M2 5 HEX KEY M4 CHIP GUARD KIT COOLANT TANK KIT SAFETY CHAIN OPTIONAL ACCESSORY CHUCK ADAPTOR 13MM CHUCK KEY MODEL 1 Speed 1 Speed N POWER INPUT 9 5A VOLTAGE 115V 60Hz NO FULL LOAD min 1 620 350 550 330 DIA X DEPTH OF CUT 35MM X 50MM CAPACITY DIA X DEPTH OF TWIST DRILL BIT 13MM X 110MM DIA X DEPTH OF TAPS NA MAGNETIC ADHESION 15...

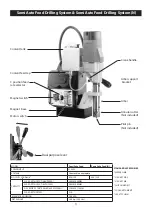
Страница 3: ...lling System N STANDARD ACCESSORIES WRENCH M8 HEX KEY M2 5 HEX KEY M4 CHIP GUARD KIT COOLANT TANK KIT SAFETY CHAIN MODEL Semi Auto Feed Semi Auto Feed N POWER INPUT 1100 W VOLTAGE See machine nameplate NO FULL LOAD min 1 620 350 550 330 DIA X DEPTH OF CUT HAND FEED 35MM X 50MM CAPACITY DIA X DEPTH OF CUT AUTO FEED 30MM X 45MM DIA X DEPTH OFTWIST DRILL BIT HAND FEED ONLY 13MM X 110MM DIA X DEPTH OF...

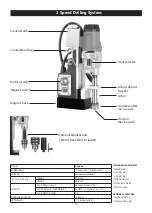
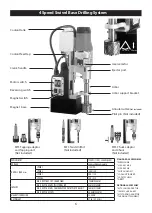
Страница 4: ... POWER INPUT 1700 W 110V 2000W 220V VOLTAGE See machine nameplate NO FULL LOAD min 1 SPEED 1 380 230 SPEED 2 550 330 DIA X DEPTH OF CUT 65 MM X 75 MM 2 X3 CAPACITY DIA X DEPTH OF TWIST DRILL BIT 16MM X 115 MM 5 8 X 4 1 2 DIA X DEPTH OF TAPS NA MAGNETIC ADHESION 32 000 N NET WEIGHT 22 9 KG 50 38 LBS STANDARD ACCESSORIES WRENCH M8 HEX KEY M2 5 HEX KEY M4 CHIP GUARD KIT COOLANT TANK KIT SAFETY CHAIN ...

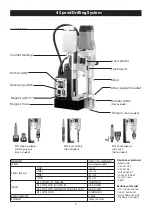
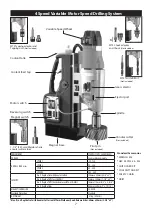
Страница 5: ...NCH M8 HEX KEY M2 5 HEX KEY M4 CHIP GUARD KIT COOLANT TANK KIT SAFETY CHAIN DRIFFT OPTIONAL ACCESSORY MT3 CHUCK ADAPTOR 16MM CHUCK KEY MT3 TAPPING ADAPTOR TAPPING ATTACHMENT POWER INPUT 1700W 110V 2000W 220V VOLTAGE See machine nameplate SPEED 1 150 90 NO FULL LOAD min 1 SPEED 2 200 120 SPEED 3 300 180 SPEED 4 380 230 DIA X DEPTH OF CUT HAND FEED 75MM X 50MM CAPACITY DIA X DEPTH OF MT3TWIST DRILL ...

Страница 6: ...DARD ACCESSORIES WRENCH M8 HEX KEY M2 5 HEX KEY M4 CHIP GUARD KIT COOLANT TANK KIT SAFETY CHAIN DRIFFT OPTIONAL ACCESSORY MT3 CHUCK ADAPTOR 16MM CHUCK KEY MT3 TAPPING ADAPTOR TAPPING ATTACHMENT POWER INPUT 1700W 110V 2000W 220V VOLTAGE See machine nameplate SPEED 1 150 90 NO FULL LOAD min 1 SPEED 2 200 120 SPEED 3 300 180 SPEED 4 380 230 DIA X DEPTH OF CUT HAND FEED 75MM X 50MM CAPACITY DIA X DEPT...

Страница 7: ...ar Cutters with 19mmWeldon or Quick Release Arbor 60mm x 50mm 2 3 8 x 2 Standard Accessories WRENCH M8 HEX KEY M2 5 M5 CHIP GUARD KIT COOLANT TANK KIT SAFETY CHAIN DRIFT POWER INPUT 1700W 110V 2000W 220V VOLTAGE See machine nameplate SPEED 1 35 120 NO FULL LOAD min 1 SPEED 2 70 220 SPEED 3 80 250 SPEED 4 140 450 Dia X Depth of cut with Annular Cutters 120mm x 50mm 4 3 4 x 2 CAPACITY Dia X Depth of...

Страница 8: ... entering a power tool will increase the risk of electric shock d Do not abuse the cord Never use the cord for carrying pulling or unplugging the power tool Keep cord away from heat oil sharp edges or moving parts Damaged or entangled cords increase the risk of electric shock e When operating a power tool outdoors use an extension cord suitable for outdoor use Use of a cord suitable for outdoor us...

Страница 9: ...dle power tools out of the reach of children and do not allow persons unfamiliar with the power tool or these instructions to operate the power tool Power tools are dangerous in the hands of untrained users e Maintain power tools and accessories Check for misalignment or binding of moving parts breakage of parts and any other condition that may affect the power tool s operation If damaged have the...

Страница 10: ...ing long chips by regularly interrupting downward pressure Sharp metal chips may cause entanglement and personal injuries h Never remove chips from the drilling area while the tool is running To remove chips move the accessory away from the workpiece switch off the tool and wait for the accessory to stop moving Use tools such as a brush or hook to remove chips Contact with rotating parts or chips ...

Страница 11: ...uch as a vacuum base adapter Use of accessories which are not manufacturer approved could result in a hazardous situation k Do not operate with dull or damaged cutting tools This may overload the motor l Avoid operating annular cutters without cutting fluid Always check fluid level before operating Annular cutters require cutting fluid for proper operation and long life m Protect the motor Never a...

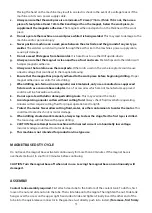
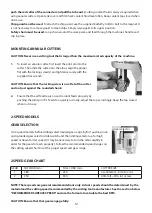
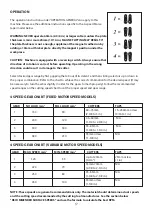
Страница 12: ... a flat of the cutter and not just against the rounded shank 2 Ensure that the oil feed tap is on and coolant feeds properly by pushing the pilot pin If it feeds too quickly or slowly adjust the tap accordingly Keep the tap closed when not in use 2 SPEED MODELS GEAR SELECTION On 2 speed models before drilling select desired gear range by first pushing in on spring loaded gear selector slider switc...

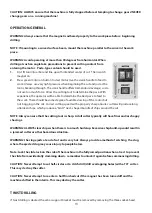
Страница 13: ...e degree of audible slowing of the motor but not bogging in the cut Correct cutting speed with a properly sharp annular cutter will produce long unbroken chips which produce a bird s nest shaped bundle of chips around the cut NOTE Always ensure that the cutting tool is sharp A dull cutter typically will have finer and or choppy shavings WARNING ALWAYS clear chips when there is too much build up Ex...

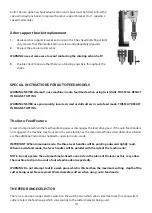
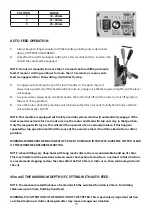
Страница 14: ...ed Feature A lever incorporated into the feed handle engages or disengages the feed drive gears If the auto feed mode is not engaged the machine may be used in the same fashion as the manual machine as described above Below are the additional instructions needed to operate in auto mode IMPORTANT When in manual mode the three lever handles will be pointing outward slightly out When in auto feed mod...

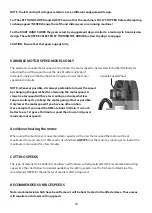
Страница 15: ... is equipped with safety override systems which will automatically engage If the load exceeds maximum for 2 seconds or more the motor and feed will stop and stay in that position Only the magnet will stay on This will alert the operator of an overload problem If this happens repeatedly stop operation and find the cause of the excessive load It could be a bad cutter or other problem WARNING WHENEVE...

Страница 16: ...l to tap with a soft faced mallet to fully engage the taper If it is properly in position one will not be able to pull it back apart by hand To remove line up the ejector slot of the arbor with the ejector port in the gear case slide the ejector drift into the slot and tap with a hammer to eject the tool CAUTION When removing take care that the cutting tool does not crash down and get damaged or i...

Страница 17: ...e the correct combination for the desired speed It may be necessary to turn the arbor slightly in order for the gears to mesh properly Follow the recommended speed ranges on the cutting speed chart to set the proper speed and gear range NOTE These speeds are general recommendations only The material should determine actual speeds and the cutting speed recommended by the cutting tool manufacturer S...

Страница 18: ... motor speed A slower motor speed will have less cooling and somewhat less torque so always try to keep the motor going as fast as possible Only lower the motor speed if you have no other option For example If you need the RPM at about 100 min it is much better to use 1st gear at full motor speed than to use 3rd gear at minimum motor speed Avoid overheating the motor When using the machine at or n...

Страница 19: ...ion switch in the neutral position the machine will not turn but will be live as soon as either forward or reverse is selected the arbor will begin turning Take due care to SAFETY CLUTCH The 4 speed variable motor speed models are equipped with a safety clutch which is designed to slip when the maximum torque value is exceeded This clutch is not a tapping clutch and bottoming taps in blind hole is...

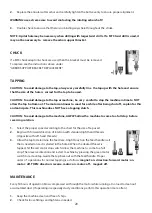
Страница 20: ...hine does NOT have a tapping clutch CAUTION To avoid damage to the machine ALWAYS allow the machine to come to a full stop before reversing rotation 1 Select the proper speed according to the chart for the size of tap used 2 Begin with forward direction of rotation with standard right hand threads Opposite with left hand threads 3 Allow the tap to determine the feed rate A light touch on the feed ...

Страница 21: ...they reach their wear limit Caution Always replace the brushes as a pair To replace 1 Remove the 4 screws and remove the motor tail cover 2 Using pliers rotate the brush spring out of the way and slide the old carbon brush out of the brush holder 3 Unscrew the screw to remove the brush lead The old carbon brush may now be lifted away 4 Install a new brush Installation is the reverse of removal 5 R...

Страница 22: ...e replaced A faulty magnet may also cause damage to the rectifier Also check the rectifier when replacing a faulty magnet see below CHECKING THE RECTIFIER Qualified technicians only The rectifier takes the AC household current and converts it to DC to power the magnet If it fails the magnet coils will not receive power Disconnect the rectifier and test the resistance of both circuits of the rectif...

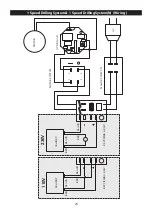
Страница 23: ... 1 Speed Drilling System 1 Speed Drilling System N Wiring 1 2 4 3 OVER LOAD MAGNET RECTIFIER EMC MAGNET SWITCH MOTOR SWITCH MOTOR RED BLACK RED BLACK AC MAGNET RED BLACK RED BLACK RECTIFIER EMC 110V 230V ...

Страница 24: ...emi Auto Feed Drilling System N Wiring MOTRO SWITCH RED MOTRO SWITCH GREEN MAGENT SWITCH FEED MOTOR 3 POSITION FEED RATE SELECTOR SWITCH CAPACITANCE MAGENT MOTOR AC RED BLACK RED BLACK RED BLACK BLUE MAGENT RED BLACK RED BLACK 230V 110V ...

Страница 25: ...25 2 Speed Drilling System Wiring 1 2 4 3 OVER LOAD MAGNET RECTIFIER EMC MAGNET SWITCH MOTOR SWITCH MOTOR RED BLACK RED BLACK AC MAGNET RECTIFIER EMC RED BLACK RED BLACK 110V 230V ...

Страница 26: ...4 Speed Swivel Base Drilling System Wiring RECTIFIER EMC MAGNET OVER LOAD MAGNET SWITCH CARBON BRUSH REVERSING SWITCH 1 2 4 3 MOTOR SWITCH STATOR RED BLACK RED BLACK AC RED BLACK MAGNET RED BLACK RED BLACK RECTIFIER EMC 110V 230V ...

Страница 27: ...M1 M2 AC AC AC STATOR REVERSING SWITCH MOTOR SWITCH RECTIFIER EMC MAGNET SWITCH BRUSH HOLDER RIGHT LEFT MAGNET ELECTRONICS BOARD RED BLACK RED BLACK RED BLACK BLACK BLACK BLACK 105cm WHITE 90cm BROWN 105cm BLUE 105cm RED 90cm YELLOW 90cm 2 3 4 1 WHITE WHITE ...

Страница 28: ...43 76 77 71 72 81 43 82 75 75 78 83 84 80 89 88 87 48 49 54 30 32 31 33 34 40 41 75 35 38 81 39 77 36 37 75 32 31 33 35 34 95 97 96 TO42 55 69 68 46 47 08 04 05 56 01 02 64 64 64 97 100 NO 01 122 Version 2 1 86 94 79 86 79 1 RECTIFIER EMC RECTIFIER 110V 230V 101 102 101 102 39 103 102 102 104 105 106 107 108 110 109 111 112 113 114 02 1 OPTIONAL 75 99 94 104 75 118 116 OPTIONAL 119 115 74 120 14 1...

Страница 29: ...G 1 121 FAN SHROUD 1 122 SAFETY BELT 1 NO Parts Name Q TY 1 SOCKET SET SCREW M8x7xP1 25 2 2 ARBOR M27 122 5L 1 2 1 QUICK RELEASE ARBOR SHAFT M27 122 5L 1 3 ARBOR SUPPORT BRACKET 1 4 TRUSS HEAD MACHINE SCREW M5x8xP0 8 2 5 NEEDLE BEARING HK 3516 1 6 SPRINGWASHER M8 3 7 SOCKET CAP SCREW M8x55xP1 25 2 8 SOCKET CAP SCREW M8x30xP1 25 1 9 WATER SEAL Ø16x16 WHITE 1 10 SPRING Ø1 5xØ13 3xØ16 3x16Tx140L 1 11...

Страница 30: ... 45 44 46 47 53 54 55 56 62 57 54 43 51 43 43 63 64 63 63 89 65 66 67 67 89 68 69 70 71 72 73 74 75 76 77 78 79 80 81 82 83 84 85 86 90 94 73 96 93 98 99 101 103 104 107 108 109 110 100 97 NO 01 128 Version 1 9 106 105 95 95 1 RECTIFIER EMC RECTIFIER 106 87 77 112 110V 230V 113 113 53 114 114 115 114 114 116 OPTIONAL 43 92 105 116 91 123 120 OPTIONAL 124 125 117 118 119 02 05 06 04 07 08 09 03 121...

Страница 31: ...ET SET SCREW M8x7xP1 25 2 125 ARBOR M27 122 5L 1 126 EARTHING MARKING 1 127 FAN SHROUD 1 128 SAFETY BELT 1 NO Parts Name Q TY 1 N A 2 CHECK BALL Ø8 1 3 QUICK RELEASE ARBOR SHAFT M27 122 5L 1 4 QUICK RELEASE COLLAR 1 5 COLLAR PIN Ø8 1 6 RING Ø40xØ44x9 1 7 SPRING Ø2 3xØ39xØ43 6x3Tx30L 1 8 SPRING SEAT RING Ø35 1xØ44 5x2 1 9 EXTERNAL CIRCLIP S 35 1 10 ARBOR SUPPORT BRACKET 1 11 TRUSS HEAD MACHINE SCRE...

Страница 32: ...91 92 93 94 95 96 97 46 101 102 103 104 105 106 107 108 109 110 111 112 111 111 112 112 113 114 115 116 117 118 119 120 124 122 123 100 98 99 100 63 2 63 3 63 45 46 47 44 43 42 48 50 34 36 35 37 39 38 113 113 100 TO50 64 65 66 99 100 115 116 115 116 114 114 127 49 51 52 126 128 128 110V 125 230V 47 128 128 134 125 129 Optional 133 130 66 71 135 136 131 76 30 138 63 1 139 NO 01 139 Version 1 9 Semi...

Страница 33: ...PRINGWASHER M4 4 66 FLATWASHER Ø4xØ10x1 6 67 SWITCH PANEL 125x82x1 5T 1 68 MAGNET SWITCH 110V 220V 1 69 70 N A 71 SWITCH GUARD BAR 64MM 2 72 MOTOR ON SWITCH 110V 220V 1 73 MOTOR OFF SWITCH 110V 220V 1 74 HEX NUT M5xP0 8 6 75 SOCKET SET SCREW M5x20xP0 8 6 76 EXTERNAL STARWASHER M5 1 77 LIMIT SWITCH 110V 220V 1 78 PIN 2 79 GIBTENSIONER 258x11x1 2T 1 80 GIB STRIP RIGHT 258MM 1 81 GIB STRIP LEFT 258MM...

Страница 34: ...26 27 28 29 30 26 26 26 31 27 32 30 33 35 26 36 37 38 39 39 39 39 40 40 41 41 42 42 43 43 44 44 45 46 47 48 49 50 51 52 51 08 53 54 58 59 64 48 65 66 66 67 68 69 70 71 72 71 73 68 3 68 2 76 77 78 79 80 141 83 82 84 85 86 87 88 89 89 90 91 92 93 94 95 96 97 98 99 100 100 106 107 108 109 110 111 112 113 125 123 124 127 128 129 NO 01 143 Version 1 6 132 130 56 57 55 133 133 110V 131 230V 52 133 133 1...

Страница 35: ...4 70 SPRINGWASHER M4 4 71 FLATWASHER Ø4xØ10x1 6 72 SWITCH PANEL 125x82x1 5T 1 73 MAGNET SWITCH 110V 220V 1 74 75 N A 76 SWITCH GUARD BAR 64MM 2 77 MOTOR ON SWITCH 110V 220V 1 78 MOTOR OFF SWITCH 110V 220V 1 79 HEX NUT M5xP0 8 6 80 SOCKET SET SCREW M5x20xP0 8 6 81 EXTERNAL STARWASHER M5 1 82 LIMIT SWITCH 110V 220V 1 83 PIN 2 84 GIBTENSIONER 258x11x1 2T 1 85 GIB STRIP RIGHT 258MM 1 86 GIB STRIP LEFT...

Страница 36: ... 86 44 81 88 89 90 96 98 100 77 57 103 104 105 106 107 108 109 112 111 16 8 10 135 NO 1 141 Version 2 3 TO69 97 66 67 68 44 46 45 47 48 49 47 46 48 49 45 44 93 92 91 83 126 126 110V 230V 125 126 52 125 126 127 124 Optional 131 133 130 114 135 95 Optional 44 95 RECTIFIER 102 Optional RECTIFIER EMC 102 1 94 94 44 113 129 128 136 137 138 116 119 120 118 121 122 123 139 140 76 141 2 Speed Drilling Sys...

Страница 37: ...GEAR RACK M2 0x170L 1 73 STAND BODY 1 74 SOCKET SET SCREW M5x25xP0 8 5 75 HEX NUT M5xP0 8 5 76 EXTERNAL STARWASHER M5 1 77 BUSHING Ø32xØ38x12 2 78 FLATWASHER Ø8xØ40x2 5 1 79 MAGNET SWITCH 110V 220V 1 80 SWITCH GUARD BAR 110MM 2 81 PANHEAD MACHIME SCREW M4x16xP0 7 1 82 SWITCH PANEL 130 5x90 5x1 5T 1 83 FLATWASHER Ø4xØ10x1 5 84 SPRINGWASHER M4 4 85 SOCKET CAP SCREW M4x16xP0 7 4 86 MOTOR SWITCH 110V ...

Страница 38: ...5 86 78 89 83 76 91 92 73 74 126 103 50 101 60 78 121 125 77 128 127 32 32A 32 32 32 32 75 2 28 27 26 25 24 28 27 26 25 24 31 57 56 30 108 142 50 NO 1 157 Version 2 5 30 13 62 110 18 19 20 21 22 23 29 12 6 6 67 66 65 50 54 55 53 51 52 50 54 55 53 51 52 84 85 86 102 104 105 84 110V 230V 130 130 49 133 133 134 133 133 49 135 132 Optional 129 142 50 108 137 Optional 138 140 141 146 147 148 144 145 14...

Страница 39: ...ITCH 110V 220V 1 80 MAGNET SWITCH 110V 220V 1 81 PANHEAD MACHIME SCREW M4x16xP0 7 1 82 SWITCH GUARD BAR 110MM 2 83 SWITCH PANEL 130 5x90 5x1 5T 1 84 FLATWASHER Ø4xØ10x1 5 85 SPRINGWASHER M4 4 86 SOCKET CAP SCREW M4x16xP0 7 4 87 MOTOR SWITCH 110V 220V 1 88 EXTERNAL STARWASHER M5 1 89 SPRINGWASHER M8 4 90 FLATWASHER Ø8xØ40x2 5 1 91 BUSHING Ø32xØ38x12 2 92 STAND BODY 1 93 SOCKET SET SCREW M5x25xP0 8 ...

Страница 40: ...125 77 128 127 32 32A 32 32 32 32 75 2 28 27 26 25 24 28 27 26 25 24 31 57 56 30 NO 1 171 Version 2 6 30 13 62 18 19 20 21 22 23 29 12 6 6 67 66 65 50 54 55 53 51 52 50 54 55 53 51 52 84 85 86 102 104 105 107 91 111 110 109 112 114 108 156 110 100 99 98 130 131 132 133 134 78 100 140 141 142 135 76 76 110V 230V 143 143 49 146 146 147 146 49 148 84 145 Optional 129 156 50 108 50 150 Optional 151 15...

Страница 41: ...NET SWITCH 110V 220V 1 81 PANHEAD MACHIME SCREW M4x16xP0 7 1 82 SWITCH GUARD BAR 110MM 2 83 SWITCH PANEL 130 5x90 5x1 5T 1 84 FLATWASHER Ø4xØ10x1 5 85 SPRINGWASHER M4 4 86 SOCKET CAP SCREW M4x16xP0 7 4 87 MOTOR SWITCH 110V 220V 1 88 EXTERNAL STARWASHER M5 1 89 SPRINGWASHER M8 7 90 FLATWASHER Ø8xØ40x2 5 1 91 BUSHING Ø32xØ38x12 2 92 STAND BODY 1 93 SOCKET SET SCREW M5x25xP0 8 5 94 HEX NUT M5xP0 8 5 ...

Страница 42: ... 80 105 128 130 33 32 34 33 32 31 17 18 20 21 23 24 26 25 28 29 30 28 29 30 42 41 40 40 43 45 46 52 44 48 40 49 50 52 54 53 47 55 56 51 NO 01 159 Version 2 0 05B 04 03 02 01 19 27 99 98 109 158 138 110V 230V 141 141 129 129 72 142 129 129 93 63 108 Optional 105 RECTIFIER Optional RECTIFIER EMC 131A 131B 132 133 133 22 94 95 125 96 99 122 113 114 112 115 116 75 71 37 35 38 39 36 35 61 62 63 64 65 7...

Страница 43: ...USH SPRING 0 4x4x3 5T 2 79 PANHEAD MACHINE SCREW M4x10xP0 7 2 80 PANHEADTAPPING SCREW M4x12 4 81 MOTORTAIL CASTING 1 82 PANHEADTAPPING SCREW M4x30 4 83 SPEED CONTROL 110V 220V 1 84 THUMBWHEEL 1 85 SPEED ADJUSTOR COVER 1 86 FLAT HEADTAPPING SCREW M4x16 2 87 CABLE PROTECTOR 3 8 x65CM 1 88 WIRE LEADS 1 89 FLAT HEADTAPPING SCREW M5x10 4 90 MOTOR COVER PLATE 1 91 PANHEADTAPPING SCREW M4x16 2 92 CABLE C...

Страница 44: ......
Отзывы: