Agilent InfinityLab LC Series Multicolumn Thermostats User Manual
76
3
Using the Module
Installing and Using Column ID Tags
10
Click the
>>
button at the top right of the
Column Tag Information
table to
show the hidden table columns. Use the horizontal scroll bar to access the
columns at the right of the table.
11
If all the information for the column is correct, click the
Ok/Write Tag
button to
write the information to the column ID tag.
The information in the ChemStation's
Edit Columns
table is also updated.
12
You can edit the information on the column ID tag using the ChemStation
Edit
Columns
table. When you have finished editing the information, repeat steps 7
to 9 to update the information in the tag.
13
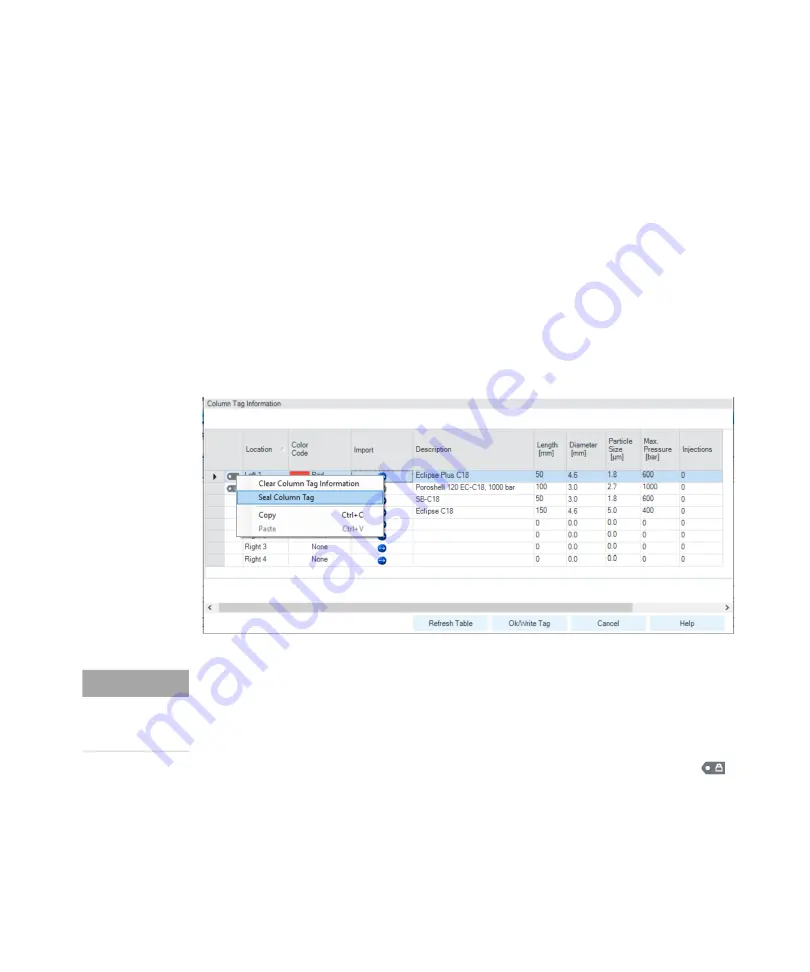
When you are sure that you will not make any more changes to the
information in the tag, you can irrevocably seal the tag to set all static fields to
read-only. Right-click in the appropriate line in the
Column Tag Information
table and select
Seal Column Tag
from the context menu.
The sealed column is shown in the
Column Tag Information
table with the
icon at the beginning of the row. In the
Edit Columns
table of the ChemStation,
it is shown with
Sealed
in the
Tag
column.
The
Plumbing
button of the ChemStation
Edit Columns
table displays the
Column Assignment
dialog box. It can also be displayed by selecting
Column
Assignment
from the context menu of the column compartment Dashboard
panel in the ChemStation's
Method and Control
view.
Figure 15 The Column Tag Information table context menu
NOTE
Once a column ID tag has been sealed, the static fields cannot be edited.
Until the column ID tag has been sealed, you can delete all information in static
fields on the tag using the
Clear Column Tag Information
command from the
context menu.


