Set Up
DR500 Operation and Technical Manual
2-2
Aerotech, Inc.
Version 16
2.2.
DR500 Jumper Selections and Configurations
The DR500 is configured by the factory according to the specifications given by the user.
The user should not need to reconfigure the DR500 chassis. However, if there is a need
to add change the type of amplifier for an axis, it will be necessary to configure the slot
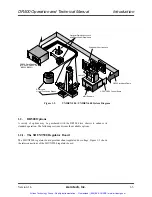
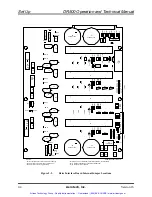
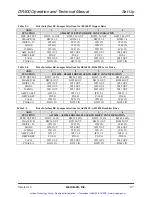
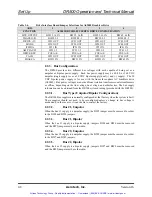
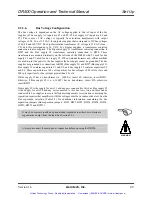
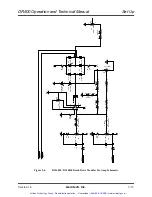
jumpers, shown in Figure 2-1 and Figure 2-2, according to the following sections. The
“BW” type slot jumpers on the Mother/Interface board are high current solid bus wire
jumpers and are soldered to the board. The “JP” type jumpers are two pin headers that
insert and pull out of a socket.
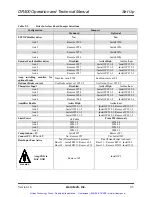
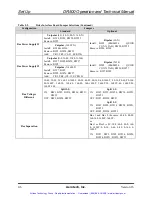
NOTE: There are two circuit boards within the DR500, be sure to reference the
correct jumper table for setting each board’s jumpers.
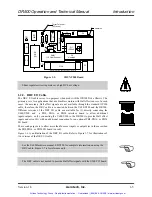
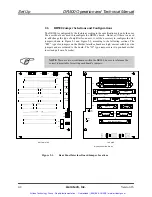
Figure 2-1.
Rear Panel Interface Board Jumper Locations
J12
11
J100
J10
FROM CONTROLLER P5
1
J11
I/O BUS
1
J3
AXIS 2
1
J4
AXIS 3
1
J2
AXIS 1
1
J5
AXIS 4
1
J13
MISC I/O
1
J16
ICMD
SIGNALS
1
J12
JOYSTICK
1
J14
BRAKE
1
J1
FROM CONTROLLER P1
DS5
I/O BUS POWER
DS1
ENCODER 1 POWER
DS2
ENCODER 2 POWER
DS3
ENCODER 3 POWER
DS4
ENCODER 4 POWER
1
R30
R29
R28
R27
R26
C4
C3
C1
C2
100UF
.001UF
10UF
10UF
BOTTOM SIDE
J10
J11
J3
J4
J2
J5
J13
J16
J14
J1
J100
R21
R20
R19
C6
P15
P14
1
1
EN1-N
PAD1
EN2-N
PAD2
EN3-N
PAD3
EN4-N
PAD4
JP28
JP29
1
JP14
J
P
4
J
P
3
J
P
2
J
P
1
2
8
7
1
2
8
7
JP5
6 7
JP8
12 10
JP13
JP9
TP12
TP1
22 32 42 2
TEST POINTS
Drawing 690D1529 Rev. D2
TOP SIDE
R6
R5
R4
R9
R8
R7
R18
R17
R16
C5 .1UF
.1UF
M1
M2
R
3
– C
11 –
.001
R
2
– C
10 –
.001
R1 – C9 –
.001
R
15 – C
17 –
.001
R
14 – C
16 –
.001
R
13 – C
15 –
.001
R
12 – C
14 –
.001
R
11 – C
13 –
.001
R
10 – C
12 –
.001
R
25 – O
P
E
N
C
8
– .001U
F
C
7
– .001U
F
R
24 – C
20 –
.001
R
23 – C
19 –
.001
R
22 – C
18 –
.001
7407
7407
Artisan Technology Group - Quality Instrumentation ... Guaranteed | (888) 88-SOURCE | www.artisantg.com

