21
Settings can only be adjusted while the
printer is in
Setup
mode. An error will
be displayed on the baggers touch
screen. After adjustments and test are
complete, return the printer to
run
mode by pressing <setup>. Do the same
to take the printer out of
run
mode.
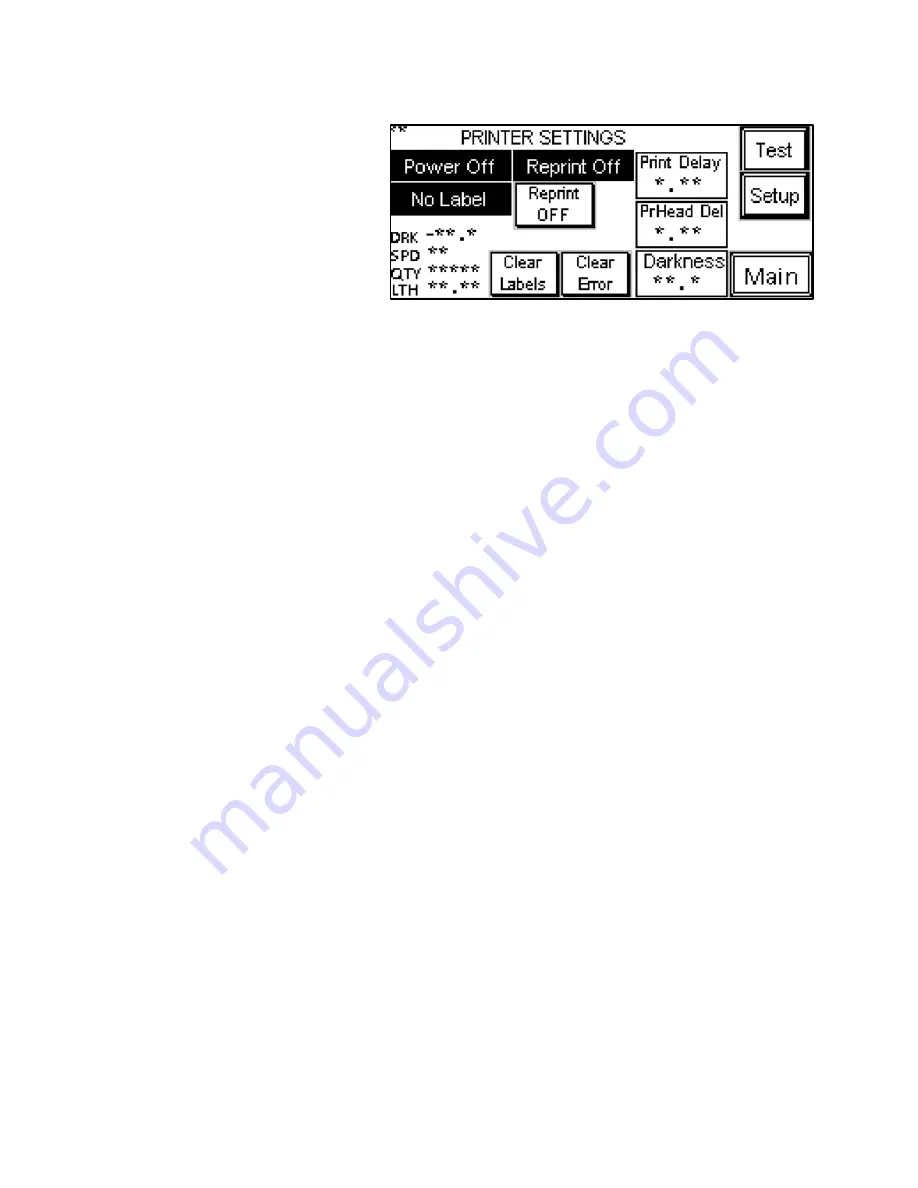
The Printer Settings screen features
rectangular indicators that display the
printer’s status:
•
Power OFF
indicates that the printer is off. This box will also display “Self-Test” when the
printer is first turned on and “Ready” during startup if an error does not exist.
•
No Label / Label
indicates whether or not a label has been downloaded.
This box will also
display “Error,” “Printing” and “No Ribbon” during various stages of operation.
•
ReprintBuffer
: If “ReprintBuffer” is displayed, the printer is continuously printing a preset
amount of the same label. If “ReprintBuffer” is displayed in grey, the reprint function is not
activated. If “New Label” is displayed, a new label has been downloaded. If “StoredLabel” is
displayed, a label has been recalled from stored memory.
The second column on the Printer Setup screen serves as a further indicator of the printer’s status. This
box will display
Reprint OFF
, if the reprint function has been turned off,
Reprint ON
if the reprint
function has been turned on and
OverWrite
if previous label settings are overridden.
This screen also displays the downloaded label parameters, including the
Darkness
setting, the
Speed
setting, the
Quantity
setting and the
Length
setting. The Darkness, Print Speed, Quantity and Length
parameters are set up in the label software. They are displayed on the OFL Printer Setup screen for
informational purposes. However, the Darkness and Length settings can be changed on this screen.
Print Delay
: This setting causes the nip rollers to compress first, thus delaying the print head from
lowering. This will ensure that the film is captured and ready to start feeding before the print head lowers.
Increasing this delay time will cause loss of production. To change this setting, press the
Print Delay
button, enter a value on the numeric keypad and press the
ENT
button.
PrHead Del
: This setting is the amount of time, in seconds, before the machine cycles again after
completing the previous cycle. To change this setting, press the
PrHead Del
button, enter a value into the
numeric keypad and press the
ENT
button.
Darkness
: Darkness can be set between 1 and 30. Darkness settings can be set in your label software,
but can also be overridden by adjusting the Darkness setting on the OFL Printer Setup screen. Increase the
Darkness setting to improve print quality. A typical setting is 20. To change this setting, press the
Darkness
button, enter a value into the numeric keypad and press the
ENT
button.
The
Stored Label
button will expand the options to include
Label #
and
Length
.
Figure 3-4
Содержание Ti-1000ZR
Страница 1: ...0 Ti 1000ZR Operation Guide Version 1A Setup Operation and Parts Manual ...
Страница 6: ...5 This page intentionally left blank ...
Страница 16: ...15 Ti 1000Z THREADING DIAGRAM Figure 2 1 ...
Страница 17: ...16 Ti 1000Z WITH T 1000 S14 THREADING DIAGRAM SINGLE DANCER Figure 2 2 ...
Страница 18: ...17 Ti 1000Z RIBBON THREADING DIAGRAM Figure 2 3 ...
Страница 26: ...25 Figure 3 15 Figure 3 16 Figure 3 17 Figure 3 18 ...
Страница 33: ...32 4 14 1 TIZ E1_110VAC Electrical Drawing Figure 4 1 ...
Страница 34: ...33 4 14 1 TIZR E2_FPG IO Electrical Drawing Figure 4 2 ...
Страница 35: ...34 4 14 1 TIZ E3_AXH_rev1 Electrical Drawing Figure 4 3 ...
Страница 36: ...35 4 14 1 TIZR E6_ZebraIF Electrical Drawing Figure 4 4 ...
Страница 37: ...36 Figure 4 5 4 14 1 TIZR E7_FP0R GT02 Electrical Drawing ...
Страница 38: ...37 4 14 1 TIZR E9_CB IF Electrical Drawing Figure 4 6 ...
Страница 39: ...38 4 14 1 TIZ E8_AuxIF_rev4 Electrical Drawing Figure 4 7 Figur ...
Страница 40: ...39 This page intentionally left blank ...
Страница 44: ...43 Electronics Assembly TA T2Z 1000 ...
Страница 46: ...45 Mounting Assembly TA T2Z 2000 ...
Страница 48: ...47 Nip Roll Assembly TA T2Z 2000 1 ...
Страница 50: ...49 Printer Register TA T2Z 4000 ...
Страница 52: ...51 Zebra Printer Assembly TA T2Z 8010 ...
Страница 55: ...54 Zebra Printer Assembly TA T15 8000 ...


