


Adding a PCS Instrument
Reminder:
PCS2/PCS3 instruments need to be in
Computer Link
mode to connect with ArtelWare.
8
Confirm PCS instrument is mapped to the correct
driver: Under Control Panel > Driver Manager,
expand Ports. The PCS instrument should be linked to
STMicroelectronics. If it is not, right-click on the PCS
Instrument USB listing, select Update Driver, navigate
to C:\Program Files (x86)\STMicroelectronics, then
click OK and accept all screens.
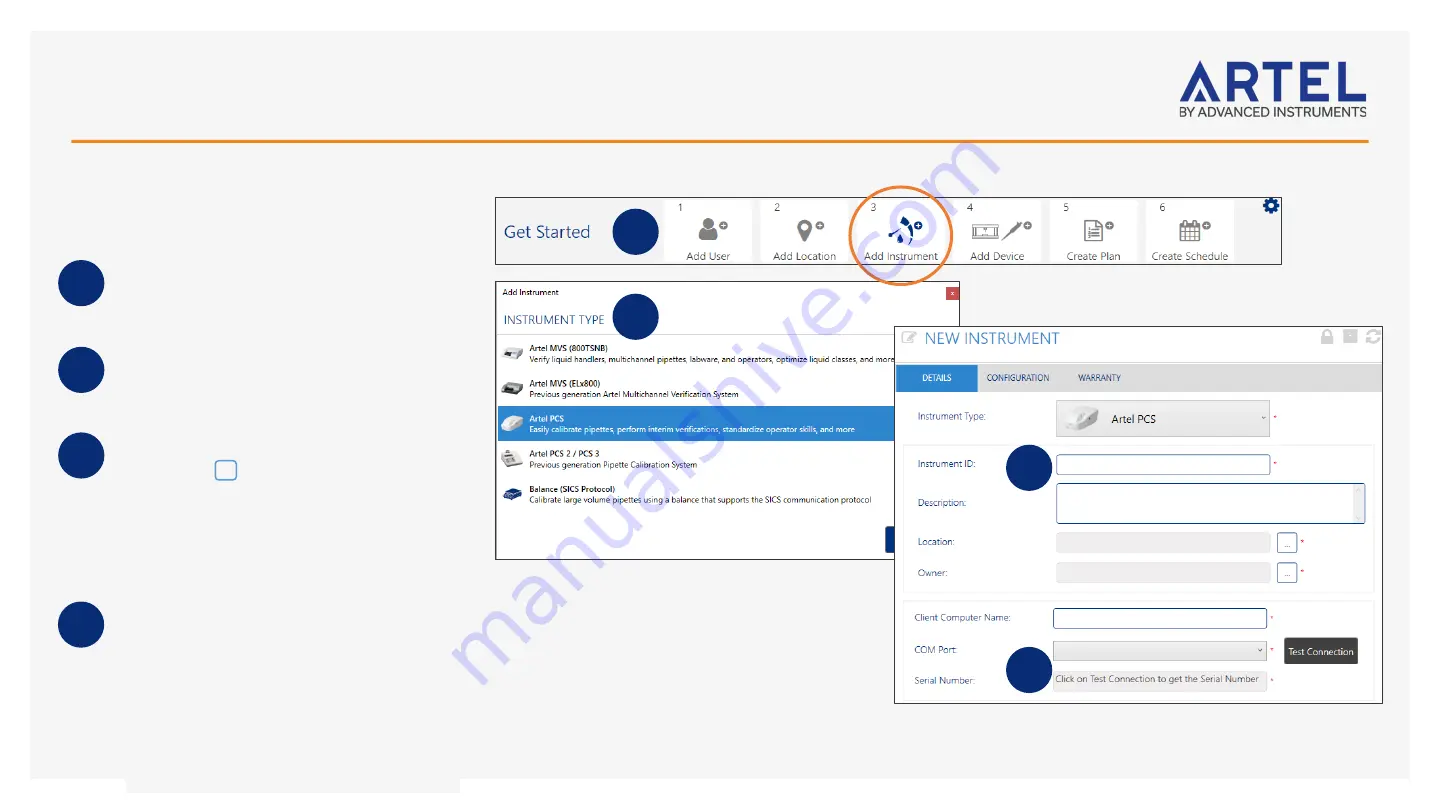
Ensure the PCS Instrument is powered on and
connected to the PC. After completing steps 1
Add
User
and 2
Add Location
from the
!
Home
screen’s Get Started bar, click step 3
Add
Instrument
.
Select the appropriate PCS type from the
Add
Instrument
screen and then click
OK
.
On the
New Instrument
screen, confirm the
Instrument Type
, provide a unique
Instrument ID
,
and then select a
Location
and an
Owner
from the
lists using the … browse buttons. ArtelWare
automatically detects and enters the
Client
Computer Name
, the name of the PC where the
Instrument is connected.
Select the
COM Port
where the PCS is connected
and click
Test Connection
. The Serial Number will
be automatically read from the PCS instrument if
communications are established. Proper driver and
adapter operation can be checked by finding the
connected port in the Windows Device Manager
under [Computer Name]\Ports (COM & LPT).
(Recommended) Return to the
!
Home
screen and
use
Create Schedule
and create an instrument
calibration schedule for every 30 days for the PCS
instrument.
1
2
3
4
4
3
2
1


