ADTRAN MX3216 Скачать руководство пользователя страница 69

Section 6, User Interface - Menu Navigation

61189008L1-1B

6-5

MENU NAVIGATION

Basic menu navigation is accomplished by selecting the desired option number and then 
pressing 

E

NTER

. To work backward through the menus press the 

E

SC

 (escape) key. To access 

the System Help screen, press the question mark (

?

) key, and press 

E

NTER

.

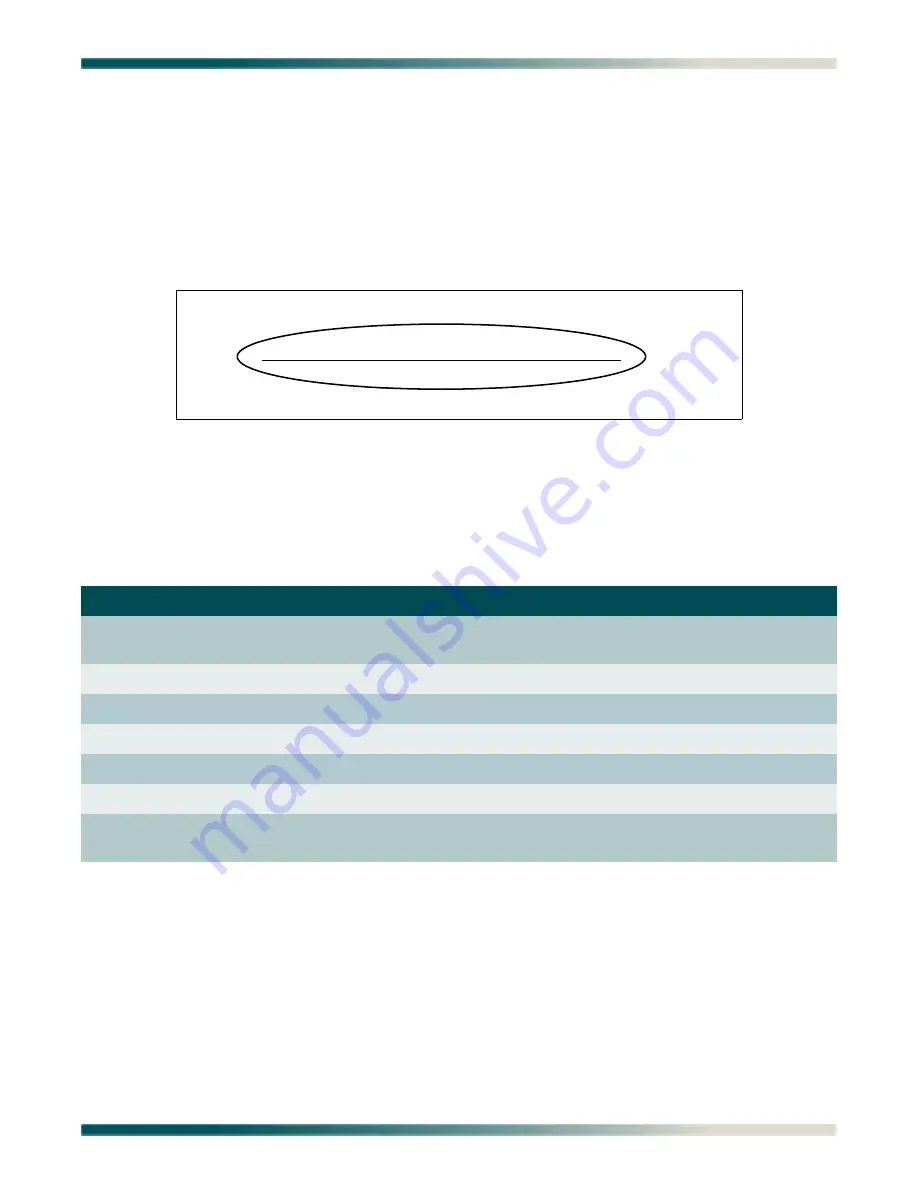
Quickly identify the location of each menu and screen in the MX3216 system by referencing 
the underlined menu title shown on every menu and screen (see 

Figure 6-2

). Each menu title 

shows the current path.

Figure 6-2.  Menu Title

Table 6-1

 displays the general keyboard commands for the MX3216 system. The System Help 

screen can be accessed from any MX3216 screen or menu by pressing “

?

.

MENU TREES

This subsection provides a detailed set of menu trees for the MX3216 system. The menu trees 
are maps that can be used to locate provisioning options with ease. Some of the menu trees 
span multiple pages, signified by the “(Continued)” at the end of the illustration title. The 
following menu trees are provided:

“MX3216 Main Menu Tree” 

on page 6-6

“MX3RMM Main Menu Tree” 

on page 6-15

Table 6-1.  MX3216 Keyboard Commands

Keyboard Command

Description

B

ACKSPACE

This keyboard command is used to delete the character to left of the 
cursor during keyboard input.

E

NTER

 (or Return) 

This keyboard command is used to terminate input.

E

SC

 (Escape)

This keyboard command is used to back up to the previous menu.

C

TRL

+A 

(Control and a) 

This keyboard command is used to acknowledge all alarms

C

TRL

+C

/

(Control and c or d) 

This keyboard command is used to log out and disconnect.

C

TRL

+R

 (Control and r) 

This keyboard command is used to refresh the display.

C

TRL

+Z

 (Control and z)

This keyboard command is used to force an exit of the terminal 
menus.

Card: Controller A          ADTRAN MX3216 System                 MM/DD/YY hh:mm
Unacknowledged Alarms: NONE                            ID:       Site 1  MX3216

            MX3216->Provisioning->DS3->A Equipment Identification

   1 - Near End Facility ID Code  : N/A

Содержание MX3216

Страница 1: ...MX3216 System Manual Part Number 61189008L1 1B February 2007 NET NET ETHERNET MX3RMM NET NET ETHERNET MX3RMM...

Страница 2: ...ts of this publication are current as of the date of publication ADTRAN reserves the right to change the contents without prior notice In no event will ADTRAN be liable for any special incidental or c...

Страница 3: ...ocumentation and is also used for emphasis This font indicates on screen messages and prompts This font indicates text to be typed exactly as shown This font indicates silk screen labels or other syst...

Страница 4: ...nd functions while covering applications of ADTRAN s product lines ADTRAN provides a variety of training options including customized training and courses taught at our facilities or at customer sites...

Страница 5: ...2 1 Dimensions of Equipment 2 2 Environmental Requirements 2 2 Power Requirements 2 3 Module Configurations 2 3 System Configurations 2 3 Power Dissipation 2 4 Module Configurations 2 4 System Configu...

Страница 6: ...2 Installation 4 2 Rackmount Installation 4 2 Wallmount Installation 4 4 Power Connections 4 4 Rear Chassis Connections 4 7 Installing Cards and Modules 4 10 Installing the Fan Module 4 10 Installing...

Страница 7: ...thernet Interface Menu 6 44 Network Service Ports Menu 6 46 SNMP Menu 6 47 Trap Host Menu 6 49 Auto Save Menu 6 50 Security Administration Menu 6 51 Users Currently Logged On Screen 6 52 Edit Accounts...

Страница 8: ...Provisioning Menu 6 105 Network Menu 6 107 Network Interface Menu 6 108 Terminal Server Menu 6 110 Terminal Server Port Provisioning Menu 6 111 Ethernet Interface Menu 6 113 Quick Setup Menu 6 115 St...

Страница 9: ...Figure 3 16 Remote Management of Other Systems Using Terminal Server Ports Application Diagram 3 15 Figure 4 1 19 inch Rack Applications 4 3 Figure 4 2 23 inch Rack Applications 4 3 Figure 4 3 Wallmo...

Страница 10: ...t Account Screen 6 56 Figure 6 38 Quick Setup Menu 6 57 Figure 6 39 Change Menu 6 59 Figure 6 40 Status Menu 6 60 Figure 6 41 Controller Equipment Screen 6 62 Figure 6 42 DS3 Status Menu 6 64 Figure 6...

Страница 11: ...gure 6 67 Network Menu 6 107 Figure 6 68 Network Interface Menu 6 108 Figure 6 69 Terminal Server Menu 6 110 Figure 6 70 Terminal Server Port Provisioning Menu 6 111 Figure 6 71 Ethernet Interface Men...

Страница 12: ...Required Equipment 3 15 Table 3 5 PORT 1 4 Terminal Connector Pin List 3 16 Table 4 1 Amphenol Connector Pin List 4 8 Table 4 2 AUX Inputs 1 8 Pin List 4 9 Table 5 1 MX3216 Default Provisioning Option...

Страница 13: ...lds 6 68 Table 6 45 DSX 1 Port Tests 6 69 Table 6 46 Environmental Alarms Screen Fields 6 70 Table 6 47 Environmental Alarm External Inputs 6 71 Table 6 48 Test Menu Options 6 72 Table 6 49 DS1 Port T...

Страница 14: ...rk Menu Options 6 107 Table 6 76 Network Interface Menu Options 6 109 Table 6 77 Terminal Server Menu Options 6 110 Table 6 78 Terminal Server Port Provisioning Menu Options 6 111 Table 6 79 Ethernet...

Страница 15: ...X3 chassis as short haul DSX 1 signals Six DS1s can be routed to the two expansion slots to allow custom system configu ration at each node of the network Use an MX3 Remote Management Module MX3RMM to...

Страница 16: ...ernet extension over a single T1 and terminal server functionality Ideal for IP based traffic over TDM backhauled network Remotely managed through SNMP or Telnet DB9 craft interface for access to user...

Страница 17: ...igure 1 2 MX3216 Controller Card LEDs Table 1 2 Active MX3216 Controller Card LED Status Label Status Description ACT 4 Green Green Amber Alternating Amber Amber Red Alternating Red Flashing Normal Al...

Страница 18: ...ing previous second DSX 1 TEST 4 4 Off Red Flashing once per event Amber Amber Flashing No DSX 1 tests in progress Single Burst pattern errors on drop in test In test locally originated In test remote...

Страница 19: ...the enabled network interface Table 1 4 shows the status descriptions for the MX3RMM Figure 1 3 MX3RMM LEDs Table 1 4 MX3RMM LED Status Label Status Description ACT 4 Green Red Amber Amber Flashing Op...

Страница 20: ...MX3216 System Manual 1 6 61189008L1 1B This page is intentionally blank...

Страница 21: ...s the following guidelines Dimensions of Equipment on page 2 2 Environmental Requirements on page 2 2 Power Requirements on page 2 3 Module Configurations on page 2 3 System Configurations on page 2 3...

Страница 22: ...ote Management Module Height 0 7 inches Width 5 2 inches Depth 7 6 inches 0 375 pounds 1189005L1 MX3 Controller Blank Plug Height 0 7 inches Width 9 4 inches Depth 7 6 inches 0 375 pounds 1189006L1 MX...

Страница 23: ...48 VDC and 24 VDC for the different MX3216 system configurations Table 2 3 Maximum Current Draw Part Number Equipment Maximum Current Draw at 48 VDC Maximum Current Draw at 24 VDC 1189004L1 MX3RMM 0...

Страница 24: ...and 24 VDC for the different MX3216 system configurations Table 2 5 Heat Dissipation Part Number Equipment Heat Dissipation at 48 VDC Heat Dissipation at 24 VDC 1189004L1 MX3RMM 3 0 watts 3 0 watts 11...

Страница 25: ...nded at both ends All coaxial cable for the MX3216 DS3 signals should meet the following minimum specification The coaxial cable should have characteristic impedance of 75 ohms Nominal mutual capacita...

Страница 26: ...onnect these interfaces metallically to OSP wiring Table 2 8 provides the amphenol connector pin assignments for the MX3216 Controller Card Table 2 8 Amphenol Connector Pin List Function Pin Tip In Ri...

Страница 27: ...2002 Section 9 this system is designed and intended only for installation in a DC C common Bonding and Grounding system It is not intended or designed for installation in a DC I isolated Bonding and G...

Страница 28: ...11 MX3 Fan Module P N 1189007L1 Code Input Output Power Code PC F Telecommunication Code TC Installation Code IC A Table 2 12 MX3216 Controller Card P N 1189008L1 Code Input Output Power Code PC F C T...

Страница 29: ...MX3216 Data Path Block Diagram on page 3 2 Drop and Continue Application on page 3 3 Drop and Insert Application on page 3 6 MX3RMM Data Path Block Diagram on page 3 9 MX3216 with Remote Management Ap...

Страница 30: ...ault mapping of the 3 1 cross connect is for all the DS1s to pass straight through from one DS3 to the other No DS1s are dropped to the DSX 1 ports or the expansion slots If needed re establish the de...

Страница 31: ...3 2 Drop and Continue Application Diagram Table 3 1 shows the equipment needed for a drop and continue application Table 3 1 Drop and Continue Application Required Equipment Part Equipment Quantity 11...

Страница 32: ...ots If needed re establish the default mapping through selecting the Restore Map to Factory Default option in the Cross Connect Menu on page 6 35 Starting from the default mapping use the Quick Setup...

Страница 33: ...ystem 17 System ID Site 1 MX3216 18 IP Address 0 0 0 0 19 Subnet Mask 255 255 255 0 20 Gateway 0 0 0 0 21 Date 01 01 2005 22 Time 12 00 00 Selection System Help Screen Card Controller A ADTRAN MX3216...

Страница 34: ...3 2 shows the equipment needed for a drop and insert application Table 3 2 Drop and Insert Application Required Equipment Part Equipment Quantity 1189001L1 MX3 Chassis 1 1189007L1 MX3 Fan Module 1 11...

Страница 35: ...efault option in the Cross Connect Menu on page 6 35 Starting from the default mapping use the Quick Setup menu to drop and insert the DS1s Select each DS1 port 1 16 to which a DS1 needs to be dropped...

Страница 36: ...X3216 18 IP Address 0 0 0 0 19 Subnet Mask 255 255 255 0 20 Gateway 0 0 0 0 21 Date 01 01 2005 22 Time 12 00 00 Selection System Help Screen Card Controller A ADTRAN MX3216 System MM DD YY hh mm Unack...

Страница 37: ...n page 3 2 This is either Module A 1 MA1 or Module B 1 MB1 depending on whether the MX3RMM is installed in Expansion Slot A bottom slot or Expansion Slot B top slot respectively In like manner the Net...

Страница 38: ...9008L1 1B The following applications are related to the MX3RMM Data Path Block Diagram MX3216 with Remote Management Application on page 3 11 Remote Management of Other Systems Using Terminal Server P...

Страница 39: ...o remotely manage other systems located on the same network Figure 3 10 illustrates this application Figure 3 10 MX3216 with Remote Management Application Diagram Table 3 3 shows the equipment needed...

Страница 40: ...this does not match the application then select the MX3RMM Quick Setup menu to change these settings 4 These setup instructions assume that the timing source for the DS1 carrying the PPP traffic is fr...

Страница 41: ...ID Site 1 MX3216 MX3216 Quick Setup DS1 Ports Module Drops None Installed 1 1 DS3 A T1 12 9 9 MX3RMM Module A 2 2 DS3 A T1 13 10 10 23 MA1 3 3 DS3 A T1 14 11 11 24 MA2 4 4 DS3 A T1 15 12 12 25 MA3 5 5...

Страница 42: ...then no changes need to be made to the timing modes for the MX3RMM DS1s Figure 3 15 Quick Setup Menu Showing Mapping of MX3RMM DS1s Card Controller A ADTRAN MX3216 System MM DD YY hh mm Unacknowledge...

Страница 43: ...rnal devices can be accessed in this way Figure 3 16 Remote Management of Other Systems Using Terminal Server Ports Application Diagram Table 3 4 shows the equipment needed for a MX3216 with remote ma...

Страница 44: ...M 3 The default setting for the terminal server ports is 9600 bps with no parity If this setting does not match the craft port setting of the other equipment then change the setting on the Terminal Se...

Страница 45: ...has occurred file a claim with the carrier and then contact ADTRAN Customer Service Refer to Appendix A Warranty for further information If possible keep the original shipping container to return the...

Страница 46: ...the side of the MX3 chassis using the two screws provided for each bracket For 19 inch rack applications adjust the bracket so that the larger side of the bracket is flush to the chassis see Figure 4...

Страница 47: ...Section 4 Installation Installing the MX3 Chassis 61189008L1 1B 4 3 Figure 4 1 19 inch Rack Applications Figure 4 2 23 inch Rack Applications A B F R O N T B A C K A B F R O N T B A C K...

Страница 48: ...s To make the power connections for the MX3 chassis perform the following steps 1 Connect the frame ground from the frame ground lug on the rear panel of the MX3 chassis to the equipment rack groundin...

Страница 49: ...ow a Determine which fuse pairs are to supply power to the chassis b Remove the fuses from the A and B slots for the pair c Connect the ends of one wire between the A CO VDC supply and the PWR A termi...

Страница 50: ...the DC power terminal block and the DC volts normally red lead on the PWR A post of the DC power terminal block For a 48 VDC supply the reading should be in the operating range of 42 VDC to 60 VDC Fo...

Страница 51: ...ed for use as intra building interfaces only The addition of Primary Protectors is not sufficient protection in order to connect these interfaces metallically to OSP wiring 1 The ETHERNET port is an 8...

Страница 52: ...agement port connection and the DS3 connections 4 The alarm connectors connect to the three contacts of a relay on the main board of the MX3216 Controller Card Connect the CRIT critical MAJOR and MINO...

Страница 53: ...ults to a severity level of major The severity level can be changed on the Environmental Alarms Menu Assign any alarm input to function as an alarm cut off ACO 6 After steps 4 and 5 are completed inst...

Страница 54: ...ications with ambient tem peratures below 50 C the MX3 Fan Module is not required The MX3 chassis with the fans installed is not intended to be deployed in Central Offices or similar network facilitie...

Страница 55: ...ght sides of the front panel of the MX3216 Controller Card 3 Gently but firmly slide the MX3216 Controller Card into the upper B or lower A controller slot taking note of the left and right guide groo...

Страница 56: ...left side of the MX3RMM front panel 3 Gently but firmly slide the MX3RMM into the upper B or lower A expansion slot taking note of the left and right guide grooves in the chassis Simultaneously apply...

Страница 57: ...r detailed information on the MX3216 menus refer to Section 6 User Interface Table 5 1 MX3216 Default Provisioning Options Provisioning Option Available Options Default Setting DS3 Interfaces Tx Frami...

Страница 58: ...0 255 Not configured Subnet Mask 0 255 0 255 0 255 0 255 Not configured Gateway 0 255 0 255 0 255 0 255 Not configured Provisioned Data Rate 10 Mbps 100 Mbps Auto Auto Cross Over Mode MDI MDI X Auto A...

Страница 59: ...minutes 45 minutes 60 minutes 5 minutes Pattern QRSS ALL ONES ALL ZEROS 2 IN 8 2 6 1 IN 8 1 7 2 15 1 INV QRSS System Alarms Aux 1 4 Input Description User defined AUX 1 4 INPUT respectively Aux 1 4 I...

Страница 60: ...al State Enabled Disabled Enabled Baud Rate 9600 19200 38400 57600 115200 9600 Parity Even Odd None None Telnet Port Number User defined 2023 Security Enabled Disabled Enabled Username User defined po...

Страница 61: ...st method consists of three views that are accessed by the T hot key The DS3 A and DS3 B views show DS3 connections see Figure 5 1 The Drops view shows DS1 port and module connections see Figure 5 2 F...

Страница 62: ...B 3 9 DS1 9 24 Module B 4 10 DS1 10 11 DS1 11 12 DS1 12 13 DS1 13 14 DS1 14 15 DS1 15 25 Restore Map to Factory Default 16 DS1 16 T oggle View DS3 A DS3 B V iew Map Selection System Help Screen Card...

Страница 63: ...r the DS1 Input examples are as follows A1 identifies the first tributary DS1 in DS3 A B28 identifies the last tributary DS1 in DS3 B P1 identifies the first DS1 port DSX 1 drop MA1 identifies the fir...

Страница 64: ...MX3216 System Manual 5 8 61189008L1 1B This page is intentionally blank...

Страница 65: ...nd provisioning is facilitated by a series of intuitive menus that are accessible on a computer screen The MX3216 provides three methods for management access Craft Interface on page 6 1 Ethernet Inte...

Страница 66: ...through a rear panel Ethernet port or a front panel Ethernet port if the optional MX3RMM is installed 1 Connect the local Ethernet port to another 10 100 Mbps Ethernet port using either a straight thr...

Страница 67: ...If using a Telnet session proceed to step 4 3 Press ENTER until the logon prompt appears NOTE The MX3216 system requires the user ID and associated password 4 Enter the default user ID ADMIN or the c...

Страница 68: ...ield displays information that cannot be changed The information displayed in a read only field can be static or can be automatically updated by the MX3216 Read write Field A read write field displays...

Страница 69: ...ons with ease Some of the menu trees span multiple pages signified by the Continued at the end of the illustration title The following menu trees are provided MX3216 Main Menu Tree on page 6 6 MX3RMM...

Страница 70: ...anual 6 6 61189008L1 1B Figure 6 3 MX3216 Main Menu Tree MX3216 Main Menu 1 Configuration 2 Provisioning 3 Quick Setup 4 Status 5 Test 6 System Alarms 9 Module B 10 Logout A B C D E F 7 Firmware Upgra...

Страница 71: ...Provisioning B 1 DS3 Interfaces 1 Tx Framing 2 Tx Clock Source 3 Loopback Detection 4 DS3 Circuit Identifier 1 C Bit 2 M23 1 C Bit 2 M23 1 Disabled 2 Enabled 1 Near End Facility ID Code 2 Near End Lo...

Страница 72: ...h feet 2 Line Coding 3 Loopback Detection 4 Circuit Identifier 1 0 133 2 133 266 3 266 399 4 399 533 5 533 655 1 AMI 2 B8ZS 1 Disabled 2 CSU 3 NIU 1 Copy FROM DS1 Port Line Length feet Line Coding Loo...

Страница 73: ...Default Provisioning 1 Auto 2 Disabled 5 38400 6 57600 7 115200 3 9600 4 19200 1 Disabled 4 10 Min 5 15 Min 2 1 Min 3 5 Min 7 45 Min 8 60 Min 6 30 Min 1 Rear Ethernet Interface 2 Network Service Port...

Страница 74: ...ation 9 System Contact 10 Read Community 11 Write Community 1 Disabled 2 Enabled 1 Status 1 Valid 2 Under Creation 3 Invalid 1 Disabled 2 Enabled 10 Security Administration 1 Users Currently Logged On...

Страница 75: ...Gateway 21 Date 22 Time 23 24 Module A 1 2 Drops 1 Choose Group 2 Choose DS1 3 Apply Cross Connect 1 DS1 Port 2 Module A 3 Module B 4 DS3 A 5 DS3 B 25 Module A Quick Setup Menu 4 Status D 1 Controlle...

Страница 76: ...LB w Pattern 8 Pattern Test 17 18 DS3 A B 19 20 DS1s in DS3 A B 21 Test Alarm Relays 22 Reset ALL Tests 1 Data Mode 2 Line Loopback 3 Digital Loopback 4 Remote Loopback 5 Remote ALL T1 1 28 DS1 1 28 i...

Страница 77: ...L1 1B 6 13 Figure 6 6 Test Menu Tree Continued K 23 Test Timeout 24 Pattern 1 Disabled 2 1 minute 3 5 minutes 4 10 minutes 5 15 minutes 6 30 minutes 7 45 minutes 8 60 minutes 1 QRSS 2 ALL ONES 3 ALL Z...

Страница 78: ...by Controller Removed Level 1 4 Aux 1 4 Input 5 6 PWR Bus A B Input 1 AUX Input Description 2 AUX Input Level 1 Disabled 2 Info 3 Alert 4 Minor 5 Major 6 Critical 7 ACO 1 PWR A B FAIL Level 1 Disabled...

Страница 79: ...Section 6 User Interface Menu Trees 61189008L1 1B 6 15 Figure 6 8 MX3RMM Main Menu Tree MX3RMM Main Menu 1 Configuration 2 Provisioning 3 Quick Setup 4 Status 5 Test A B C D...

Страница 80: ...1 Network 2 Terminal Server 1 Network Interface A 2 Network Interface B 3 Framing 4 Timeslot Assignment 1 Primary Timing Mode 2 Secondary Timing Mode 3 Interface State 1 Internal 2 Line 3 Through 1 En...

Страница 81: ...Speed Duplex Functional Link Speed Duplex 3 Cross over Mode Link Status 1 Enabled 2 Disabled 1 Auto 2 10 Mbps Half Duplex 3 10 Mbps Full Duplex 4 100 Mbps Half Duplex 5 100 Mbps Full Duplex 1 Auto 2...

Страница 82: ...Manual 6 18 61189008L1 1B Figure 6 10 Test Menu Tree 5 Test D 1 DS1 A Testing 2 DS1 B Testing 3 Loopback TImeout 1 None 2 Line 3 Payload 1 120 Minutes 2 90 Minutes 3 60 Minutes 4 30 Minutes 5 15 Minut...

Страница 83: ...e 6 23 MX3216 Main Menu The MX3216 Main menu see Figure 6 11 is the access point to all other operations Each Main menu item has several functions and submenus that identify and provide access to spec...

Страница 84: ...6 system 5 Test This option displays the Test Menu on page 6 72 The Test menu provides access points to all test features in the MX3216 system 6 System Alarms This option displays the System Alarms Me...

Страница 85: ...the part number of the MX3216 Serial Number This field displays the serial number of the MX3216 MAC Address This field displays the factory programmed Media Access Control MAC or physical layer addre...

Страница 86: ...the boot firmware revision code Table 6 4 Configuration Screen Options Option Description Function 1 Module A MX3RMM Configuration This option displays the Module A Configuration screen if a card is i...

Страница 87: ...lays the Cross Connect Menu on page 6 35 The Cross Connect menu provides provisioning options for the 3 1 cross connect 4 Equipment Protection This option displays the Equipment Protection Menu on pag...

Страница 88: ...e current network settings 9 Auto Save This option displays the Auto Save Menu on page 6 50 The Auto Save menu provides options to enable or disable the periodic storage of all provisioning settings 1...

Страница 89: ...ntification Menu on page 6 28 The Equipment Identification menu provides options to enter equipment ID codes and copy the codes from the near end to far end 4 5 DS1 Tributaries in DS3 A B This option...

Страница 90: ...ming This option is used to provision the framing Options are as follows C Bit M23 also called M13 2 Tx Clock Source This option is used to provision the timing Options are as follows Loop When this o...

Страница 91: ...s follows Disabled Enabled 4 DS3 Circuit Identifier This option is used to enter a DS3 circuit identifier The circuit ID is a user configurable text string field used to name the individual ports This...

Страница 92: ...ing This field accepts up to 38 alphanumeric characters including spaces and special characters 2 Near End Location ID Code This option is used to enter a near end location ID code When using C bit fr...

Страница 93: ...and special characters N A Far End Facility ID Code When using C bit framing this field displays the facility ID code that is received in the DS3 overhead from the device at the far end of the DS3 N A...

Страница 94: ...ID Site 1 MX3216 MX3216 Provisioning DS3 DS1s in DS3 A 1 DS1 Tributary 1 in DS3 A 15 DS1 Tributary 15 in DS3 A 2 DS1 Tributary 2 in DS3 A 16 DS1 Tributary 16 in DS3 A 3 DS1 Tributary 3 in DS3 A 17 DS...

Страница 95: ...S1 Ports Menu on page 6 34 The Copy Provisioning to Multiple DS1 Ports menu is used to copy the provisioning settings for a selected DS1 to multiple DS1s Card Controller A ADTRAN MX3216 System MM DD Y...

Страница 96: ...This option is used to set the line length line build out for each port interface according to the distance from the MX3216 system to the DTE device Options are as follows 0 133 133 266 266 399 399 53...

Страница 97: ...follows Disabled CSU NIU 4 Circuit Identifier This option is used to enter a circuit identifier The circuit ID is a user configurable text string field used to name the individual ports This field acc...

Страница 98: ...g This field displays the line coding setting that is to be copied N A Loopback Detection This field displays the loopback detection setting that is to be copied 2 First DS1 Port to Copy TO This optio...

Страница 99: ...Cross Connect menu options are shown in Table 6 13 Table 6 13 Cross Connect Menu Options Option Description Function 1 28 DS3 A T1 1 28 If currently mapped this option displays the Confirm Unmap Map s...

Страница 100: ...d to toggle through the DS3 A view DS3 B view and Drops view see Figure 6 22 V View Map This hot key is used to display the View Map Menu on page 6 39 Card Controller A ADTRAN MX3216 System MM DD YY h...

Страница 101: ...this option displays the Confirm Unmap Map screen that provides a yes no option to unmap the selected cross connect If currently unmapped this option displays the Cross Connect Change Menu on page 6...

Страница 102: ...n is used to select the group for the cross connect Options are as follows DS1 Port Module A Module B DS3 A DS3 B 2 Choose DS1 This option is used to enter the number for the DS1 that is to be connect...

Страница 103: ...e MAP selection TO DS1 prompt appears at the bottom of the menu allowing another selection to be made to complete the connection If the second selection is currently mapped to a T1 the Confirm Unmap M...

Страница 104: ...ipment Protection menu option is shown in Table 6 18 Table 6 18 Equipment Protection Menu Option Option Description Function 1 Perform Manual Switch This option is used to perform a manual switch from...

Страница 105: ...ed to reflect the change CAUTION Resetting this card disrupts traffic and causes a switch to the standby card if it is installed Figure 6 26 General Provisioning Menu The General Provisioning menu opt...

Страница 106: ...38400 57600 115200 N A Functional Baud Rate This field displays the actual craft port baud rate 2 Date This option is used to enter the date 3 Time This option is used to enter the time 4 Auto Logoff...

Страница 107: ...Interface Menu on page 6 44 2 Network Service Ports This option displays the Network Service Ports Menu on page 6 46 The Network Service Ports menu provides the option to enter the secondary port num...

Страница 108: ...Figure 6 28 Rear Ethernet Interface Menu The Rear Ethernet Interface menu options are shown in Table 6 21 Card Controller A ADTRAN MX3216 System MM DD YY hh mm Unacknowledged Alarms NONE ID Site 1 MX...

Страница 109: ...ion is used to enter the default gateway router between the internal network and the external network The Gateway address is written in the format XXX XXX XXX XXX where each 3 digit field has a value...

Страница 110: ...able 6 22 Network Service Ports Menu Options Option Description Function 1 Secondary Telnet Port This option is used to enter an additional port to which a Telnet connection can be established This po...

Страница 111: ...bled Enabled 3 6 Trap Host 1 4 This option displays the Trap Host Menu on page 6 49 7 System ID This option provides a user configurable text string for the name of the MX3216 This name helps dis ting...

Страница 112: ...il address of a person responsible for the SNMP Up to 55 alpha numeric characters can be entered in this field including spaces and special characters such as an underscore 10 Read Community This opti...

Страница 113: ...t menu options are shown in Table 6 24 Table 6 24 Trap Host Menu Options Option Description Function 1 Status This option is used to set the SNMP trap host status Options are as follows Valid Under Cr...

Страница 114: ...Auto Save Menu Options Option Description Function 1 Disabled This option is used to disable the auto save option 2 Enabled This option automatically saves current provisioning settings at one minute...

Страница 115: ...Accounts This option displays the Edit Accounts Menu on page 6 53 This menu allows for the management of all user accounts 3 Access Tech Support Account This option displays the Access Tech Support Ac...

Страница 116: ...ed on USER This field displays the account name ACCESS This field displays the access as one of the following Craft User is logged on through the front panel craft port of the MX3216 controller IP Use...

Страница 117: ...onfigured Table 6 29 Edit Accounts Menu Hot Key Hot Key Description Function N New Account This hot key is used to create a new user account Pressing the hot key displays a screen where the new user n...

Страница 118: ...count Level is established and accessed as directed by ADTRAN Technical Support during troubleshooting and analysis Table 6 30 Edit User Accounts Menu Options Account Level Account Name Account Passwo...

Страница 119: ...ons are as follows READ This level allows the user to see but not change the current system configuration TEST This level allows system testing READ WRITE This level allows the user to both see and ch...

Страница 120: ...nical Support on page A 1 for contact information Entry of a valid response key promotes this menu session to the technical support level Card Controller A ADTRAN MX3216 System MM DD YY hh mm Unacknow...

Страница 121: ...ge 6 59 This menu is used to connect the DSX 1 drops through the 3 to 1 cross connect 17 System ID This option is used to enter a 20 character system identification for the unit The System ID is a use...

Страница 122: ...n the internal network and the exter nal network The Gateway address is written in the format XXX XXX XXX XXX where each 3 digit field has a value between 000 and 255 21 Date This option is used to en...

Страница 123: ...nter 7 for option 2 then apply the cross connect Table 6 33 Change Menu Options Option Description Function 1 Choose Group This option is used to select a group of DS1s to connect the selected DS1 Opt...

Страница 124: ...d mapping information 4 DS1 Ports This option displays the DS1 Ports Screen on page 6 68 The DS1 Ports screen displays status and test information for the DSX 1 ports 5 Environmental Alarms This optio...

Страница 125: ...en displays the status information for module A Figure 6 40 shows the MX3RMM installed as module A 7 Module B If module B is installed this option displays the status screen for the card installed in...

Страница 126: ...andby This field displays the status of the standby card Table 6 37 describes the possible standby card states Alarms This field displays the condition of the alarms Table 6 38 describes the possible...

Страница 127: ...state indicates modules are not able to communicate with each other Card Failure This state indicates a card has failed and should be replaced Table 6 38 Alarm Conditions Condition Description None Th...

Страница 128: ...ays the network framing type Types are as follows C bit M23 Unknown Rx FEAC This field displays the conditions of the remote system shown in Table 6 41 Card Controller A ADTRAN MX3216 System MM DD YY...

Страница 129: ...ent back toward the source of a failed transmit circuit The X bits X1 and X2 are set to zero LOS Indicates the MX3216 system has lost the Rx signal AIS Indicates the MX3216 system is receiving an Alar...

Страница 130: ...e far end unit detects a framing loss Loss of Frame LOF from the network DS3 Idle Indicates the far end unit detects an idle sequence from the network DS3 Eqpt Fail SA Indicates the far end unit or ne...

Страница 131: ...om the network across a DS2 This alarm is a signal sent back toward the source of a failed transmit circuit The X bit is set to zero AIS Indicates the unit is receiving an AIS blue alarm condition fro...

Страница 132: ...Alarm Indication Signal LOS Loss of Signal OFF Indicates the port is not mapped through the 3 1 cross connect and the transmitter is in a high impedance mode Test This field displays the active test...

Страница 133: ...on of the AFE Additionally a loop is established towards the DS3 after the M12 block CSU Loopback This test sends CSU loop up commands towards the DSX 1 line CSU LB w Pattern This test sends CSU loop...

Страница 134: ...cribes the possi ble external inputs Alarm Status This field displays the alarm status as one of the following Active Inactive Level This field displays the alarm level as one of the following Disable...

Страница 135: ...icates open or closed relay contacts for AUX 3 AUX 4 Input This input indicates open or closed relay contacts for AUX 4 PWR BUS A B This input generates an alarm signal when one of the power feeds fai...

Страница 136: ...all the test options available on the tributary DS1s 21 Test Alarm Relays This option displays the Test Alarm Relays Menu on page 6 81 This menu allows for testing to be performed on the alarm relays...

Страница 137: ...s are as follows Disabled 1 minute 5 minutes 10 minutes 15 minutes 30 minutes 45 minutes 60 minutes 24 Pattern This option is used to select the test pattern used by the internal BERT Options are as f...

Страница 138: ...ayload is uninterrupted 2 Analog Network This test loops towards the 3 1 cross connect and includes the analog portion of the AFE 3 Digital Line Net This test loops towards the DSX 1 line and includes...

Страница 139: ...ng the internal BERT 6 NIU Loopback This test sends NIU loop up commands towards the DSX 1 line 7 NIU LB w Pattern This test sends NIU loop up commands towards the DSX 1 line and sends a test pattern...

Страница 140: ...ons are shown in Table 6 50 Table 6 50 DS3 Test Menu Options Option Description Function 1 Data Mode When this mode is selected no tests are active and the customer payload is uninterrupted 2 Line Loo...

Страница 141: ...DS3 framer 4 Remote Loopback C Bit Only This test performs a line loopback at the equipment on the other end of the selected DS3 5 Remote ALL T1 C Bit Only This test performs a tributary loopback on a...

Страница 142: ...his menu is used to select the test to be performed on a specific tributary DS1 Card Controller A ADTRAN MX3216 System MM DD YY hh mm Unacknowledged Alarms NONE ID Site 1 MX3216 MX3216 Test DS1s in DS...

Страница 143: ...s the DS3 after the M12 block but excludes the 3 1 cross connect 3 Remote Loopback This test performs a tributary loopback on the selected DS1 in the DS3 terminated at the connecting equipment 4 CSU L...

Страница 144: ...ards the DSX 1 line 7 NIU LB w Pattern This test sends NIU loop up commands towards the DSX 1 line and sends a test pattern using the internal BERT 8 Pattern Test This test sends a test pattern using...

Страница 145: ...igure 6 51 Test Alarm Relays Menu with Active Alarm Relay Test Status Card Controller A ADTRAN MX3216 System MM DD YY hh mm Unacknowledged Alarms NONE ID Site 1 MX3216 MX3216 Test Test Alarm Relays 1...

Страница 146: ...ws Inactive Active Options 2 5 are visible when this option is selected 2 Toggle Critical Relay This option is a toggle key to change between Inac tive and Active status 3 Toggle Major Relay This opti...

Страница 147: ...ptions Option Description Function 1 Master Log This option displays the Master Alarms Log Screen on page 6 85 This screen displays the alarms for all cards installed in the system 2 Controller A B Th...

Страница 148: ...s Menu on page 6 92 This menu displays environmental and card removed alarms which have user definable severity levels 6 Alarm Chronology This option is used to select the alarm chronology Options are...

Страница 149: ...g Master Alarms Alarms 1 to 14 of 155 Page 1 of 12 Date Time Pos Type Port Level Description Status 10 10 00 00 00 00 CA Controller ENV Major PWR B FAIL Active 10 10 00 00 48 28 CA Controller DS3 A T1...

Страница 150: ...ged Table 6 56 Master Alarms Log Hot Keys Hot Keys Description Function N Next This hot key is used to display the next page of alarms P Previous This hot key is used to display the previous page of a...

Страница 151: ...16 Alarm Log Controller Alarms Alarms 1 to 14 of 155 Page 1 of 12 Date Time Pos Type Port Level Description Status 10 10 00 00 00 00 CA Controller ENV Major PWR B FAIL Active 10 10 00 00 48 28 CA Cont...

Страница 152: ...ble 6 58 Controller Alarms Log Hot Keys Hot Keys Description Function N Next This hot key is used to display the next page of alarms P Previous This hot key is used to display the previous page of ala...

Страница 153: ...iated Pos This field displays the position source of the alarm Possible sources are as follows CA Controller A CB Controller B MA Module A MB Module B Type This field displays the type of the card tha...

Страница 154: ...Alert Minor Major Critical Description This field displays a brief description of the alarm Status This field displays the status of the alarm Possible states are as follows Active Clear Event An ast...

Страница 155: ...P Previous This hot key is used to display the previous page of alarms F First This hot key is used to display the first page of alarms L Last This hot key is used to display the last page of alarms...

Страница 156: ...e 6 56 User Definable Alarms Menu The User Definable Alarms menu options are shown in Table 6 61 Card Controller A ADTRAN MX3216 System MM DD YY hh mm Unacknowledged Alarms NONE ID Site 1 MX3216 MX321...

Страница 157: ...alarms including auxiliary input and power bus related alarms 2 3 Module A B Removed Level This option displays the types of alarms that can be generated if the card in slot A B is removed Options ar...

Страница 158: ...n and set the alarm severity level for the selected auxiliary input 5 6 PWR Bus A B Input This option displays the Power Menu on page 6 96 The Power menu is used to enter a description and set the ala...

Страница 159: ...on Function 1 AUX Input Description This option is used to enter a 16 character auxil iary input description 2 AUX Input Level This option is used to set the alarm severity level of the selected auxil...

Страница 160: ...Power Menu Options Option Description Function 1 PWR A FAIL Level This option is used to set the alarm severity level of the selected power bus input Options are as follows Disabled Info Alert Minor M...

Страница 161: ...is used to upgrade the controller card application software In a redundant system both cards are upgraded A Module A This option displays the Method Menu on page 6 98 This menu is used to upgrade mod...

Страница 162: ...plication software to the unit by Y Modem 2 TFTP This option displays the TFTP Menu on page 6 99 This menu is used to transfer the new application software to the unit by TFTP 3 Reset Active Controlle...

Страница 163: ...fer in progress Table 6 68 TFTP Menu Options Option Description Function 1 TFTP Server This option is used to enter the IP address of the TFTP server hosting the application software file 2 Remote Fil...

Страница 164: ...the TFTP filename that is used to upgrade the con troller TFTP Status This field displays the progress of the TFTP download Table 6 70 describes the TFTP download progress messages Controller A B sta...

Страница 165: ...mmunication with the TFTP network server has been established and the update file is being transferred between the TFTP network server and the MX3216 Completed This message indicates that the MX3216 s...

Страница 166: ...ble 6 72 MX3RMM Main Menu Options Option Description Function 1 Configuration This option displays the Configuration Screen on page 6 104 The Configuration screen displays inventory information such a...

Страница 167: ...t common provisioning options required to configure the MX3RMM 4 Status This option displays the Status Screen on page 6 117 The Status screen displays the current status of the MX3RMM 5 Test This opt...

Страница 168: ...his field displays the unit name CLEI Code This field displays the Common Language Equipment Identifier CLEI code of the MX3RMM Part Number This field displays the part number of the MX3RMM Serial Num...

Страница 169: ...ng Menu on page 6 23 or Quick Setup Menu on page 6 57 CAUTION Restoring provisioning settings or resetting this card can disrupt service Figure 6 66 Provisioning Menu The Provisioning menu options are...

Страница 170: ...Interface This option displays the Ethernet Interface Menu on page 6 113 The Ethernet Interface menu is used to provision the front panel Ethernet interface on the MX3RMM 4 Save Provisioning This opt...

Страница 171: ...interface B 3 Framing Mode This option is used to set the framing mode for both DS1 network interfaces Options are as follows ESF This option sets the DS1 network inter face framing mode to Extended S...

Страница 172: ...ross connect to the appropriate module slot and DS1 Refer to the Provisioning Menu on page 6 105 or Quick Setup Menu on page 6 115 for more details Figure 6 68 Network Interface Menu The Network Inter...

Страница 173: ...sets the primary timing mode Options are as follows Internal Line Through 2 Secondary Timing Mode This option sets the secondary timing mode that is to be used in the event of a failure of the primar...

Страница 174: ...The Terminal Server menu options are shown in Table 6 77 Table 6 77 Terminal Server Menu Options Option Description Function 1 4 Port 1 4 This option displays the Network Interface Menu on page 6 108...

Страница 175: ...rminal State This option is used to enable or disable the terminal server port Options are as follows Enabled Disabled 2 Baud Rate This option is used to select the terminal server port baud rate Opti...

Страница 176: ...s option is used to enable or disable password protection on the selected terminal server port Options are as follows Enabled Disabled 6 Username This option is used to enter a username if security is...

Страница 177: ...he rear panel Ethernet jack on the MX3 chassis To configure that interface refer to the Rear Ether net Interface Menu on page 6 44 Figure 6 71 Ethernet Interface Menu The Ethernet Interface menu optio...

Страница 178: ...s follows Auto This option allows auto negotiation of the Ethernet line speed and duplex 10 Mbps Half Duplex 10 Mbps Full Duplex 100 Mbps Half Duplex 100 Mbps Full Duplex N A Functional Link Speed Dup...

Страница 179: ...y number of DS0s can be assigned from one to twenty four but they must be in a contiguous block 3 State This option is used to enable or disable the DS1 for network interface A Options are as follows...

Страница 180: ...sable the DS1 for network interface B Options are as follows Enabled Disabled 7 Primary Timing Mode This option sets the primary timing mode for network interface B Options are as follows Internal Lin...

Страница 181: ...ollows SF ESF DS1 A B Timing Mode This field displays the current DS1 timing Possible timing modes are as follows Internal Line Through Line Status This field displays the current DS1 line status Tabl...

Страница 182: ...llows Up Down Test Bridging This field displays the state of the BCP link across the PPP The bridging status depends on the PPP status being up Possible states are as follows Up Down Test Ethernet Lin...

Страница 183: ...DS1 is in loss of frame RX AIS This state indicates the DS1 is receiving AIS TX AIS This state indicates the DS1 is transmitting AIS RX RAI This state indicates the DS1 is receiving RAI TX RAI This s...

Страница 184: ...ns for the DS1 interfaces Figure 6 74 Test Menu The Test menu options are shown in Table 6 84 Card Module A ADTRAN MX3216 System MM DD YY hh mm Unacknowledged Alarms NONE ID Site 1 MX3216 DS1 X Testin...

Страница 185: ...scription Function 1 DS1 A Testing This option selects the loopback for the DS1 A interface Options are as follows None Line Payload 2 DS1 B Testing This option selects the loopback for the DS1 B inte...

Страница 186: ...MX3216 System Manual 6 122 61189008L1 1B This page is intentionally blank...

Страница 187: ...CTION The MX3216 does not require routine maintenance for normal operation Do not attempt to make repairs in the field Repair services can be obtained by returning the defective unit to ADTRAN For war...

Страница 188: ...MX3216 System Manual 7 2 61189008L1 1B This page is intentionally blank...

Страница 189: ...s support Customer and Product Service CAPS requests or further information ADTRAN Sales Pricing Availability 800 827 0807 ADTRAN Technical Support Pre Sales Applications Post Sales Technical Assistan...

Страница 190: ...Carrier Networks Division 901 Explorer Blvd Huntsville AL 35806...

Отзывы: