


70
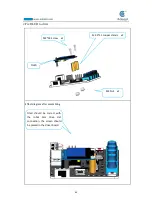
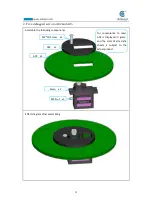
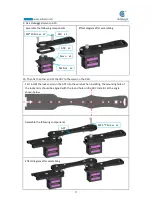
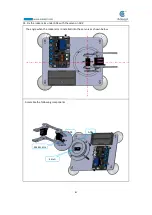
Connect five servos to the Adeept Arm Drive Board.
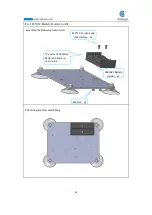
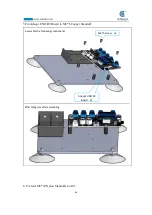
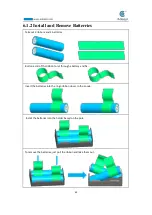
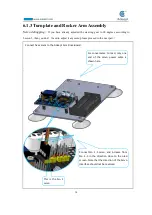
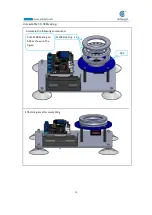
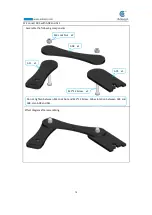
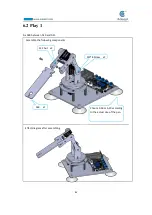
6.1.3 Turnplate and Rocker Arm Assembly
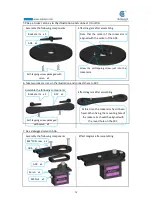
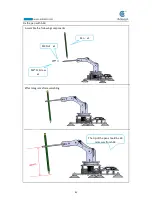
Servo debugging
(
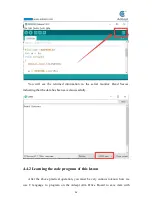
If you have already adjusted the steering gear to 90 degrees according to
Lesson 5, then you don
’
t need to adjust it anymore, please proceed to the next part
)
`
Connect No. 1-5 servo, and increase from
No. 1-5 in the direction close to the oled
screen. Note that the direction of the Servo
interface should not be reversed
For convenience to read, only one
end of the servo power cable is
shown here.
This is the No. 1
servo
Содержание Robotic Arm
Страница 1: ...1...
Страница 33: ...30 9 Running effect is as follow...
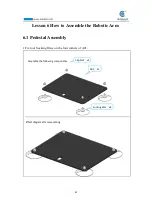
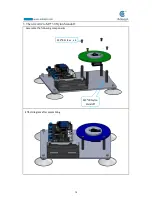
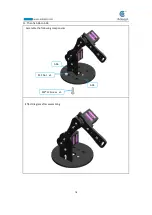
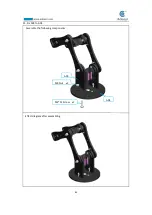
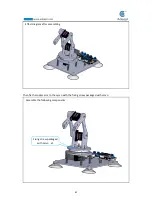
Страница 70: ...67 Effect diagram after assembling Assemble the following components M3 8 Screw x4 M3 30 Nylon Standoff x4...
Страница 74: ...71 SERVO of number 5 4 2 1 3...
Страница 86: ...83 Effect diagram after assembling...
Страница 95: ...92 40mm 60mm 66 5mm 65mm 13mm 70mm...
Страница 99: ...96...
Страница 111: ...108...
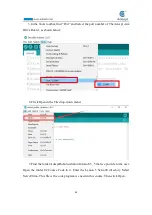
Страница 117: ...114 6 Click More apps then click OK 7 Slide the mouse down click Look for annother app on this PC and then click OK...
Страница 137: ...134...
Страница 154: ...151 7 the library file controlP5 needs to be added...
Страница 156: ...153 9 Click Run 10 Running effect is as follow...
Страница 164: ...161...
Страница 181: ...178...
Страница 182: ...179...


