


128
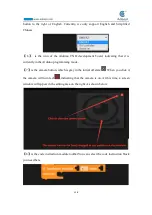
button to the right of English. Currently, we only support English and Simplified
Chinese.
【
6
】
is the icon of the Arduino UNO development board, indicating that it is
currently in the Arduino programming mode.
【
7
】
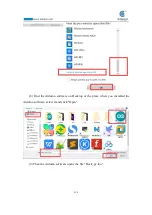
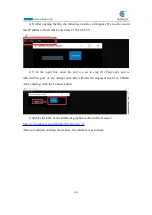
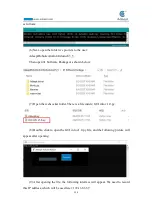
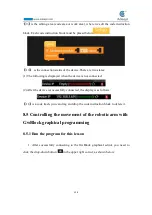
is the camera button, which is gray in the initial off state:
When you click it,
the camera will turn red:
,indicating that the camera is on. At this time, a screen
window will appear in the editing area on the right. As shown below:
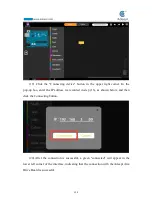
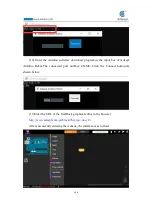
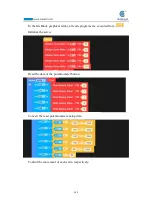
【
8
】
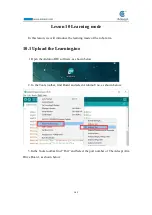
is the code instruction module toolbar.You can select the code instruction block
you need here.
Содержание Robotic Arm
Страница 1: ...1...
Страница 33: ...30 9 Running effect is as follow...
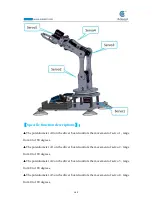
Страница 70: ...67 Effect diagram after assembling Assemble the following components M3 8 Screw x4 M3 30 Nylon Standoff x4...
Страница 74: ...71 SERVO of number 5 4 2 1 3...
Страница 86: ...83 Effect diagram after assembling...
Страница 95: ...92 40mm 60mm 66 5mm 65mm 13mm 70mm...
Страница 99: ...96...
Страница 111: ...108...
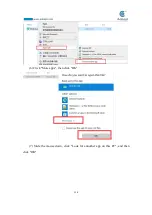
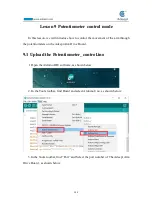
Страница 117: ...114 6 Click More apps then click OK 7 Slide the mouse down click Look for annother app on this PC and then click OK...
Страница 137: ...134...
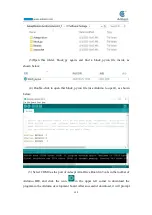
Страница 154: ...151 7 the library file controlP5 needs to be added...
Страница 156: ...153 9 Click Run 10 Running effect is as follow...
Страница 164: ...161...
Страница 181: ...178...
Страница 182: ...179...