9
DoorLIFT DL
-
6
Remote door system
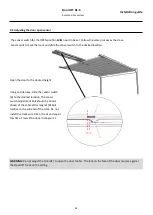
4.2 Fastening the rail to the roof
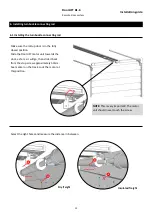
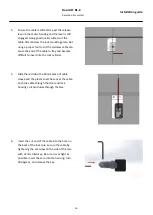
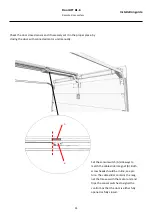
Use the groves in the track to DRILL the
required holes. The number of holes depends
on the roof structure. Minimum
requirements: front, back and middle of the
track. In case of dry freight applications,
always connect to every roof bow.
Insulated ceilings require furring strips or
some type of mounting brackets to secure the
track to the ceiling liner and roof. These
measures should of been accounted for in the
Pre Install Inquiry. DO NOT SECURE TRACK TO
THE CEILING LINER ONLY WITH NO SUPPORT.
Never glue the track to the ceiling
TIP
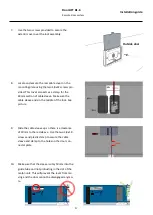
: Moving the motor unit back and forth in the track in this step and the next
makes lifting the track assembly easier. Move the lever, shown at the right, to
the manual position. The motor unit can now be moved by hand. Moving the
lever towards the battery icon will put the motor unit back in automatic mode.
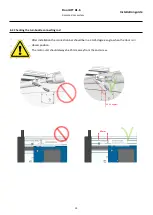
Use large diameter head screws or rivets
where the screw heads or rivet heads do not
protrude more than
1.8mm
from their seated
position. The motor unit will hit the
protruding screw or rivet heads during its
travel if the heads protrude more than
1.8mm
into its path of motion.
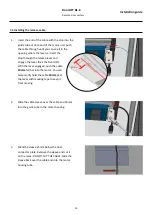
Secure the track to the roof. The number of
rivets is to be decided by the installer, as
every body is different. The aluminium profile
weighs approximately 14Kg and the motor
unit 7Kg.
* Important: Please drill and
install the fasteners using the
V
-
shaped guides on the track.
This will have motor clearance
implications if not followed.
Installation guide
Содержание DoorLIFT DL-6
Страница 2: ...2 ...
Страница 29: ...29 DoorLIFT DL 6 Remote door system Installation guide ...
Страница 31: ...31 DoorLIFT DL 6 Remote door system Installation guide ...


