


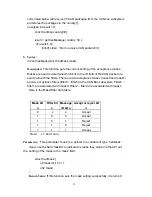


be 0 ~ 5. Filter0 and filter1 are associated with mask0. Filter2 ~ filter5 are
associated with mask1.
By setting up ‘filterType’, users indicate the type of the filter. Filter type could
be ‘STD_ID’ or ‘EXT_ID’.
Depending on the filter type, the ‘filter’ field in the CanFilter variable could be
0x0 ~ 0x7FF (11 bits) when filter type is ‘STD_ID’. If the filter type is ‘EXT_ID’,
the ‘filter’ field in the CanFilter variable could be 0x0 ~ 0x1FFFFFFF (29 bits).
.
For example:
struct CanFilter varFilter;
i32 result;
varFilter.filterId = 3;
varFilter.filterType = STD_ID;
varFilter.filter = 0x555;
result = setCanFilter(&varFilter);
if( result != 0)
printf(“Fail to set up the filter!\n”);
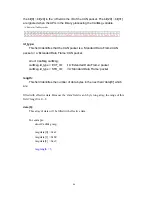
Return Value:
If this function sets the filter successfully, it returns 0, any
other returned value stands for error.
10.
Syntax:
Full Mode Enable
Description:
Enable the Function can receive 11bit and 29bit data.
Parameters:
The Function suggestion Use Test mode and debug.
11.
Syntax:
Full Mode Disable
Description:
The Function is setting default.
Parameters:
The Function suggestion Use Test mode and debug.
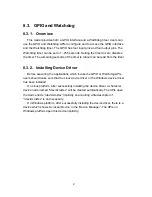
8.6.2 GPIO and Watchdog
8.6.2.1.
GPIO
1.
Syntax:
i32 getChLevel(u8 *val )
96
Содержание AIV-HM76V0FL Series
Страница 1: ...AIV HM76V0FL User Manual 1 ...
Страница 7: ...1 4 System Dissection 1 4 1 Dimensions 7 ...
Страница 8: ...1 4 2 I O Panel FRONT IO PRINT Rear I O PRINT 8 ...
Страница 11: ...2 1 2 Open the bracket Assemble HDD into bracket by fastening 4 screws 11 ...
Страница 12: ...12 ...
Страница 13: ...2 1 3 Assemble the HDD bracket back to system Finish SCREW 13 ...
Страница 14: ...2 2 CF Card Installation 2 2 1 Unfasten the 2 screws and pull the CF bracket from I O panel 14 ...
Страница 15: ...2 2 2 Assemble the CF card with CF bracket The direction for installing the CF card 15 ...
Страница 16: ...Finish 16 ...
Страница 17: ...2 3 SIM Card Installation 2 3 1 Unfasten the 3 screws from Rear I O panel 17 ...
Страница 18: ...2 3 2 Insert SIM card Step1 Step2 18 ...
Страница 19: ...Finish 19 ...
Страница 20: ...2 4 Antenna Installation Tack out antenna from packing bag and install 20 ...
Страница 21: ...Board Guide 21 ...
Страница 26: ...Bottom SIDE 27 26 ...
Страница 46: ...5 2 5 W83627DHG HW Monitor 46 ...
Страница 52: ...display 52 ...
Страница 58: ...58 ...
Страница 64: ...7 1 1 Driver Page This is the Driver Installation Page 64 ...
Страница 65: ...Click the icon all the drivers will be selected 65 ...
Страница 66: ...Click the icon all selected items will be cleared 66 ...
Страница 67: ...Click the icon to install the selected drivers Windows XP 32bit Driver Installation 67 ...
Страница 68: ...Please click Yes to restart the system 68 ...
Страница 69: ...Click this icon to browse this CD content 69 ...
Страница 72: ...This is the test utility 72 ...
Страница 75: ...75 ...
Страница 76: ...7 1 3 Documents Page Double click on one of the items to open the manual 76 ...
Страница 78: ... The program will appear on the screen Please click the Select All icon 78 ...
Страница 79: ...Click the Install icon to install the drivers 79 ...
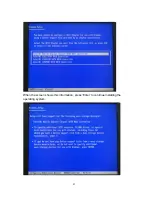
Страница 83: ...When the screen shows this information press Enter to continue installing the operating system 83 ...