


Description:
This function sends out CAN packages over the CAN bus.
Parameters:
If there is more than one CAN packet to send, these CAN
packages are stored in an
array of type ‘CanMsg’. This function sends out packets in a sequential fashion.
The memory address of the first CAN packet to be sent is pointed at by the
parameter ‘buffer’. The number of CAN packets to be sent is indicated by the
parameter ‘count’.
Return Value:
If this function sends the CAN packet successfully, it returns 0, any
other returned value stands for error.
Here is an example:
If the CAN packets in the array ‘canAry[]’ have been initialized. The code listed
below will send out the CAN packets in the ‘canAry[]’ over the CAN bus.
unsigned int result = 0;
struct CanMsg canAry[30];
/* …
Initialize the CAN packages in the canAry[30]
*/
result = sendCanMessages( canAry, 30 );
if( result != 0)
fprintf( stderr, “Send CAN package error!\n”);
5.
Syntax:
i32 getCanMessage( struct CanMsg *buffer, u8 count )
Description:
This function receives CAN packets from the CAN bus subsystem.
Parameters:
This function stores received CAN packages sequentially at an
array of type ‘CanMsg’. The number of packages to receive is indicated by the
parameter ‘count’.
Return Value
:
If this function receives the CAN packet successfully, it returns 0,
any other returned value stands for error.
Here is an example:
If the array ‘canAry[]’ of type ‘CanMsg’ has been declared and allocated. The
92
Содержание AIV-HM76V0FL Series
Страница 1: ...AIV HM76V0FL User Manual 1 ...
Страница 7: ...1 4 System Dissection 1 4 1 Dimensions 7 ...
Страница 8: ...1 4 2 I O Panel FRONT IO PRINT Rear I O PRINT 8 ...
Страница 11: ...2 1 2 Open the bracket Assemble HDD into bracket by fastening 4 screws 11 ...
Страница 12: ...12 ...
Страница 13: ...2 1 3 Assemble the HDD bracket back to system Finish SCREW 13 ...
Страница 14: ...2 2 CF Card Installation 2 2 1 Unfasten the 2 screws and pull the CF bracket from I O panel 14 ...
Страница 15: ...2 2 2 Assemble the CF card with CF bracket The direction for installing the CF card 15 ...
Страница 16: ...Finish 16 ...
Страница 17: ...2 3 SIM Card Installation 2 3 1 Unfasten the 3 screws from Rear I O panel 17 ...
Страница 18: ...2 3 2 Insert SIM card Step1 Step2 18 ...
Страница 19: ...Finish 19 ...
Страница 20: ...2 4 Antenna Installation Tack out antenna from packing bag and install 20 ...
Страница 21: ...Board Guide 21 ...
Страница 26: ...Bottom SIDE 27 26 ...
Страница 46: ...5 2 5 W83627DHG HW Monitor 46 ...
Страница 52: ...display 52 ...
Страница 58: ...58 ...
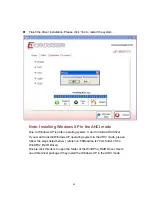
Страница 64: ...7 1 1 Driver Page This is the Driver Installation Page 64 ...
Страница 65: ...Click the icon all the drivers will be selected 65 ...
Страница 66: ...Click the icon all selected items will be cleared 66 ...
Страница 67: ...Click the icon to install the selected drivers Windows XP 32bit Driver Installation 67 ...
Страница 68: ...Please click Yes to restart the system 68 ...
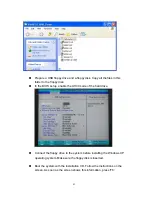
Страница 69: ...Click this icon to browse this CD content 69 ...
Страница 72: ...This is the test utility 72 ...
Страница 75: ...75 ...
Страница 76: ...7 1 3 Documents Page Double click on one of the items to open the manual 76 ...
Страница 78: ... The program will appear on the screen Please click the Select All icon 78 ...
Страница 79: ...Click the Install icon to install the drivers 79 ...
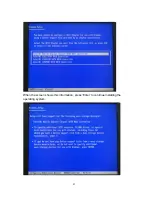
Страница 83: ...When the screen shows this information press Enter to continue installing the operating system 83 ...