


IRIS 3000® DIGITAL VIDEO PHONE USER MANUAL
24
Time Zone Settings
(GMT –10:00)
Hawaii
(GMT –06:00)
Central Time
(GMT –09:00)
Alaska
(GMT –05:00)
Eastern Time
(GMT –08:00)
Pacific Time
Note: Additional Time Zone Settings outside of the U.S. are available.
(GMT –07:00)
Mountain Time
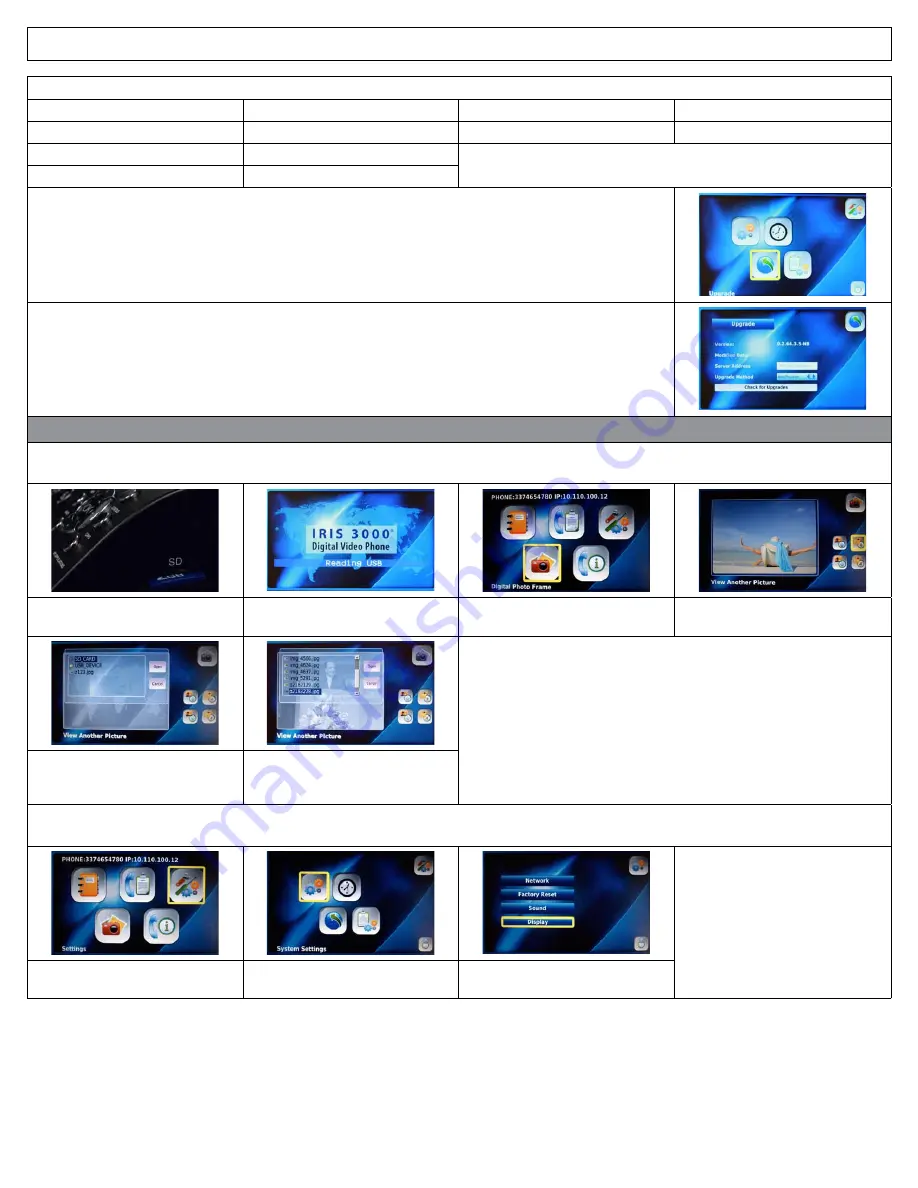
4-6-3. Upgrade
The Upgrade section shows the details of your digital video phone’s software. If the present version of
software is not the most current, you can upgrade the present software through the Internet.
PLEASE DO NOT ATTEMPT TO ADJUST ITEMS IN THE UPGRADE MENU. PLEASE CONTACT IRIS
3000® DIGITAL PHONE SERVICE CUSTOMER SUPPORT FOR ASSISTANCE – 1-866-619-6444
4-6-4. Administrator
The Administrator Menu provides access to more complex settings, such as SIP, A/V Codec setting,
DNS, Proxy and LAN settings.
PLEASE DO NOT ATTEMPT TO ADJUST ITEMS IN THE UPGRADE MENU. PLEASE CONTACT IRIS
3000® DIGITAL PHONE SERVICE CUSTOMER SUPPORT FOR ASSISTANCE – 1-866-619-6444
4.7 Digital Photo Frame
Your digital video phone provides you with the functionality of displaying digital photos taken on other devices such as cameras, camera
phones, etc.
Insert the USB device or SD card into
your digital video phone
The screen will then show Reading
SD or Reading USB
Select “
Digital Photo Frame
” from
the Main Menu and Press
OK
Select “
View Another Picture
”
and Press
OK
Digital Photo Frame will automatically display all images on the SD or
USB device. If you do not wish for a specific image to appear, you must
remove it from the device before inserting it into your digital video
phone.
Select the file type where your
pictures are stored and Press
OK
Select the image and Press
OK
. Your
images should begin to appear after
the appropriate delay time frame
To initialize Digital Photo Frame, you must turn Digital Photo Frame “On” and set the desired delay between photos in the Digital Photo
Frame Delay menu.
Select “
Settings
” in the Main Menu
and Press
OK
Select “
System Settings
” in the
Settings Menu and Press
OK
Select “
Display
” in
the System Settings Menu


