


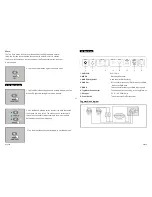


7C
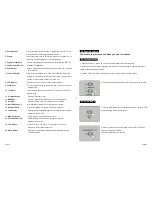
2. Scene Buttons
Press the scene buttons to load or stored your scenes. There
are a maximum of 240 programmable scenes.
3. Faders
These faders are used to control the intensity of channel 1-8 or
channel 9-16 depending upon the selected page.
4. Page Select Button
Used to select page between Page A(1-8) and Page B(9-16).
5. Fog Machine Button
Activates Fog Machine .
6. Speed Slider
Used to adjust the chase speed within the range of 0.1 second
to 10 minutes.
7. Fade Time Slider
Used to adjust the fade time. Fade time is the amount of time
it takes for a scanner(or scanner) to move from one position to
another, for the dimmer to fade in or fade out.
8. LCD Display
Shows the current activity or programming state.
9. Pan Wheel
This jog wheel is used to control the pan of the scanner or for
programming.
10. Tilt Wheel
This jog wheel is used to control the Tilt of the scanner or for
programming.
11. Program Button
Activates Program mode.
12. MIDI/Rec
Used to control MIDI operation or to record programs.
13. Auto/Del
Activates Auto mode or to delete scenes or chases.
14. Music/Bank Copy
Activates Music mode or to copy a bank of scenes
15. Bank Up/Down
Press the Up/Down button to select from 30 banks.
16. Tap/Display
Used to create a standard beat or to change the value mode
between % and 0-255.
17. Blackout Button
Tap to momentarily pause whole output.
18. Chase Buttons(1-6)
These buttons are used for activating the chase of
programmed scenes.
19. Fine Button
When Fine is on, the Pan or Tilt wheel will control the
scanner in the smallest increment.
20. Mode Button
Pressing Fine and Mode buttons allows to activate Assign
or Reverse mode.
Page 5
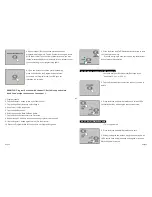
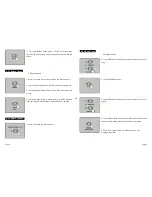
4-6 Running Chases
You must program scenes before you can run chases.
4-6.1 Manual Mode
1. When the power is turned on, this unit enters Manual mode automatically.
2. Select your desired chase by tapping one of the six Chase buttons. A second tap of this
button will deactivate this function.
3. Use the Fade Time slider to adjust the current scenes to your desired effects.
4. Use the Bank Up/Down button to run the chase step by step.
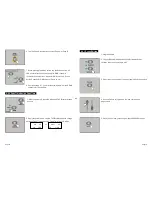
4-6.2 Auto Mode
1. Tap the Auto/Del button to activate Auto mode.The Auto LED
lights indicating Auto mode is active.
2. Select your desired chase by tapping one of the six Chase
buttons. A second tap of this
button will deactivate this function.
Page 26