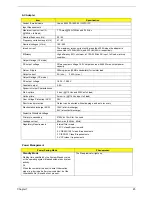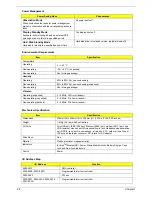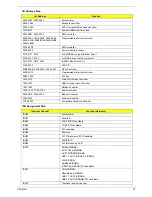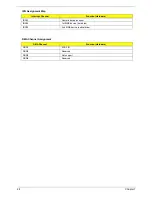
Chapter 2
35
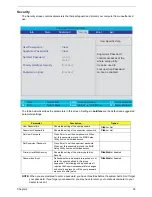
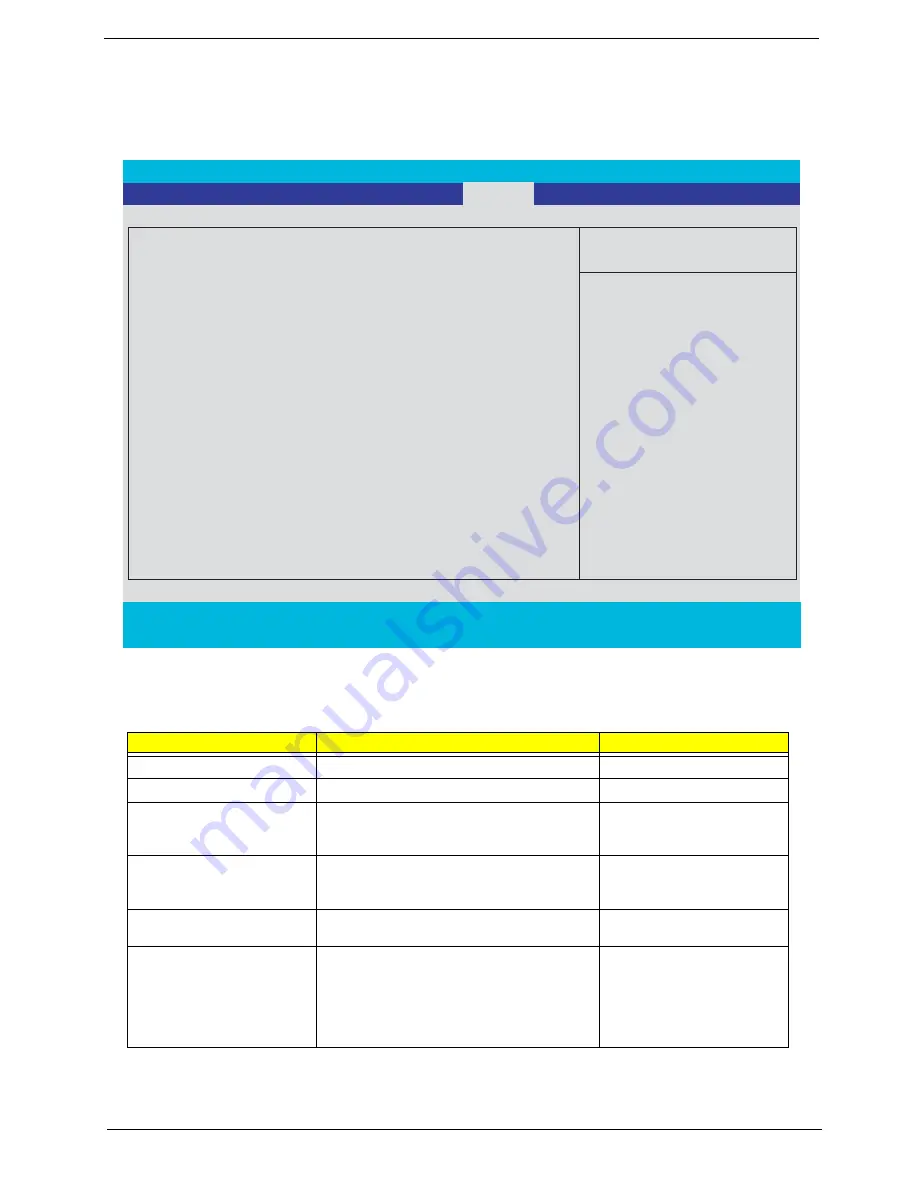
Security
The Security screen contains parameters that help safeguard and protect your computer from unauthorized
use.
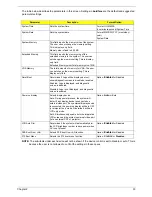
The table below describes the parameters in this screen. Settings in
boldface
are the default and suggested
parameter settings.
NOTE:
When you are prompted to enter a password, you have three tries before the system halts. Don’t forget
your password. If you forget your password, you may have to return your notebook computer to your
dealer to reset it.
Parameter
Description
Option
User Password is
Shows the setting of the user password.
Clear
or Set
Supervisor Password is
Shows the setting of the supervisor password.
Clear
or Set
Set User Password
Press Enter to set the user password. When
set, this password protects the BIOS Setup
Utility from unauthorized access.
Set Supervisor Password
Press Enter to set the supervisor password.
When set, this password protects the BIOS
Setup Utility from unauthorized access.
Primary HardDisk Security
Shows the setting of the primary hard disk
Security.
Disabled
or Enabled
Password on Boot
Defines whether a password is required or not
while the events defined in this group
happened. The following sub-options are all
requires the Supervisor password for changes
and should be grayed out if the user password
was used to enter setup.
Disabled
or Enabled
PhoenixBIOS Setup Utility
Info.
Main Advanced
Boot
Item Specific Help
User Password is :
Clear
Supervisor Password is :
Clear
Set User Password
[Disabled]
Primary HardDisk Security
Supervisor Password
controls accesses of the
whole setup utility.
It can be used to
boot up when Password
on boot is enabled.
F1
Help
↑ ↓
Select Item
F5/F6
Change Values
F9
Setup Defaults
Esc
Exit
←
→
Select Menu
Enter
Select
4
Sub -Menu
F10
Save and Exit
[Enter]
Set Supervisor Password
[Enter]
Password on Boot
[Disabled]
Exit
Security
Содержание TravelMate 380 series
Страница 6: ...VI ...
Страница 50: ...44 Chapter 3 ...
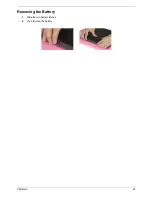
Страница 51: ...Chapter 3 45 Removing the Battery 1 Slide the two battery latches 2 Then remove the battery ...
Страница 85: ...Chapter 4 79 8 You will see the screen displaying PASS when the system has buit NAPP Master hard disc drive ...
Страница 86: ...80 Chapter 4 ...
Страница 88: ...82 Chapter 5 12 RTC Battery Connector 25 RJ45 Ethernet Connector 13 HDD Connector 26 RJ11 Modem Connector ...
Страница 91: ...84 Chapter 6 Exploded Diagram The Unit ...
Страница 100: ...Chapter 6 93 ...
Страница 107: ...100 Appendix C ...

