54
Chapter 3
Disassembling the LCD Module
1.
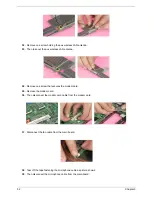
Remove the eight LCD rubber caps as the picture shows.
2.
Then remove the eight screws holding the LCD bezel.
3.
Remove the three screws on one side.
4.
Remove another three screws on the other side.
5.
Then detach the LCD bezel carefully.
.
6.
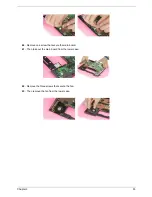
Remove one screw holding the LCD bracket on one side.
7.
Remove another screw holding the LCD bracket on the other side.
8.
Then remove the entire LCD from the LCD panel.
9.
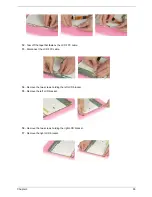
Disconnect the LCD FPC cable from the inverter board.
10.
Disconnect the high voltage cable from the inverter board.
11.
Then take out the inverter board.
Содержание TravelMate 380 series
Страница 6: ...VI ...
Страница 50: ...44 Chapter 3 ...
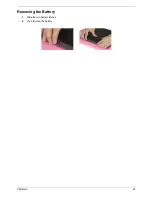
Страница 51: ...Chapter 3 45 Removing the Battery 1 Slide the two battery latches 2 Then remove the battery ...
Страница 85: ...Chapter 4 79 8 You will see the screen displaying PASS when the system has buit NAPP Master hard disc drive ...
Страница 86: ...80 Chapter 4 ...
Страница 88: ...82 Chapter 5 12 RTC Battery Connector 25 RJ45 Ethernet Connector 13 HDD Connector 26 RJ11 Modem Connector ...
Страница 91: ...84 Chapter 6 Exploded Diagram The Unit ...
Страница 100: ...Chapter 6 93 ...
Страница 107: ...100 Appendix C ...

