


SuperWorkstation 5039D-I User's Manual
Chapter 3: Maintenance and Component Installation
20
21
Screw#2
Screw#1
Figure 3-4. Inspecting the Processor Installation
Motherboard
5. With the processor inserted into the socket, inspect the four corners of the CPU to make
sure that it is properly installed and flush with the socket.
Mounting Holes
CPU properly
installed
Load lever locked into
place
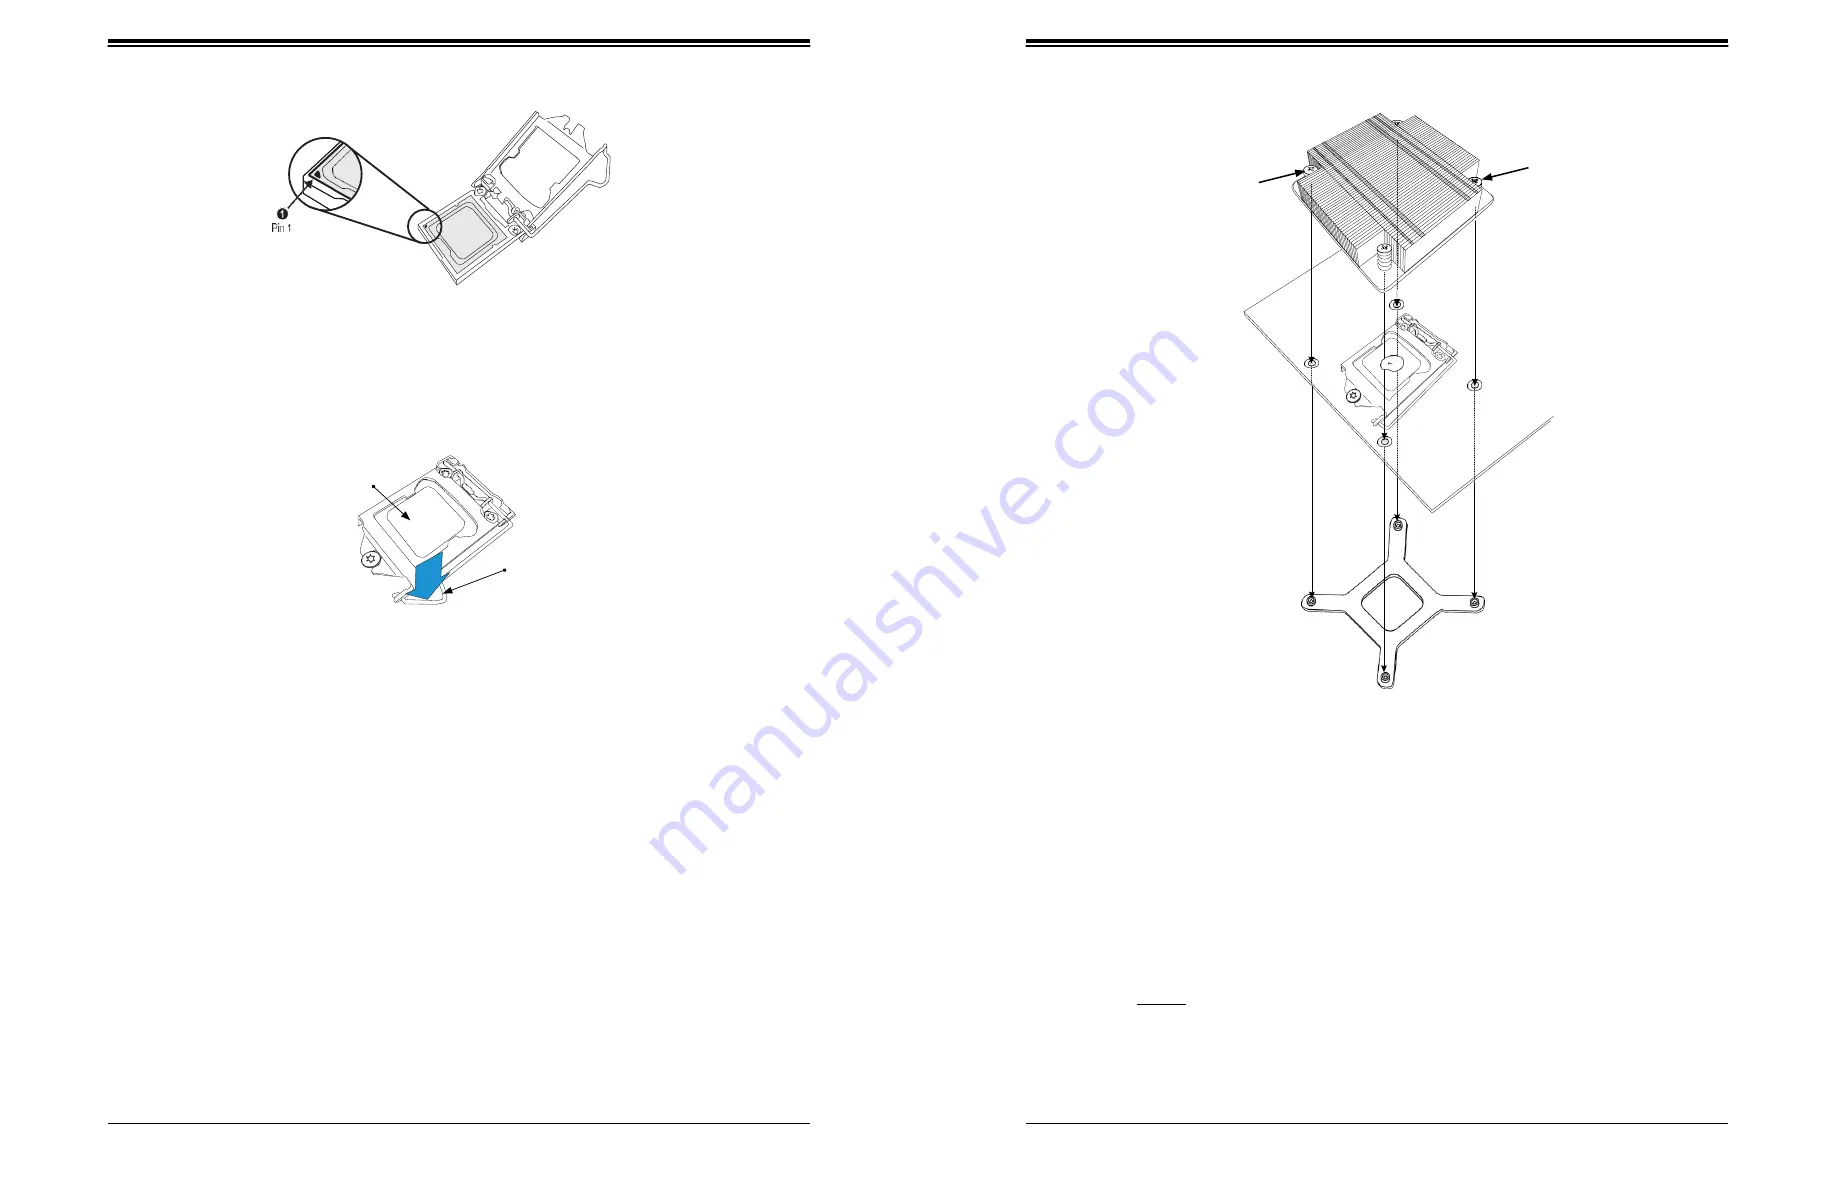
Figure 3-5. Installing/Removing the Heatsink
6. Carefully press the processor load lever down until it locks into its retention tab.
Installing a Heatsink (Example)
1. Place the heat sink on top of the CPU so that the four mounting holes are aligned with
those on the heatsink retention mechanism.
2. Screw in two diagonal screws (i.e. the #1 and the #2 screws) until they are just snug.
Do not fully tighten the screws or you may damage the CPU.
3. Add the two remaining screws then finish the installation by fully tightening all four
screws (be careful not to overtighten).
Heatsink Bracket
Figure 3-6. Installing the Heatsink
Note:
The figure above is for illustrative purposes only. A different heatsink may be used in
the 5039D-I
Removing a Heat sink
We do not recommend removing the heatsink. If necessary, please follow the instructions
below to prevent damage to the CPU or the CPU socket.
1. Unscrew and remove the heatsink screws from the motherboard in the sequence as
show in the figure above.
2. Hold and gently pivot the heatsink back and forth to loosen it from the CPU. (Do not use
excessive force when dislodging the heatsink.).
3. Once the heatsink is loose, remove it from the CPU.


