Appendix B: Acer Altos G710 rack installation guide
150
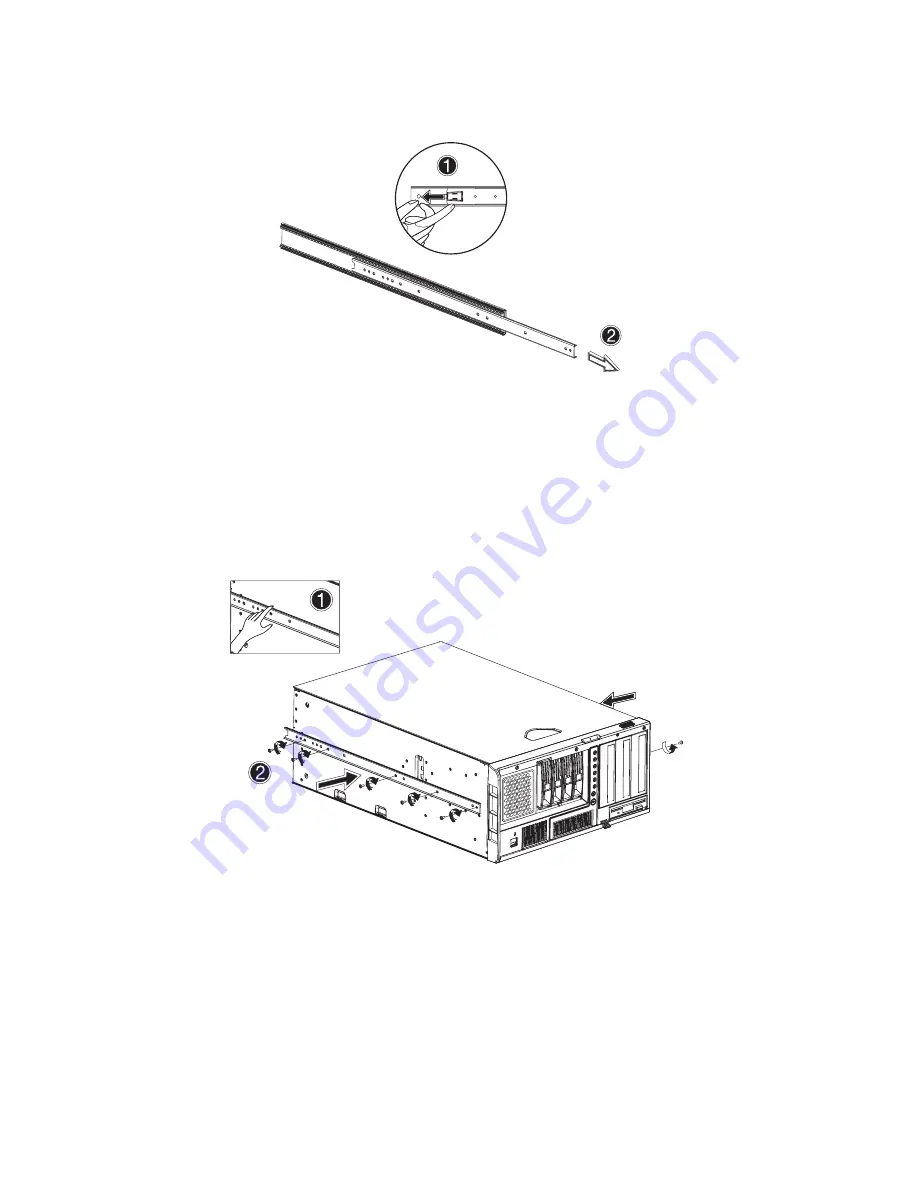
(2) Depress the release latch and slip the inner rail out.
(3) Do the same thing to the other mounting rail.
4
Attach the inner rails to the server by following the steps below:
(1) Align the inner rails to the top and bottom sides of the server.
(2) Secure the rails to the server using the ten #8-32 screws (see
page 147) from the rack mount kit.
Make sure the release latches are at the front of the system.
5
Attach the side handles to the server by following the steps below:
(1) Align the two side handles to the top and bottom sides of the
server.
Содержание Altos G710
Страница 1: ...Acer Altos G710 User s Guide ...
Страница 10: ...x Setting 183 Index 187 ...
Страница 11: ...1 System tour ...
Страница 35: ...2 System setup ...
Страница 46: ...2 System setup 36 ...
Страница 47: ...3 System upgrade ...
Страница 69: ...59 2 Pull out the CPU from the socket 2 ...
Страница 89: ...4 BIOS setup ...
Страница 130: ...4 BIOS setup 120 ...
Страница 131: ...5 Troubleshooting ...
Страница 142: ...5 Troubleshooting 132 ...
Страница 143: ...Appendix A System management ...
Страница 151: ...Appendix B Acer Altos G710 rack installation guide ...
Страница 152: ...This appendix shows you how to set up the Altos G710 server in a rack mount configuration ...
Страница 167: ...Appendix C SCSI RAID configuration ...
Страница 168: ...This appendix shows you how to create a RAID volume in your SCSI drives ...
Страница 173: ...Appendix D ePanel ...
Страница 196: ...Appendix D ePanel 186 ...


