background image

Doc. # 7430-0710-01 Rev. C 

Page 

63


ēKo Pro Series User’s Manual 


1. 

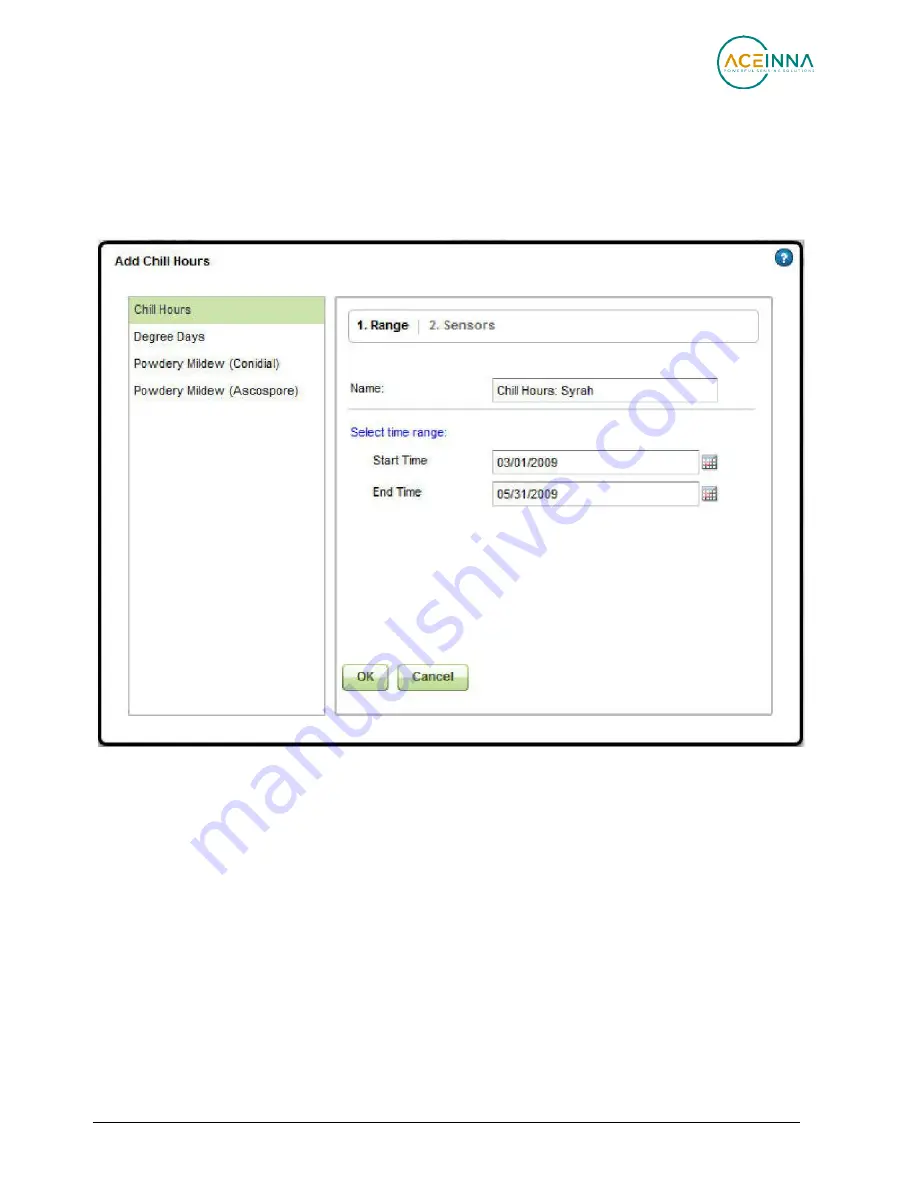
Range Section


Type

 – Select the calculation type from the left hand side.


Name

 –Type in a user defined name for the calculation.


Time Range

 – Specify a 

Start Time

 for the calculation. Typically start time is before  

dormancy. Also, specify the End Time which is usually when dormancy ends.


2. 

Sensors Section


Nodes 

and

 Sensors

 – clicking on 

Select

 button next to “Sensor” or “Measurements” will 

bring up a Measurement and Sensor chooser dialog window. Select the sensor 
measurement that you want to use for the calculations. The same calculation name and 
conditions can be applied to several sensors in the network.


Содержание eko Pro Series

Страница 1: ...Ko Pro Series User s Manual Rev C May 2009PN 7430 0710 01 ACEINNA INC NEXT GENERATION WIRELESS FOR PRECISION AGRICULTURE by...

Страница 2: ...rights reserved Information in this document is subject to change without notice Crossbow IRIS Ko TrueMesh and XMesh are registered trademarks of ACEINNA Inc Other product and trade names are trademar...

Страница 3: ...ing up KoView 13 4 Ko Node Commissioning 16 4 1 Pre commissioning 16 4 2 Commissioning 16 4 3 Post commissioning 17 4 4 Factory Reset Mode 19 5 Deploying the Ko system 20 5 1 Deploying the Ko base rad...

Страница 4: ...Humidity Sensor 95 8 3 eS1110 soil water content sensor 97 8 4 eS1301 leaf wetness sensor 99 8 5 eS1401 solar radiation sensor 100 9 Appendix C Managing Agricultural Calculations 102 9 1 Chill Hours...

Страница 5: ...s symbol It means there is a chance that physical harm could happen to either the person or the equipment The following paragraph heading formatting is used in this manual 1 Heading 1 1 1 Heading 2 1...

Страница 6: ...Ko Pro Series User s Manual...

Страница 7: ...nsors Sensors are simply plugged into the unit there is no additional work required such as connecting wires to terminal blocks or changing jumper configurations This operation can be done within a fe...

Страница 8: ...10 soil water content sensor eS1201 ambient temperature and humidity sensor eS1301 leaf wetness sensor eS1401 solar radiation sensor 2 2 4 GHz IRIS family radio processor module Uses ACEINNA s low pow...

Страница 9: ...ly radio processor module to manage the network of Ko nodes The base radio relays all network radio messages from the network to the Ko gateway 2 eB2100 Ko gateway Controls the base radio station Runs...

Страница 10: ...ualize network topology and sensor data relative to a background map Charts wizard to create trend charts of multiple sensors across customized time spans Network diagnostic tools to performance of ne...

Страница 11: ...odes Ko nodes without sensors can be placed anywhere to act as repeaters if required Each node monitors the radio traffic in its neighborhood and keeps track of possible alternate radio paths If one p...

Страница 12: ...system disk The Ko gateway runs the Debian Linux operating system It comes preloaded with ACEINNA s Sensor Network management and data visualization software packages KoView and XServe Those programs...

Страница 13: ...communication with Ko nodes The eB2110 Ko base radio provide a direct sequence spread spectrum radio DSSS supporting a wireless sensor network operating in the 2 4 GHz global ISM band The USB interfa...

Страница 14: ...is provides plug and play network scalability for wireless sensor network The eN2100 Ko node consists of the following Four sensor ports connectors supporting any combination of eS1101 or eS1201 senso...

Страница 15: ...sor Up to four eS1101s can be connected to one Ko node to measure soil moisture at different soil depths The Watermark provides accurate readings from 0 to 200 centi bars This covers the entire soil m...

Страница 16: ...ray The housing includes a cable strain relief Figure 2 6 eS2101 ambient temperature and humidity sensor To ensure accurate readings when measuring outdoor air temperature and humidity the eS1201 shou...

Страница 17: ...Ko gateway also contains an USB FLASH disk included in the package Insert this device into the bottom USB port of the Ko gateway labeled Disk 1 IMPORTANT Make sure that the side with the electrical c...

Страница 18: ...o the remaining USB slot on the Ko gateway labeled Disk 2 Figure 3 3 Ko base radio connections The Ko base radio receives radio messages from the deployed Ko nodes It is can easily be mounted indoors...

Страница 19: ...e end of the boot up period Ko gateway will emit an audible beeping sequence which can be decoded to find the IP address Refer to section 7 1 4 Wait for the Disk 1 LED to turn green this will take 1 t...

Страница 20: ...need the KoView URL address 1 Open a web browser eg Internet Explorer or Firefox 2 The following URLs will bring up the KoView welcome page http eko xxxxx where xxxxx is the serial number written on...

Страница 21: ...ters do not support the means to use the hostname In those cases users will need to use the IP address of the Ko gateway device The IP address of the Ko gateway can be found either using the GatewayFi...

Страница 22: ...tries to communicate with the Ko base radio Following should be the LED pattern with no sensors attached during commissioning process LED Sequence 1st Flash 2nd Flash 3rd Flash 4th Flash Repeated Fla...

Страница 23: ...io links Following should be the LED pattern with no sensors attached once a node is accepted and commissioned LED Sequence 1st Flash 2nd Flash 3rd Flash 4th Flash Repeated Flashes Solid On LED On Per...

Страница 24: ...ected button at the bottom right side of the page In the Advanced Commissioning dialog window you can now select and highlight the node that you wish to recover and click on Accept button 13 KoView al...

Страница 25: ...te LED will come on indicating that the node is ready for factory reset Release the OFF button the unit will be factory reset Following is the LED pattern during the factory reset operation LED Sequen...

Страница 26: ...a must be used Standard outdoor Wi Fi antennas such as a Hawking s HAO9AI that can be bought at local outlets or online work well When using these antennas be sure to use the manufacturer s recommende...

Страница 27: ...Rev C 3 High gain Outdoor Antenna Mount an outdoor omni directional antenna above the roof line Use an RF extender cable to connect to the Ko base The Ko base radio and Ko gateway can be located near...

Страница 28: ...connected via a lightening arrestor to a solid earth ground for protection against lightening Failure to do so may result in a serious safety hazard Using an External Omni directional Antenna These an...

Страница 29: ...d the Ko base radio 5 1 2 UPS For high reliability consider a UPS battery backup to keep the gateway powered during power outages The Ko gateway is a low power device that only consumes about 4 watts...

Страница 30: ...preferable Trees foliage and canopies that are higher than the antennas will reduce radio range The Figure 5 3 shows a correct installation and one that will experience RF degradation due to canopy co...

Страница 31: ...uld see green LED flash for that port It will then enter a network search mode and signal nearby Ko nodes and or the Ko base radio to find out how many good radio paths are available This takes about...

Страница 32: ...the network is established by placing the first Ko nodes close to the base radio and then working outwards EXAMPLE 1 Place the first Ko node in the network at a position that is within good range of t...

Страница 33: ...ons of radio ranges due to altitude changes and foliage Figure 5 6 is a picture of a deployment done in a vineyard in Napa California Radio range between Ko nodes mounted about 8 ft above ground in th...

Страница 34: ...yment will usually require repeater nodes due to RF attenuation of the dense foliage The Figure 5 7 shows the single hop radio range in a walnut orchard which is about 200 feet For this deployment the...

Страница 35: ...e section 6 5 2 before proceeding to the next section on attaching the sensors 5 3 Deploying Ko Sensors Presently Ko Pro series system supports five external sensors and one internal set of sensors eS...

Страница 36: ...d On LED On Period 2 sec 2 sec 2 sec 2 sec 1 sec 20 sec LED Color 2 connections 1 connection No connections Operation Scan Port 1 Scan Port 2 Scan Port 3 Scan Port 4 Scanning the network Results of ne...

Страница 37: ...d side Map Panel To position a node onto the Map click and drag the node from the un positioned box to its location on the Map Once you have positioned all the nodes on the map press the Save button o...

Страница 38: ...e node will be labeled as Node xxx where xxx is its network address same as ID of the node An eS1101 Ko sensor name will be defaulted to eS1101 Soil Moisture Port x where x is the port number of the K...

Страница 39: ...er s Manual Select and highlight the node you wish to reconfigure and click on the Details button at the bottom of the page It will bring up the Node Details dialog window Edit the name and descriptio...

Страница 40: ...http eko xxxxx where xxxxx is the serial number written on a sticker attached to the bottom side of the device NOTE If you re using a home network router or can t login with using the name on the stic...

Страница 41: ...packet readings and statistics received for each node in the network NOTE To view the tool tip information move and place your mouse cursor over a specific tab or button and a brief description will...

Страница 42: ...he un positioned box to its location on the Map Refer to the previous section 5 4 2 for more details on this NOTE You will need admin privileges to upload map or move the position of the nodes If you...

Страница 43: ...for each node To view the network data overlay click on Network button at the top right of the map page Initially users will see node parent and route information visually Each link represents a paren...

Страница 44: ...e than two neighbors with Green link quality Orange Node has only one node with Green link quality Red Link has no nodes with Green link quality The Network Overlay also allows you to see the nodes ne...

Страница 45: ...ensor data overlay users will see the most recent sensor data from each node To view the sensor data click on Sensor button on the top right of the map view place your mouse over the node and wait a s...

Страница 46: ...ion choose a sensor from the drop down box The digital sensor value will appear next to each of the nodes that have selected sensor attached to them Also shown in the brackets is the port number assoc...

Страница 47: ...inimum sensor limits are displayed at the top and bottom of the bar respectively and the current sensor reading is shown relative to these by a grey line and a digital display Similarly the alert thre...

Страница 48: ...earch string and filters out the results Clearing Alerts Once you have seen an alert and taken action on it you may clear it from the Alert page This will also reset the color of the node from Red to...

Страница 49: ...any sensor network applications it is important to view data trends over time KoView allows users to visualize data trends through advanced charting tools Users can create new charts modify existing c...

Страница 50: ...sensor data is sent from Ko nodes their types will be displayed in this menu selection Users can view available sensors by clicking on the button next to the sensor type to expand the selection You ma...

Страница 51: ...ify the selection of the sensors associated with different nodes If an Ko node contains several sensors that have the same measurement type users may only wish to chart one of the sensors using the Ex...

Страница 52: ...her ends of the slider bar and slide the mouse Each chart is displayed as a named tab in the Charting window Users can switch between charts by clicking on the named tab for the chart to be displayed...

Страница 53: ...he end time and will select the start based on the relative date range When a custom date range is reloaded the given start and end date will always be used 6 3 3 Exporting data From the chart tab use...

Страница 54: ...the individual data points attempting to interpolate the trend being displayed Point plots display each data value as a point with not connections The High Low plots display each data value as a bar r...

Страница 55: ...oaded later When the user clicks on the Save Chart button a Save Chart dialog is displayed to the user To save a chart the user must select a unique name for the chart This name will be used later to...

Страница 56: ...r can load a given chart at a later date When clicked on the Load Chart button a Load Chart dialog is displayed to the user The list of saved charts is displayed in the drop down chooser After selecti...

Страница 57: ...hart confirmation dialog click on Yes Once a chart is deleted it is no longer available in the load chart wizard The Delete Chart option is used to delete saved charts Charts which were created with t...

Страница 58: ...in the Configure existing nodes list Node Details KoView allows users to rename both the node and the sensor Select and highlight the node you wish to rename and click on the Details button at the bo...

Страница 59: ...r value from any sensor node An alert is a user programmable event that gets triggered when sensor data goes outside pre defined threshold The Configure Alerts page can be accessed from Configure Aler...

Страница 60: ...rt Section Name Allows to type in a user defined name for the alert The Measurement name clicking on Select button next to The measurement will bring up a Measurement and Sensor chooser dialog window...

Страница 61: ...an alert should be triggered From Alert Condition drop down list specify an appropriate condition to trigger the Alert viz or Alert Threshold the value to compare the alert condition against For Thres...

Страница 62: ...Section specify the maximum number of alerts that can be reported within a time range no matter how many times the alert has occurred From the Remind me every drop down list specify the interval You m...

Страница 63: ...n Section specify the operation to perform in response to a triggered alert From the Send alert to user drop down list select the user name you would assign this alert to The user name list will be au...

Страница 64: ...27 13 43 31 Sensor Node 203 Measurement Battery Volts Battery Volts reading 3 84 is than alert threshold 4 00 Edit an existing alert To edit an existing alert select and highlight the alert you wish...

Страница 65: ...e dialog window provides SMTP presets for Gmail as an exmple If you are using one of the other mail service provides eg Comcast SBC AT T etc you should consult the service provider for these SMTP sett...

Страница 66: ...you choose to send alerts by e mail specify the e mail address for the recipient 5 Mobile No if you choose to send alerts by Mobile Text message select the cellular provider and specify the number 10...

Страница 67: ...e and the Edit User Dialog window will appear You can edit the parameters that you want to change When done click on the OK button Delete an existing user To delete an existing user highlight the user...

Страница 68: ...nage Calculations link in the Configure tab eKoView presently supports the following calculations Chill Hours Degree Days Heat Powdery Mildew Conidial Powdery Mildew Ascospore After calculations are c...

Страница 69: ...lculation Typically start time is before dormancy Also specify the End Time which is usually when dormancy ends 2 Sensors Section Nodes and Sensors clicking on Select button next to Sensor or Measurem...

Страница 70: ...64 Doc 7430 0710 01 Rev C Threshold lets you set the max and min threshold values for the calculation The calculations only accumulate for temperatures between the Max Threshold and Min Threshold Thr...

Страница 71: ...ow appear in the Manage Calculations list These calculations will now show up as a sensor measurement with each of the associated nodes They can also be displayed or plotted as any sensor measurements...

Страница 72: ...k on Delete button In the Delete User confirmation dialog click on Yes This calculation will now be removed from the calculations list and will no longer be available in KoView 6 4 5 Manage Units Page...

Страница 73: ...of hops It also gives neighbor information about a particular node Server Health This page displays the gateway server s uptime and throughput Live Data This page provides a tabular searchable view of...

Страница 74: ...date of its state In addition to these health statistics the page also displays neighbor and route information in the lower neighbor table To display the neighbor and route information for a particula...

Страница 75: ...50 means that the node receives 95 of the messages from the neighbor and the neighbor receives 50 of the nodes messages ACEINNA s mesh networking software using automatic message retries if a neighbo...

Страница 76: ...ame and reading The data is continually updated as new data arrives from the mesh To search for a particular set of data users can type a search string into the top left search text box As users type...

Страница 77: ...ries User s Manual Page 71 Doc 7430 0710 01 Rev C A user wants to display all Temperature values from throughout the network In the search box type Temperature and only the Temperature sensors will be...

Страница 78: ...of the Ko gateway device The GatewayFinder tool can help scan and find the IP address 1 The hostname is determined by the prefix eko xxxxx where xxxxx is the 5 digit serial number that can be found o...

Страница 79: ...to your hostname 8 Clicking on the xserve link for this IP address will open up a Gateway Dashboard window shown below It offers the following gateway shortcut utilities eKoView launches the KoView l...

Страница 80: ...e IP 192 168 1 77 7 2 Remote Ko gateway Administration The remote gateway administration requires the Linux user name and password There are two main predefined logins User Name Password Notes user Re...

Страница 81: ...all into system requires root access ls list the content of the current directory lsusb list all attached USB devices passwd change login password ps aux list all active processes rm file delete a fil...

Страница 82: ...ing up the following screen Type in user as the user name and use the password shown above in section 7 1 1 Then select OK Then select Finish 4 Once your PC has connected the file directory on Ko gate...

Страница 83: ...P address Alternatively it defaults to the static IP address 192 168 1 77 if a DHCP address can not be obtained after 60s If a different static IP address is desired it will need to be reconfigured us...

Страница 84: ...f you are unsure about the settings specific to your network 7 Click on Set IP button 8 Restart the Ko gateway by pressing the Restart button at the bottom of the Administration page it will boot with...

Страница 85: ...ewing the Ko Gateway status The Gateway Administration page has a View Status feature at the top Clicking on Status button will show a status page as shown below IMPORTANT Ensure that the disk usage d...

Страница 86: ...cker at the bottom of the Ko Gateway The Ko Gateway Administration allows user to change this default name Type the new host name in the text box and click on Rename Restart the Ko gateway by pressing...

Страница 87: ...ne from the scroll list and click on Set TZ The time zone change will be effective immediately 7 3 5 Changing the Ko Gateway administration password To set the password for the gateway administration...

Страница 88: ...y selecting on Enabled radio button and clicking on the Change button 7 3 7 Upgrading the KoView Software ACEINNA may periodically provide an upgrade file to enable new functionality fix bugs etc You...

Страница 89: ...10 01 Rev C Select the upgrade file that you have downloaded to your PC using the Browse button Enter the associated security code in the field below The format is always xxxxx xxxxx Press the Upgrade...

Страница 90: ...ick on Upgrade button to continue The upgrade process will take few minutes Wait for the UPGRADE COMPLETE message and then click on Done 7 3 8 Managing database The Gateway Administration page provide...

Страница 91: ...n initial delay when using any of the functions above as the Gateway has to temporarily halt normal data collection to ensure database integrity Normal operation will resume after the functions comple...

Страница 92: ...d delete it from the Ko Gateway to ensure continued proper system operation If the disk becomes 100 full the system will not be able to log further data and may become unstable To restore database to...

Страница 93: ...se click on Delete button and a confirmation dialog will appear WARNING The Delete operation will erase all the information associated with the nodes from the gateway server Once you exercise this opt...

Страница 94: ...on Change Although this can be accomplished from the Manage Users page of KoView refer to section 6 4 3 this page can be used to reset the admin password should you forget it completely NOTE This wil...

Страница 95: ...Finder tool section 7 1 on a machine that is on the same subnet as the Ko gateway or consult your system administrator Often commercial networks link DHCP and DNS which will allow connecting to the Ko...

Страница 96: ...emote internet access to KoView will be available through the following URL http Router IP address 9080 EXAMPLE If you are using Linksys home router follow these steps Log into the router s webpage Op...

Страница 97: ...een For the above example remote access to KoView will be available through the following URL http 71 131 195 240 9080 The following website provides step by step procedure on how to set up port forwa...

Страница 98: ...mpliant hubs should work The hub does not need to be self powered Figure 7 2 Smart UPS connection diagram WARNING Do not plug the hub into USB slot labeled Disk 1 of the Ko Gateway This port is reserv...

Страница 99: ...ors are buried For very coarse or gravelly soils an oversized hole 1 1 1 4 may be needed to prevent abrasion damage to the soil moisture sensor membrane In this case auger a hole to the desired depth...

Страница 100: ...r it does include internally installed gypsum which provides some buffering for the effects of salinity levels normally found in irrigated agricultural crops and landscapes Because they are unaffected...

Страница 101: ...our system can react in order t o a v o i d m o i s t u r e s t r e s s S e e F i g u r e 8 2 Figure 8 2 Graph showing when to irrigate 8 1 6 Determining How Much To Irrigate Record keeping and experi...

Страница 102: ...nsor of eS1201 is rated to operate from 40 to 60C If you subject the sensor to outside this range the readings will be invalid 8 2 2 Sensor characteristics The eS1201 uses is a single chip integrated...

Страница 103: ...hows the sensor accuracy chart Figure 8 3 Relative Humidity Temperature and Dew point accuracies For the theory of operation and installation tips for the other sensors refer to the sensor vendor s ma...

Страница 104: ...s you will want to seal the connections from the elements to maintain a good connection and to prevent corrosion Insert the probes into the soil making sure that the prongs are buried completely up to...

Страница 105: ...olts The sensor leads can be extended up to 250 feet without signal attenuation When using extension cables in an unprotected environment the junctions between cables must be waterproofed This can be...

Страница 106: ...face To make this determination a sensor output threshold corresponding to the minimum wet state must be identified Figure 8 6 Sample raw output from the leaf wetness sensor 8 5 eS1401 solar radiation...

Страница 107: ...olar radiation sensor 8 5 1 Installing the Sensor Spring loaded mounting screws in conjunction with the level indicator enable rapid and accurate leveling of the sensor The Solar Radiation sensor is d...

Страница 108: ...buds remain dormant until they have accumulated sufficient chill hours of cold weather When enough chilling accumulates the buds are ready to grow in response to warm temperatures As long as there ha...

Страница 109: ...ned for some organisms through carefully controlled laboratory and field experiments For example the lower developmental threshold is 51 F and the upper developmental threshold is 90 F for the San Jos...

Страница 110: ...21 30 C was not met or if at any time during the day the temperature rose to 35 C for at least 15 min An index of 60 100 indicates the pathogen is reproducing every 5 days while an index of 0 30 indic...

Страница 111: ...ntinuous leaf wetness are required when average temperatures are between 10 15 deg C Refer to the website http www apsnet org online feature pmildew for further details Configuring the Powdery Mildew...

Страница 112: ...Manufacturer Model Manufacturer s web site Outdoor Antennas and RF cables Outdoor omni antenna Hawking HAO9SIP http www hawkingtech com Outdoor 20 RF extender cable L com CA4NMRSF020 http www l com co...

Страница 113: ...factory training available Preventative maintenance and repair programs Installation assistance available 11 2 Contact Directory United States Email info aceinna com Non U S refer to website www acein...

Страница 114: ...n the original shipping container s making sure there is adequate packing around all sides of the equipment If the original shipping containers were discarded use heavy boxes with adequate padding and...

Страница 115: ...th the instructions may cause harmful interference to radio communications Operation of this equipment in a residential area may cause harmful interference in which the users will be required to corre...

Страница 116: ...Doc 7430 0710 01 Rev C Page 110 Email info aceinna com Website www aceinna com...

Отзывы: