


Chapter 1
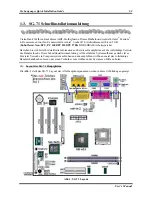
SG-71
1-8
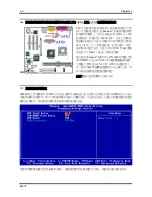
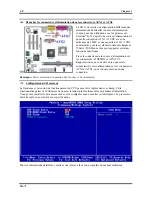
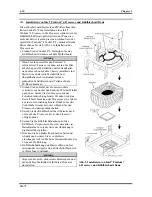
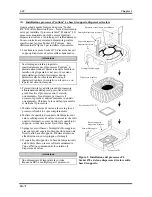
(6). Brancher les connecteurs d'alimentation dans les connecteurs ATX1 et ATX2
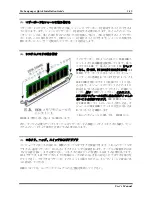
La SG-71 nécessite une alimentation différente des
alimentations habituelles (Source d’alimentation
conçue pour une utilisation avec les processeurs
Pentium
®
4). Il s’agit d’une source d’alimentation de
nouvelle conception ATX1 +12VDC avec une
puissance de 300W, et une capacité de 20A +5VDC
au minimum pour les systèmes fortement chargés et
720mA +5VSB au moins pour supporter certaines
fonctions spécifiques.
Fixez le connecteur de la source d’alimentation sur
les connecteurs ATXPWR1 et ATX12V1.
Rappelez-vous que vous devez bien pousser le
connecteur de votre alimentation sur les connecteurs
ATX2 et ATX1, pour vous assurer une bonne
connexion.
Remarque:
Faites attention à la position des broches et à l'orientation.
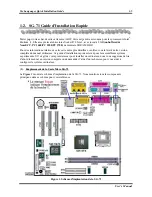
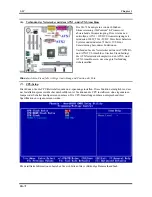
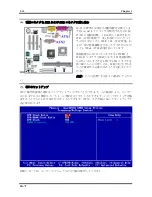
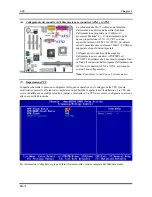
(7). Configuration du Processeur
La fréquence et la tension de fonctionnement du CPU peuvent être réglées dans ce champ. Cette
fonctionnalité permet à l’utilisateur de pouvoir terminer plus facilement les procédures d’installation.
Vous pouvez installer le processeur sans avoir à configurer aucun cavalier ou interrupteur. Le processeur
doit être réglé en accord avec ses spécifications.
Pour les informations détaillées, veuillez vous référer à la version complète du manuel utilisateur.
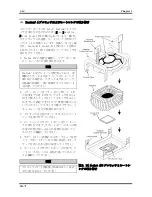
Содержание SG-71
Страница 2: ......
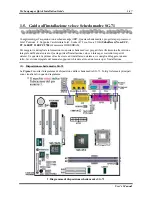
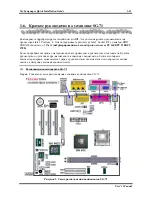
Страница 32: ...Chapter 2 SG 71 2 4 2 4 Layout Diagram for SG 71 Figure 2 1 SG 71 motherboard component location ...
Страница 50: ...Chapter 3 SG 71 3 18 ...
Страница 84: ...Appendix A SG 71 A 4 ...
Страница 88: ...Appendix B SG 71 B 4 ...
Страница 92: ...Appendix C SG 71 C 4 ...
Страница 110: ...Appendix H SG 71 H 6 ...
Страница 114: ...Appendix I SG 71 I 4 ...