Introducing the BIOS
User’s Manual
4-9
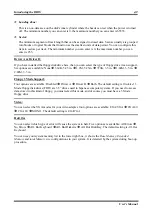
Landing Zone:
This is a non-data area on the disk's inner cylinder where the heads can rest when the power is turned
off. The minimum number you can enter is 0, the maximum number you can enter is 65535.
Sector:
The minimum segment of track length that can be assigned to stored data. Sectors usually are grouped
into blocks or logical blocks that function as the smallest units of data permit. You can configure this
item to sectors per track. The minimum number you can enter is 0, the maximum number you can
enter is 255.
Driver A & Driver B:
If you have installed the floppy disk drive here, then you can select the type of floppy drive it can support.
Six options are available: None
360K, 5.25 in.
1.2M, 5.25in.
720K, 3.5 in.
1.44M, 3.5 in.
2.88M, 3.5 in.
Floppy 3 Mode Support:
Four options are available: Disabled
Driver A
Driver B
Both. The default setting is
Disabled
. 3
Mode floppy disk drives (FDD) are 3.5” drives used in Japanese computer systems. If you need to access
data stored in this kind of floppy, you must select this mode, and of course you must have a 3 Mode
floppy drive.
Video:
You can select the VGA modes for your video adapter, four options are available: EGA/VGA
CGA 40
CGA 80
MONO. The default setting is
EGA/VGA
.
Halt On:
You can select which type of error will cause the system to halt. Five options are available: All Errors
No Errors
All, But Keyboard
All, But Diskette
All, But Disk/Key. The default setting is
All, But
Keyboard
.
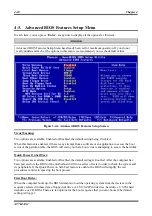
You can see your system memory list in the lower right box, it shows the
Base Memory
,
Extended
Memory
and
total Memory
size
configurations in your system. It is detected by the system during boot-up
procedure.
Содержание AB-AT7-MAX2
Страница 2: ......
Страница 34: ...Chapter 2 AT7 MAX2 2 6 ...
Страница 54: ...Chapter 3 AT7 MAX2 3 20 ...
Страница 94: ...Chapter 5 AT7 MAX2 5 6 ...
Страница 98: ...Chapter 6 AT7 MAX2 6 4 ...
Страница 102: ...7 4 Chapter 7 AT7 MAX2 ...
Страница 106: ...A 4 Appendix A AT7 MAX2 ...
Страница 110: ...Appendix B AT7 MAX2 B 4 ...
Страница 114: ...Appendix C AT7 MAX2 C 4 Step 10 Now you can check the Device Manager to see that the devices are properly installed ...
Страница 118: ...Appendix D AT7 MAX2 D 4 ...
Страница 122: ...Appendix E AT7 MAX2 E 4 ...
Страница 136: ...H 4 Appendix H AT7 MAX2 ...

