I.L. 40-386.3
5-8
(10/94)
The current required to trip can be calculated using the following:
From
Table H-1:
• Zone1G
= 4.5
Ω
• ANG POS = 75
°
• ZR=ZOL/Z1L = 3.0
using an X = 75
° (
lagging)
The current required to trip = 4.00A
±
5 % for fault current lagging fault voltage by 75
°
. This is
the maximum torque angle test. For other points on the MHO circle, change X to a value be-
tween 0
°
and 150
°
, and calculate the value of I. This formula is valid for Zone1G R set to 0.01
ohms.
When the relay trips, remove the fault current.
Zone
1 and AG LED’s will light. The LCD
display will indicate the fault distance. Using the RAISE and LOWER push-buttons the
complete fault record can be reviewed.
See Table 4-3 for a description of the displayed
fault data quantities.
The significant quantities to review are:
Fault Type – “FLT Type” “AG”
Targets – “Zone1G” “Yes”
Fault Voltages (VA, VB, VC, 3V0 and Currents (IA, IB, IC, IP)
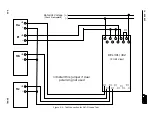
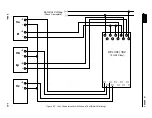
All trip associated contact outputs, should be monitored as a part of this test. Connect
appropriate monitoring equipment to the “dry” contact outputs to be monitored. See
Figures 4-1, 4-2 and 4-3 for contact output connection. Additionally, with an external
jumper connected between TB1 (
SYST TEST)
and FT-5 (
FRI/RI ENA
), the following can
be observed:
1.
Breaker failure initiate (BFI) BFIA-1 and BFIA-2 are closed as long as the fault is applied
after the trip decision is made. BFI contacts “follow” the trip contacts.
2.
General Start (GS) contact will pick-up for approximately 50 ms immediately after the fault
is applied.
3.
Trip alarm (Trip alarm, Al-2), relay will pick-up and remain picked up as long as the fault is
applied, after the trip decision is made. The AL-2 contact “follows” the trip contacts. After
the fault has been removed, AL-2 will remain picked up since the “Trip Alarm” is set to Seal-
in. Alarm 2 can then be reset by pushing the RESET push-button.
I
V
LN
Z
1
G
COS PANG
X
–
(
)
1
Z
R
1
–
(
)
3
---------------------
+
----------------------------------------------------------------------------------------------
=
Содержание REL 301
Страница 1: ......
Страница 8: ......
Страница 17: ...I L 40 386 3 1 10 10 94 2682F39 Sheet 1 of 2 Sub 2 Figure 1 2 REL 301 302 Layout Vertical...
Страница 18: ...I L 40 386 3 10 94 1 11 2682F39 Sheet 2 of 2 Sub 2 Figure 1 3 REL 301 302 Layout Horizontal...
Страница 19: ......
Страница 20: ......
Страница 44: ......
Страница 46: ......
Страница 48: ......
Страница 49: ......
Страница 51: ......
Страница 53: ......
Страница 54: ......
Страница 55: ......
Страница 56: ......
Страница 57: ......
Страница 60: ......
Страница 61: ...I L 40 386 3 2 40 10 94 1501B84 Sub 6 Figure 2 31 Reversible Zone3 Phase and Ground Reverse Block Logic...
Страница 62: ...I L 40 386 3 10 94 2 41 Figure 2 32 CO 2 Curve Characteristics 619596 Sub 2...
Страница 63: ...I L 40 386 3 2 42 10 94 Figure 2 33 CO 5 Curve Characteristic 619597 Sub 2...
Страница 64: ...I L 40 386 3 10 94 2 43 Figure 2 34 CO 6 Curve Characteristic 619598 Sub 2...
Страница 65: ...I L 40 386 3 2 44 10 94 Figure 2 35 CO 7 Curve Characteristic 619599 Sub 2...
Страница 66: ...I L 40 386 3 10 94 2 45 Figure 2 36 CO 8 Curve Characteristic 619600 Sub 2...
Страница 67: ...I L 40 386 3 2 46 10 94 Figure 2 37 CO 9 Curve Characteristic 619601 Sub 2...
Страница 68: ...I L 40 386 3 10 94 2 47 Figure 2 38 CO 11 Curve Characteristic 619602 Sub 2...
Страница 126: ...I L 40 386 3 10 94 5 19 Figure 5 3 Microprocessor Module JP6 JP5 JP3 JP4 Clock Battery 1613C55 Sheet 3 of 3 Sub 6...


