+33 4 7642 9550
www.aaton.com
User manual for Cantar-X1 & X2 v2.15 2008 March 28
p.29
p.29
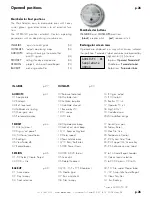
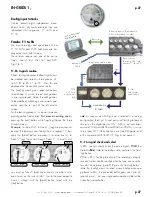
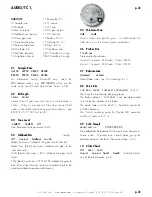
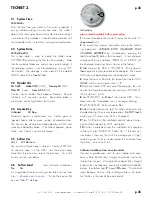
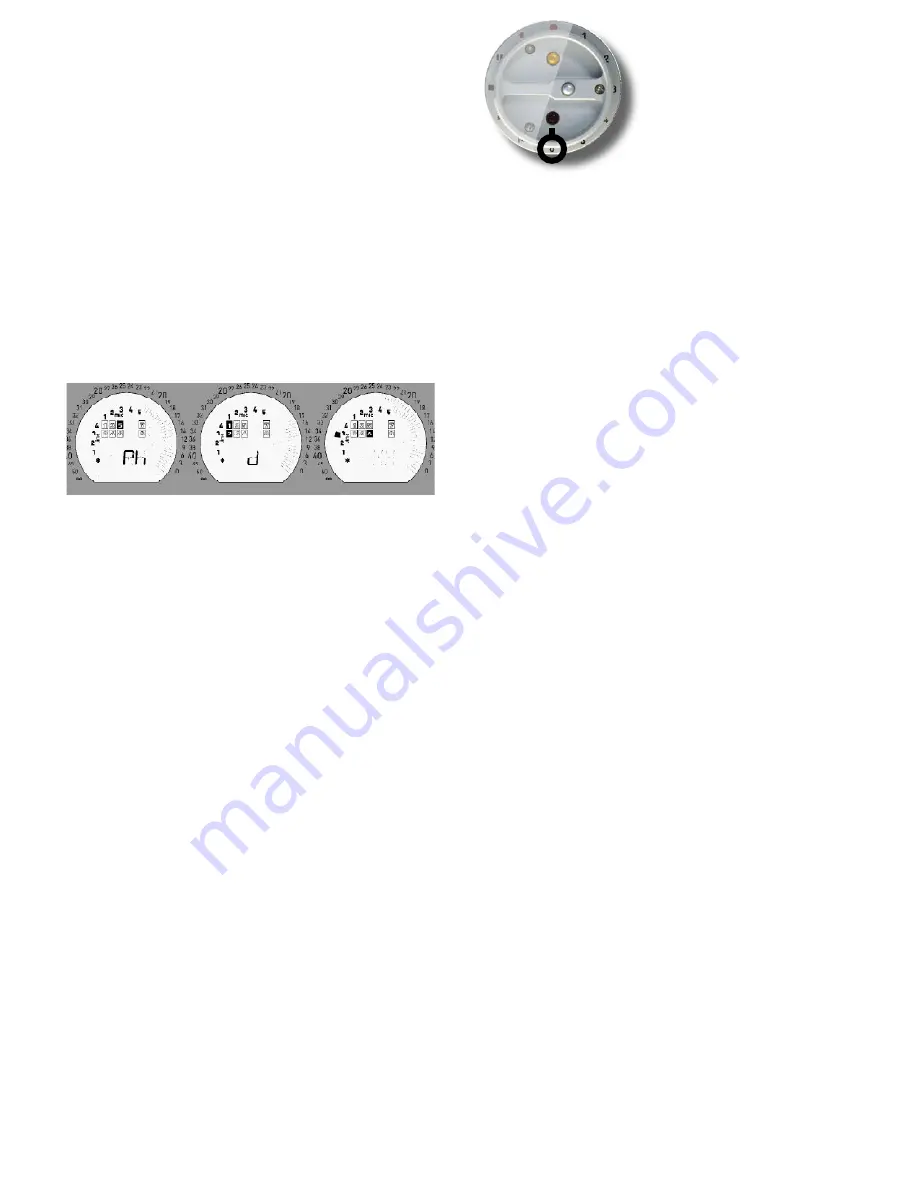
The 3 Screen map
Here is where the Cantar three screen lay-out is at its best.
Audio signals going to the left ear are displayed on the left
screen, signals to be listened to in mono are displayed on
the middle screen, and those going to the right ear are dis-
played on the right.
The middle screen does not represent a
wired output but the ‘mono’ effect resulting from the routing
to both the left and right outputs.
Map creation
Grouped in banks accessible from the black [monitor]
crown, twenty six
Out-maps
are stored for the Digi-out, Fold-
back, Line-out, and Phones. The eight tracks, nine analog
inputs and six digi-inputs (recorded or not) are indepen-
dently routed to these output channels.
Since each of them carries a left and right channel, they are
managed in the same manor. The explanation below concerns
the headphones, and is applicable to the others as well.
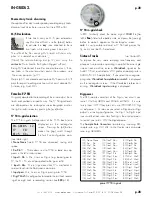
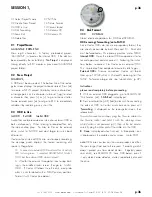
• Tracks to outputs
"Ph.d" example
Rotate the [monitor] crown to
Ph
. ‘
Ph
’ appears on the left
circular screen. Rotate the [config] crown to get
’d’
on the
middle circular screen. The black blinking cursor pinpoints
an audio source.
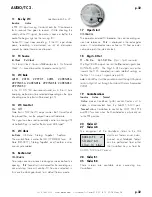
[jog] the blinking cursor to the T5 square on the left circu-
lar screen, press the [black]* button to
'link'
Track 5 to the
headphones left side, the blinking frequency increases to
acknowledge the link.
[jog] to T1 on the middle circular screen, press the [black]
button to link Track 1 to both the left and right sides of the
headphones (do the same for T2).
[jog] to T6 on the right circular screen, press the [black] but-
ton to link Track 6 to the right side of the headphones.
* press the [red] button to
'unlink'
.
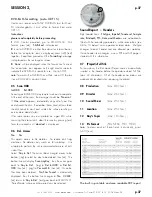
• Inputs to outputs
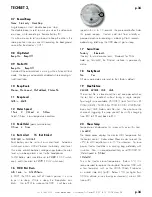
Any input,
even if it is not routed to a track,
can be directly
routed to the monitor outputs. While the blinking black cur-
sor runs on the inner ring of the circular screen, it points out
the input (Mic 1 to Mic 5, Line-in 1 to Line-in 4, Digi-in 1 to
Digi-in 6) to be possibly routed to the left/both/right ears.
[jog] the cursor throughout the ring and ‘link’ the facing input
to an ‘ear’ by pressing the [black] button.
The monitor crown
Rotate the [monitor] crown over the
Do
,
Fb
,
Lo
,
Ph
positions,
and rotate the silver [config] crown over ‘MX, A, B, to Z’: all
the stored
Out-maps
are instantly accessible (p.7).
Do
Digi 7 8-out
Mx, R
to
Z
Mx
(Xa/Xb stereo mixdown) and nine user created
R
to
Z
maps. This digital pair goes to AES ports 7&8.
Fb
Foldback
Mx, R
to
Z
Mx
(Xa/Xb stereo mixdown) and nine user created
R
to
Z
maps.
(See Foldback level adjust in TEST p.18)
Lo
Line-out
Mx, R
to
Z
Mx
(Xa/Xb stereo mixdown) and nine user created
R
to
Z
maps.
(See Line-out level adjust in TEST p.18)
Ph
Phones
Mx,
M,
A
to
Q
(the 'mono' Mc position is Xa+Xb)
Mx
(Xa/Xb stereo mixdown) and fifteen user created
A
to
Q
maps. Mx is the stereo dynamic output of the mixer, it re-
mains the dynamic mix of T1 –T6 in the PLAY position too.
So
Solos
Mx
(Xa/Xb stereo),
Mm
(Xa+Xb mono),
Ma
(Xa only)
, Mb
(Xb only)
, M1... M5, L1... L4, T1... T8.
The solo positions make a direct phone connection to all of
Cantar’s in and out ports.
Remember that Xa Xb are the slider driven dynamic outputs
of the T1-T6 mixer in both REC and PLAY, i.e. totally inde-
pendant of which is actually recorded (or not) on T7 T8;
in the
So
position their levels are monitored on the central
circular screen.
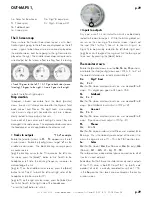
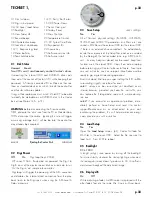
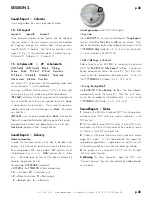
OUT-MAPS 1,
So Solos for the phones
Ph Phones pair,
Fb Foldback pair
Lo Line-out pair
Do Digi 7-8 ouput pair
Dn Digi1–8 (see p.32)
• Track T 5 goes to the left, T 1 & T 2 go to both sides (mono
listening), T 6 goes to the right. • Line-in 3 goes to the right.

