


Zone
Zone
MAIN SCREEN
Pioneer Gold 1.10 & 2.05 Touch Screen Operator Interface
2-4
NAVIGATION
Main Screen Icons and Settings Screen Icons
Icons and Button Functions
System settings and screens are easily accessible by simply
touching
one of the five icons on the
Main Screen
. The subscreens contain
data entry boxes with accessible number keypads for data entry and
screen maneuvering buttons such as
<Next>
,
<Back>
, and
<OK>
.
Main Screen Icons
There are 7
Main Screen
icons. See
Table 1
for a list of the
Main
Screen
icons and their functions.
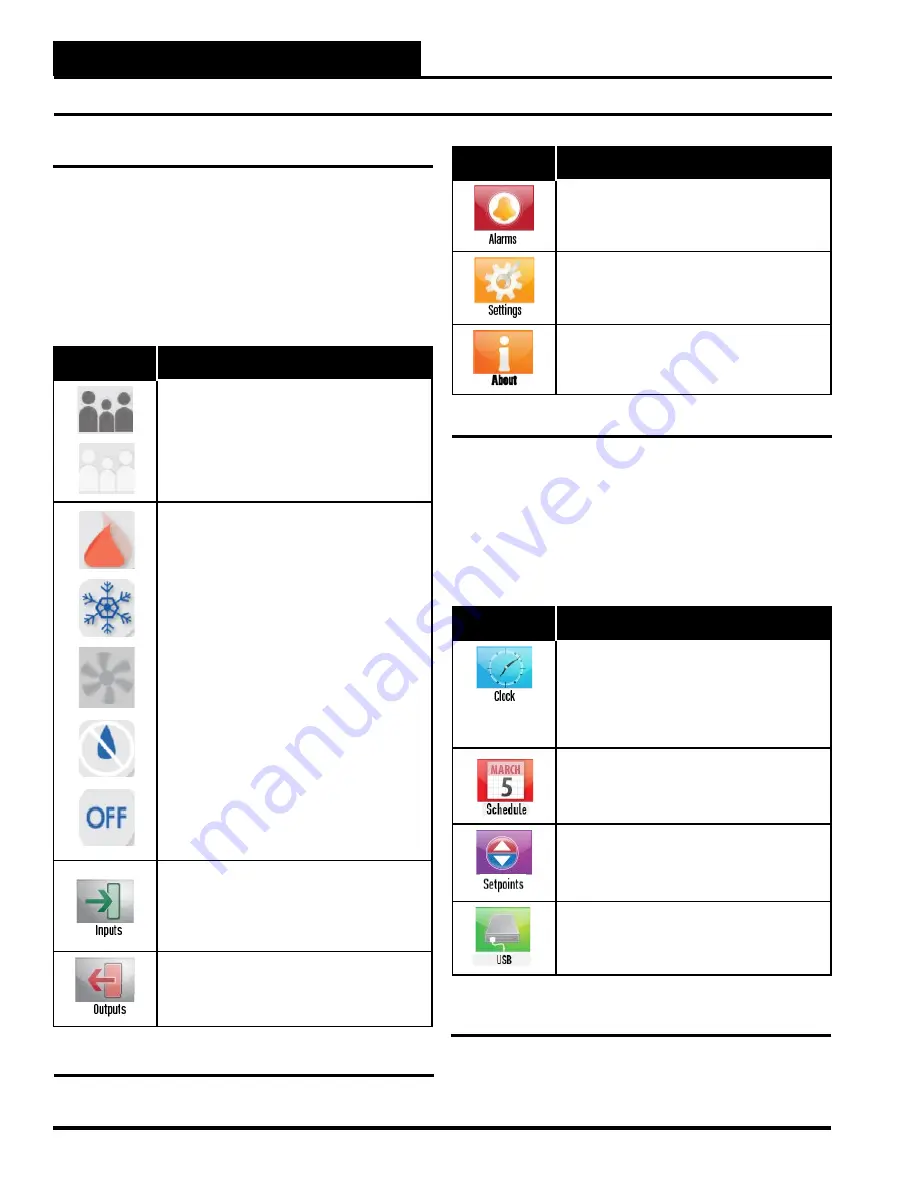
Icon
Main Screen Icons
The
<Occupied/Unoccupied>
icon is
darkened to show Occupied and lightened to
show Unoccupied.
The User Occupancy Override Time is set in the
Configuration Screens
.
The
<Operation Mode>
icon will display at the
top right of the
Main Screen
.
It will display a flame for Heating Mode, a snow
-
flake for Cooling Mode, a fan for Vent Mode, or a
no water droplet for Dehumidification Mode.
It will display the word OFF when the unit is in
Off Mode.
The
<Inputs>
icon takes you to the
Inputs
Screens
. The Input Screens display the status of
all possible inputs connected to the board.
The
<Outputs>
icon takes you to the
Outputs
Screens
. The Output Screens display the status
of all possible outputs connected to the board.
Icon
Main Screen Icons
The
<Alarms>
icon takes you to the
Alarm
Screens.
The
Alarm Screens
display the status of
all possible alarms.
The
<Settings>
icon is password protected.
Only a qualified user can access the
Settings
Screen
. The
Settings Screen
categories are
described in
Table 2
.
The
<About>
icon takes you to the
About
Screen
. The
About Screen
displays the firmware
version and provides other information about the
board.
Manager Settings Screen Icons
The
Manager Settings Screen
is password protected. Only a qualified
user can access this screen. There are seven Manager Settings Screen
icons. Three of them—Inputs, Outputs, and Alarms—are repeated
on this screen. The other four are described below. See
Table 2
for
a list of these icons and their functions.
Icon
Settings Screen Icons
The
<Clock>
icon takes you to the Clock
Screen. This screen allows you to do three
things—set the current date and time and con-
figure Daylight Savings Time. This is one of the
first things you should do—set the correct date
& time—if you notice the time or date is wrong at
the top of the
Main Screen
and
Settings Screen
.
The
<Schedule>
icon takes you to the Set
Schedule Screen. This screen allows you to set
the desired schedule for the controller.
The
<Setpoints>
icon takes you to the
Setpoint Screens
where you can access and
change setpoints.
The
<USB>
icon takes you to the
USB Screen
where you can update firmware, download
setpoints to USB, and upload setpoints from
USB.
Table 1: Main Screen Icons & Functions
Table 1, cont.: Main Screen Categories & Functions
Table 2: Manager Settings Screen Icons &
Functions


