


Operating instructions
a-TroniX inverter AX series, 1ph
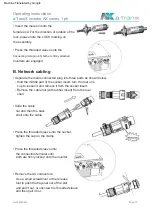
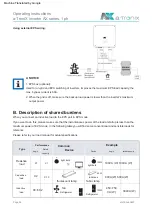
A. Installing a communication device (Optional)
• WLAN/LAN/4G (Optional)
The inverter has an interface for WiFi/LAN/4G devices, which allows this device to collect
information from the inverter; including the inverter working status, power, etc., and
update this information on the monitoring platform (the WiFi/
WLAN product manual).
2. Plug the WLAN/LAN/4G device into the “WLAN/GPRS” port on the
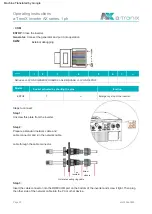
4. Set up the location account on the a-TroniX monitoring platform (please refer to the
monitoring user manual for further details).
LAN/4G device can be purchased from your local supplier).
Bottom of the inverter.
Connection steps:
3. For WiFi device: Connect the WiFi device to the local router and
1. For LAN device: Complete the cabling between the router and LAN device (refer to
the LAN product manual for more information).
complete the WiFi configuration (see the for more details
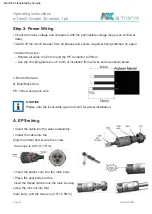
6.4 Ground connection
6.5 Electrical connection
Use a screwdriver to screw in the ground screw as shown below:
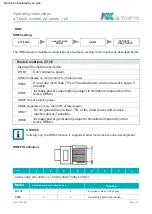
The AX1ph series inverters are available with multiple communication options such
as WiFi, LAN, GPRS, RS485 and meter with an external device.
Operational information such as output voltage, current, frequency, error information,
etc. can be monitored locally or remotely via these interfaces.
Page 26
atx009de0823
Machine Translated by Google


