


Operating instructions
a-TroniX inverter AX series, 1ph
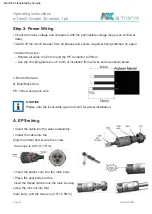
• Remove the AC connectors:
- Hold the middle part of the socket insert, turn the rear one
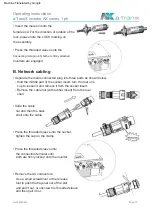
• Press the threaded sleeve onto the
• Press the threaded sleeve into the socket,
tighten the cap on the clamp.
Use a small screwdriver or the release
tool to push the bayonet out of the slot
and pull it out, or unscrew the threaded sleeve
and then pull it out.
cup to loosen it and remove it from the socket insert.
Connecting terminal until both are firmly attached
• Press the threaded sleeve onto
the connection terminal until
both are firmly locked onto the inverter.
- Remove the cable nut (with rubber insert) from the rear
shell.
• Insert the male end into the
Inverters are engaged.
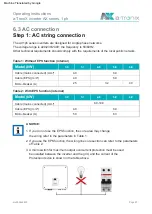
• Separate the mains connected plug into three parts as shown below.
• Slide the cable
nut and then the back
shell onto the cable.
female end. For the direction of rotation of the
lock, please note the LOCK marking on
the assembly.
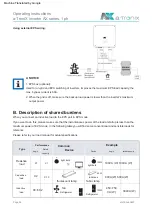
B. Network cabling
atx009de0823
Page 25
Machine Translated by Google


