Quick Installation Guide
HSG200 802.11n/b/g Hotspot Gateway ENGLISH
2
System Overview
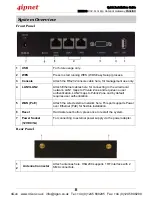
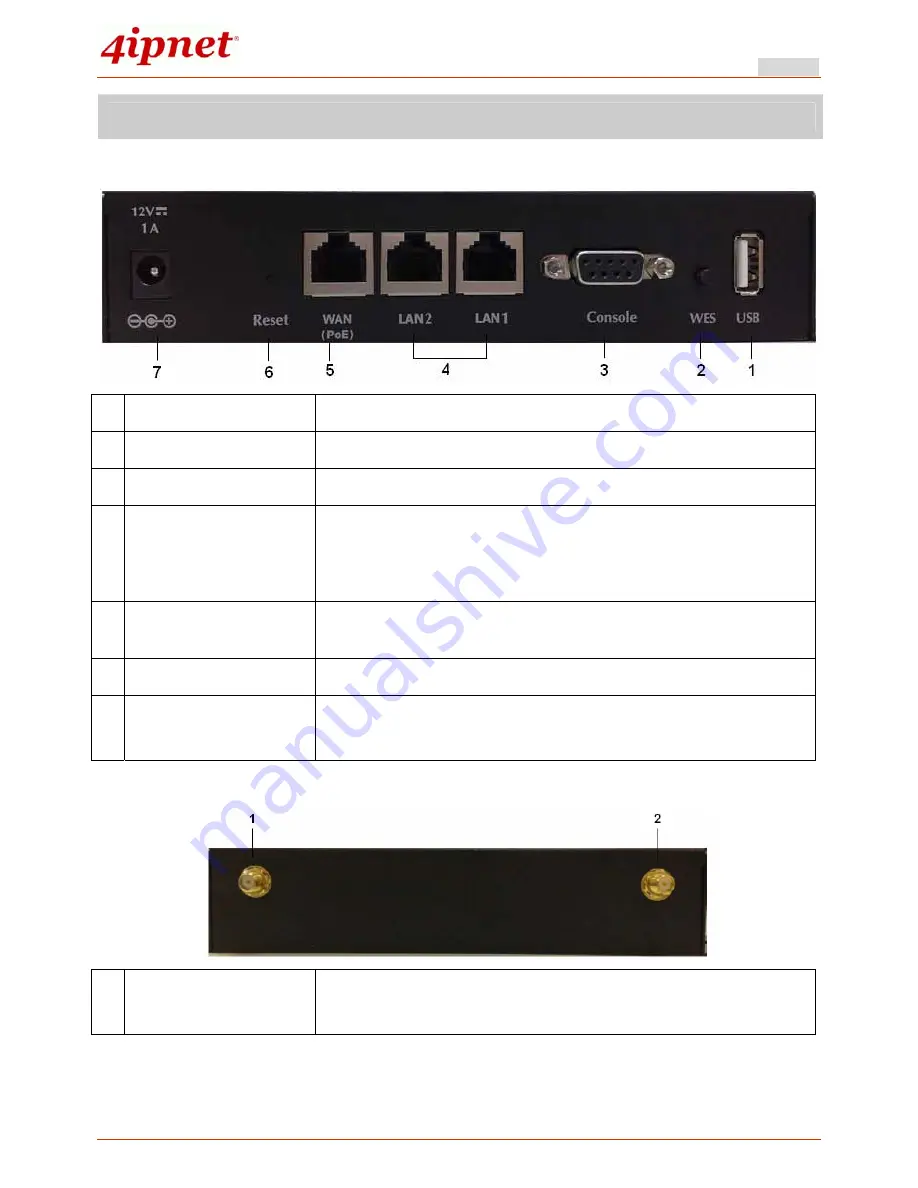
Front Panel
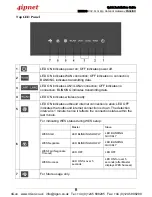
1 USB
For future usage only.
2 WES
Press to start running WES (WDS Easy Setup) process.
3 Console
Attach the RS-232 console cable here, for management use only.
4 LAN1/LAN2
Attach Ethernet cables here for connecting to the wired local
network. LAN1 maps to Private Zone and requires no user
authentication, LAN2 maps to Public Zone and by default
requires user authentication.
5 WAN
(PoE)
Attach the wired external network here. This port supports Power
over Ethernet (PoE) for flexible installation.
6 Reset
Hardware reset button, press once to restart the system.
7 Power
Socket
(12VDC/1A)
For connecting to external power supply via the power adapter.
Rear Panel
1
2
Antenna Connector
Attach antennas here. HSG200 supports 1 RF interface with 2
SMA connectors.
4Gon www.4Gon.co.uk [email protected] Tel: +44 (0)1245 808295 Fax: +44 (0)1245 808299


