


VISIX Stereoscopic People Counting Camera | Quick Start Guide |
VX-VSS-20
12000 Pecos Street, Suite 290, Westminster, CO 80234 | www.3xlogic.com | (877) 3XLOGIC
13
3.
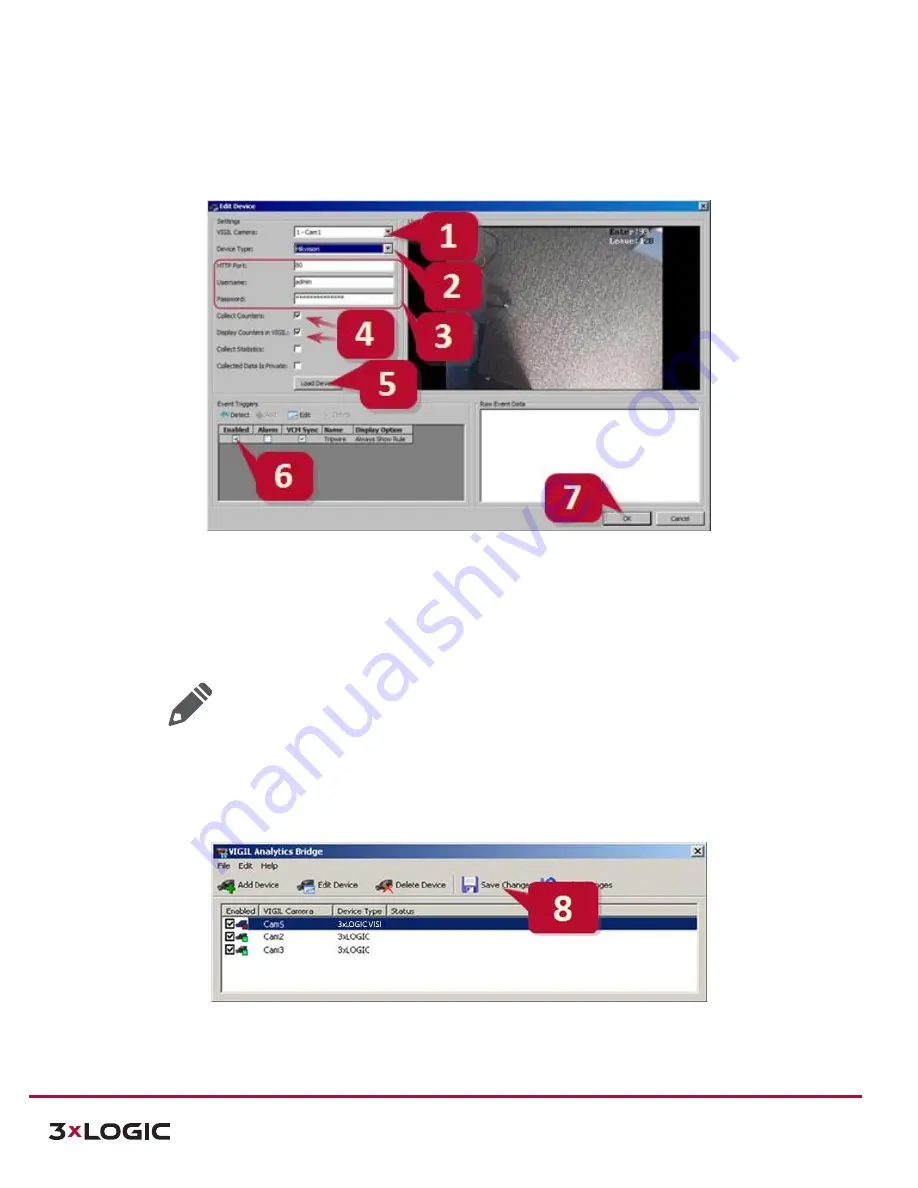
Fill in the remaining connection information (by default, this camera use Port 80).
4.
Toggle
Collect Counters
and
Display Counters in VIGIL
on.
Figure 4-10
VIGIL Analytics Bridge - Add Device Window
5.
Once you have configured camera connection information, click the
Load Device
button
to detect the
analytics rules currently configured on the camera. Whenever new rules are configured on the camera, the
Detect
button must be clicked to refresh the rules in the list. The rule list will populate with available rules.
6.
Toggle
Enable
for all rules you wish to interface with the VIGIL Server.
Note:
Toggling
Alarm
on
will enable alarms in VIGIL Server for the selected rule. If
Alarm
is not toggled,
only rule data will be inserted to the VIGIL DB.
VCM Sync
(enabled by default) will enable rule data
syncing with VIGIL Central Management. If no VCM is available, this option is ignored.
7.
Click
OK
after detecting. The
Add/Edit Device
window will close
.
8.
On the main screen, click
Save Changes.
Save Changes
will only appear when a camera has been added or
edited. All new rule settings will be pushed to VIGIL Server.
Figure 4-11
VIGIL Analytics Bridge - Saving Changes
Configuration is now complete. The VIGIL Server system will now record video as well as data based on the VX-VSS-
20’
s detected people counting events.