4. Assemble Back
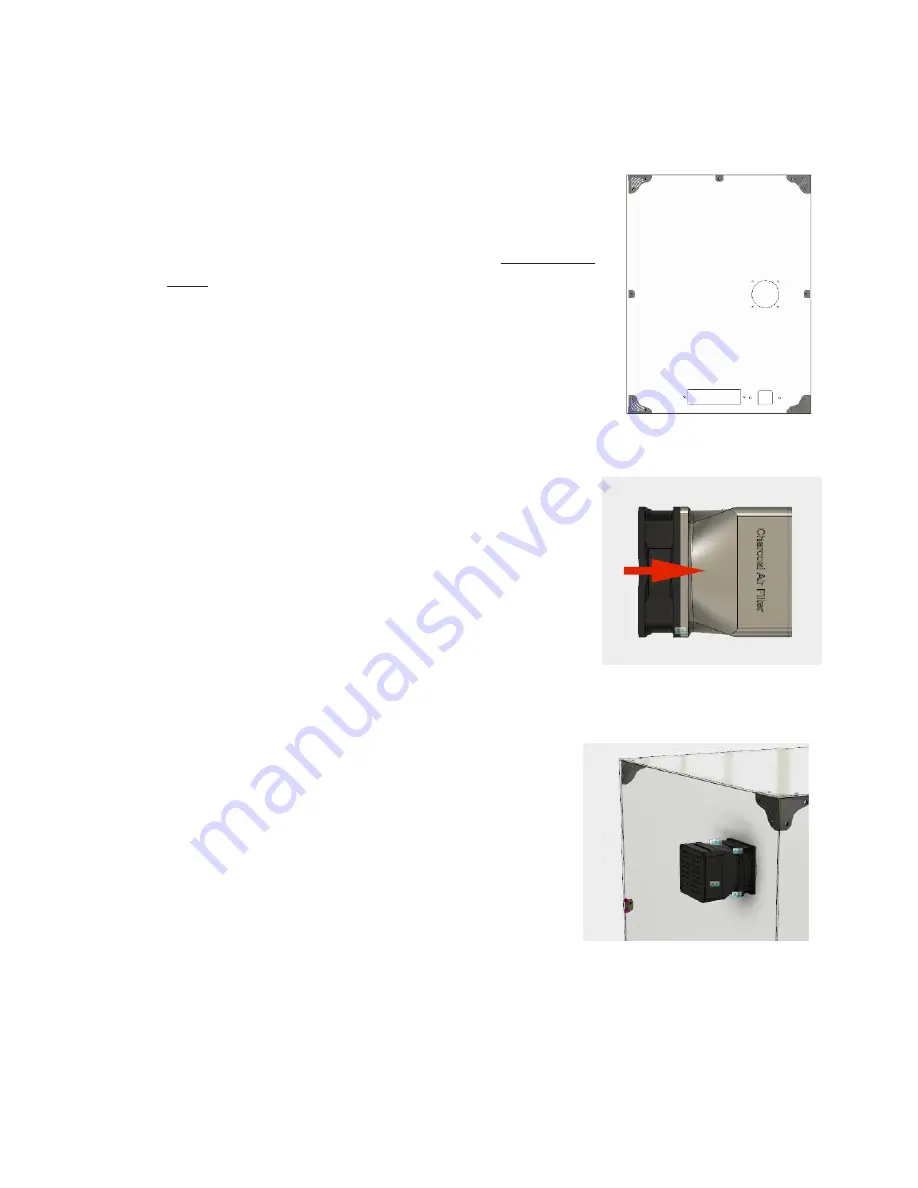
The back of the enclosure when viewed from the back is
shown to the right. The four corner connectors are mirror
images of the front. The large hole is either for an air filter
(purchased separately) or can be covered up 3D printing a
cover using M4 10mm screws. (There’s a link to the cover
on the product page.)
On the top and on each side are “mid panel corner
connectors”, which are basically simple L-shapes.
If assembling the Charcoal Air Filter, confirm the
direction of the fan’s air filter by plugging it into a USB
power supply before attaching to the filter and back of
the enclosure using M4 cap head 30mm or 40mm
screws depending on the depth of the particular fan.
The air filter should look like this after being attached.
Note that its easier to insert the screws from the
inside, and put the nuts next to the filter housing.
Copyright 2020 3DUpfitters
10


