2
GETTING STARTED
2
Getting Started
2.1
Setting up software environment
The software set-up in this section is based on a Windows operating system. The similar steps
applies to set-ups for Mac or Linux based computers. All the software can be downloaded
on our website.
2.1.1
Installing electronics driver
Like other device drivers, the electronics driver of your 3D printer allows your computer to
recognize the printer when you connect it to the computer. The Artifex 2 3D Printer uses
the RAMBo electronics from Ultimachine. No installation is required for Mac and Linux
systems. The driver file for Windows, RAMBo USBdriver.zip, can be downloaded on our
website. Follow steps below to install the driver for Windows:
1. Download the driver and save it in a folder of your choice. In our case, we saved the
file on the desktop.
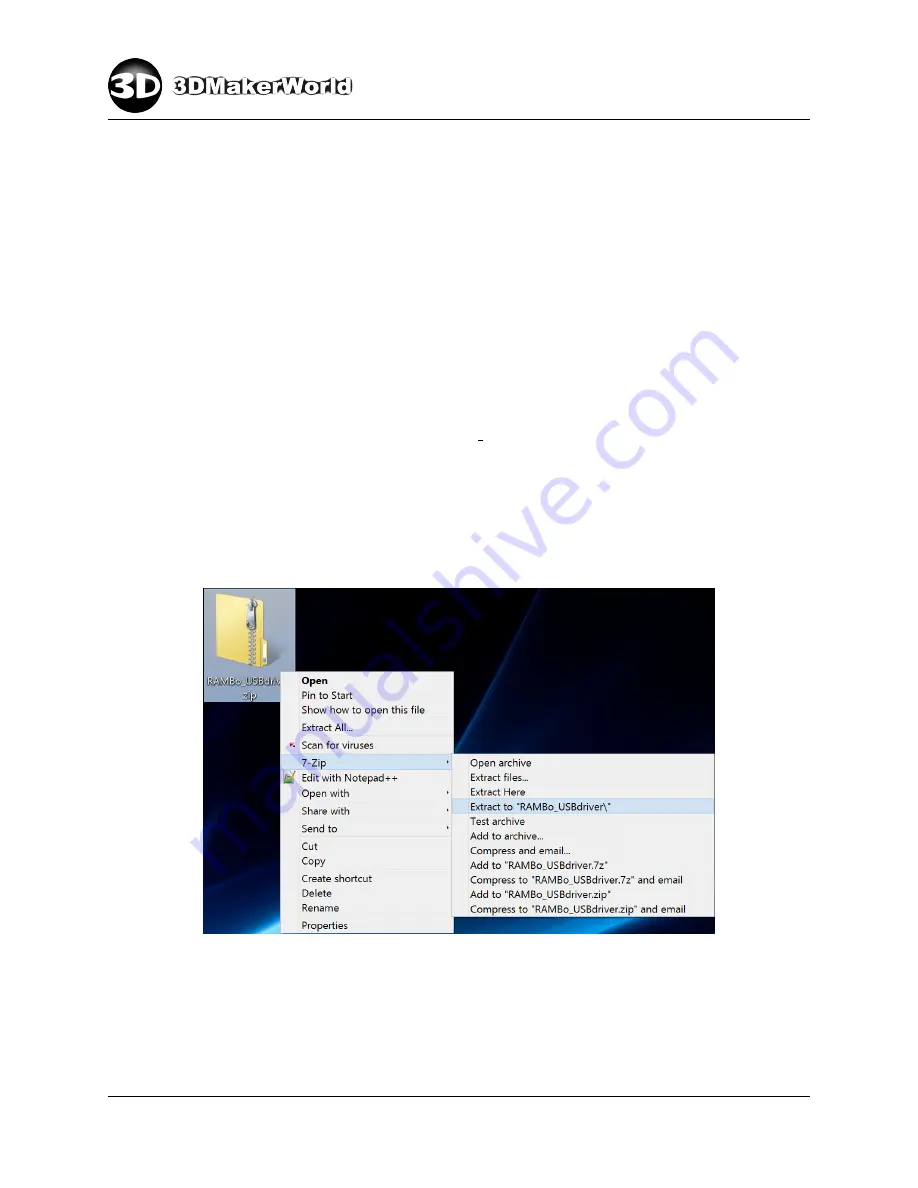
2. Unzip the compressed file using 7-Zip or other archive programs. (Figure 2.1)
Figure 2.1: Unzip the driver file using 7-Zip
3. Connect the printer to your computer via the provided USB cable. At the first time
of connecting Artifex 2 to your computer, your computer will likely fail to allocate a
driver for the hardware to work correctly. We will manually update the device driver.
http: // 3dmakerworld. com
11
Содержание Artifex 2
Страница 8: ...1 INTRODUCTION Figure 1 7 The technical specifications of Artifex 2 http 3dmakerworld com 8...
Страница 45: ...2 GETTING STARTED Figure 2 47 Printed cute octopus 3D model http 3dmakerworld com 45...
Страница 57: ...3 SLICING 3D MODELS Figure 3 12 Previewing G code generated by CuraEngine http 3dmakerworld com 57...
Страница 66: ...6 PRINTING WITH DUAL EXTRUDERS Figure 6 2 Artifex 2 Duo Printer Settings Printer http 3dmakerworld com 66...
Страница 67: ...6 PRINTING WITH DUAL EXTRUDERS Figure 6 3 Artifex 2 Duo Printer Settings Extruder http 3dmakerworld com 67...
Страница 68: ...6 PRINTING WITH DUAL EXTRUDERS Figure 6 4 Artifex 2 Duo Printer Settings Printer Shape http 3dmakerworld com 68...


