22
3D Systems, Inc.
Connecting The Printer
The printer is network-ready and easily connected .
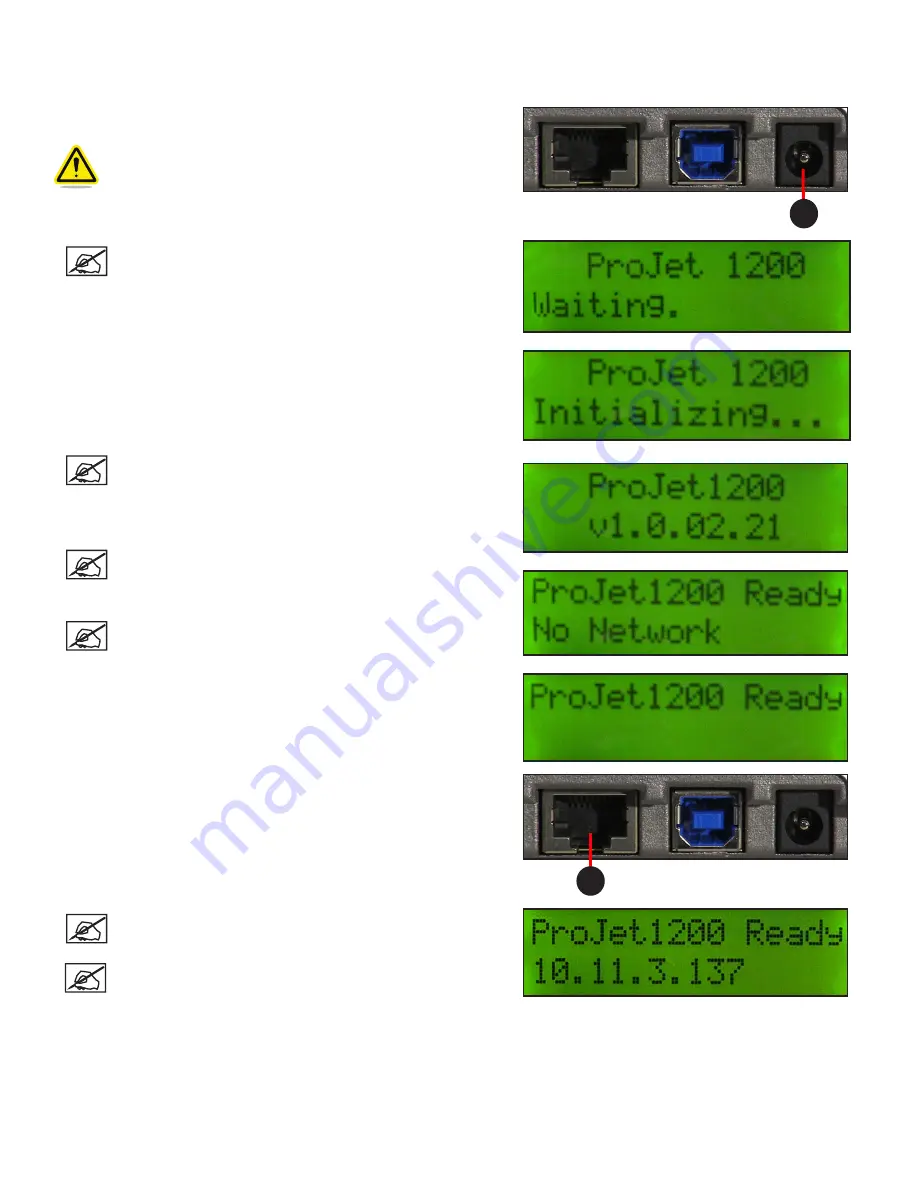
1 . Connect the A/C power cord to utility power and then connect the
power supply to the power inlet (A) on the printer .
WARNING: DO NOT PLUG IN USB CABLE AT THIS TIME .
ONLY PLUG IN USB CABLE AFTER DRIVERS ARE LOADED
AND MACHINE IS BOOTED, SEE USB INSTRUCTIONS IN
FOLLOWING SECTION .
A
NOTE: After connecting the printer to utility power, a series
of screens will appear as the printer boots up .
NOTE: This screen shows the firmware version number.
NOTE: This screen indicates that it is not connected to a
network .
NOTE: This screen shows that the printer has completed the
boot process and is ready to connect to a network .
2 . If connecting to a network, connect the printer Ethernet port (A) to
the network with an Ethernet cable . If connecting printer via USB
connection see
CONNECTING PRINTER USING USB CONNECTION
below .
A
NOTE: Once the printer is connected to the network, the IP
address will appear .
NOTE: If no IP address displays this could be because your
company is on a sub net . Contact your IT Administrator for
the IP Address .
Connecting Printer Using a USB Connection
Follow Step 1 above, when LCD display shows
ProJet 1200 Ready
connect machine via USB cable and wait while machine installs all
the necessary drivers for that particular printer on your computer . (This will take a couple of minutes) .
Once updates are complete, and printer is connected, display will show the
Printer Ready No Network
.


