


19
3D Systems, Inc.
4 . Select
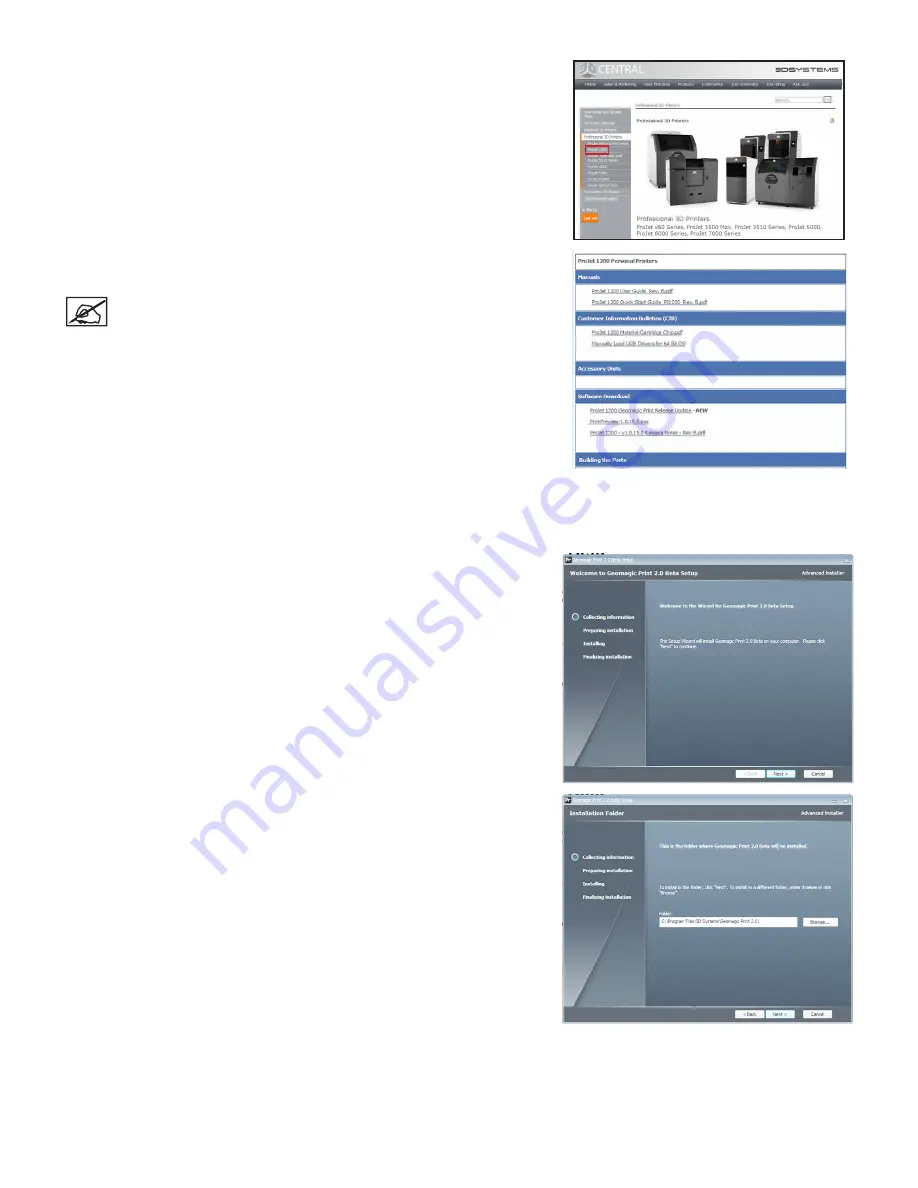
ProJet 1200
from the dropdown menu
.
5 .
Download the application software by selecting the filename under the software
header .
NOTE: A window may open asking if you want to open or save the
zipped file. Select your preferred option.
6 .
Double-click file that was just downloaded to begin installing software.
Install Application
1 .
Open the downloaded installer .
2 .
The first screen to appear in the download process is
Calculating
Information
screen .
3 .
Select
Next
4 .
This screen will allow user to select the path for the information to be stored .
a .
If the default path is sufficient, select
Next
.
b . If user wishes to select somewhere else, select
Browse
and navigate to
the selected path, select
Next
.


