11. Warranty
Warranty Time Period
The warranty will start when you make your purchase (invoice or delivery date).
Warranty time is up to 12 months. Elements are subject to wear and tear are not
covered by this warranty.
Warranty time will not be extended or renewed, nor will it be affected otherwise due to
the subsequent resale, repair, or product exchange. In case of product repair or
exchange during this time, they will be covered until the end of the warranty or 6
months, whichever comes first.
Warranty will be invalid in case of incurring any of the assumptions included in
“Warranty Exclusions”.
Warranty Management
In case of product defect, proceed as follows:
1.
Notify our Technical Support Chanel (
) of any defect or
incidence within the first month of detecting any, never after the warranty time
period.
2.
Have available proof of purchase with at least the date, serial and model
numbers.
3.
The product must be sent or taken to the original purchase place or to the 3D
Limitless address, at buyer’s expense. After inspecting the problem, if it is not
within the assumptions of the “Warranty Exclusions”, 3D limitless will take care
of returning the product to the costumer free of charge; in the case of being one
of them, we will repair the machine at a cost; budget sent to costumer’s for
approval.
4.
The performance criteria will be exclusively determined by 3D Limitless.
5.
This criterion will be as follows: repairing, element’s replacement, or complete
product exchange.
6.
Defective or replaced elements will be 3D Limitless property.
7.
The buyer will receive a detail report of the incident and actions taken once the
warranty management is finished.
Warranty Exclusions
The next cases are not under warranty:
1.
The normal wear-and-tear of the product including, without limitations, mobile
parts wear, control panels and elements that interact with the product’s
operation.
2.
Damage caused by misuse or neglect when using the product.
Содержание ILC
Страница 1: ...Welcome to a Revolution with No Limits ENGLISH USER MANUAL Rev 1 1 ...
Страница 21: ... Create an Icon on the desktop Click Next The program will copy the necessary files on your computer ...
Страница 24: ...On the Printer tab adjust the parameters as shown ...
Страница 25: ...On the Extruder tab adjust the parameters as shown ...
Страница 29: ......
Страница 30: ......
Страница 34: ......
Страница 35: ......
Страница 36: ......
Страница 37: ......
Страница 38: ......
Страница 44: ...Center This option will join together the center of the chosen object with the center of the printing base ...
Страница 53: ...Show Entirely Show One Layer ...
Страница 54: ...Show Range of Layers ...
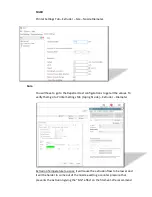
Страница 70: ...Cura Print Tab Speed and Quality Travel ...

