25
3
Undo the two screws on the Network Storage Server’s blanking
plate and remove it. Keep the blanking plate and the fixings in a
safe place.
4
Disconnect the IDE cable and the internal power supply
connector from the back of the Hard Disk.
5
Undo the four screws that secure the supporting
tray and the
Hard Disk to the Network Storage Server from the underside of
the Network Storage Server.
6
Remove the supporting tray containing the Hard Disk from the
Network Storage Server.
Inserting the New Hard Disk
To insert the new Hard Disk:
1
Ensure that the Network Storage Server has been powered down
and disconnected from the mains power supply. Ensure that you
are wearing an anti-static wristband connected to a suitable
earth point.
2
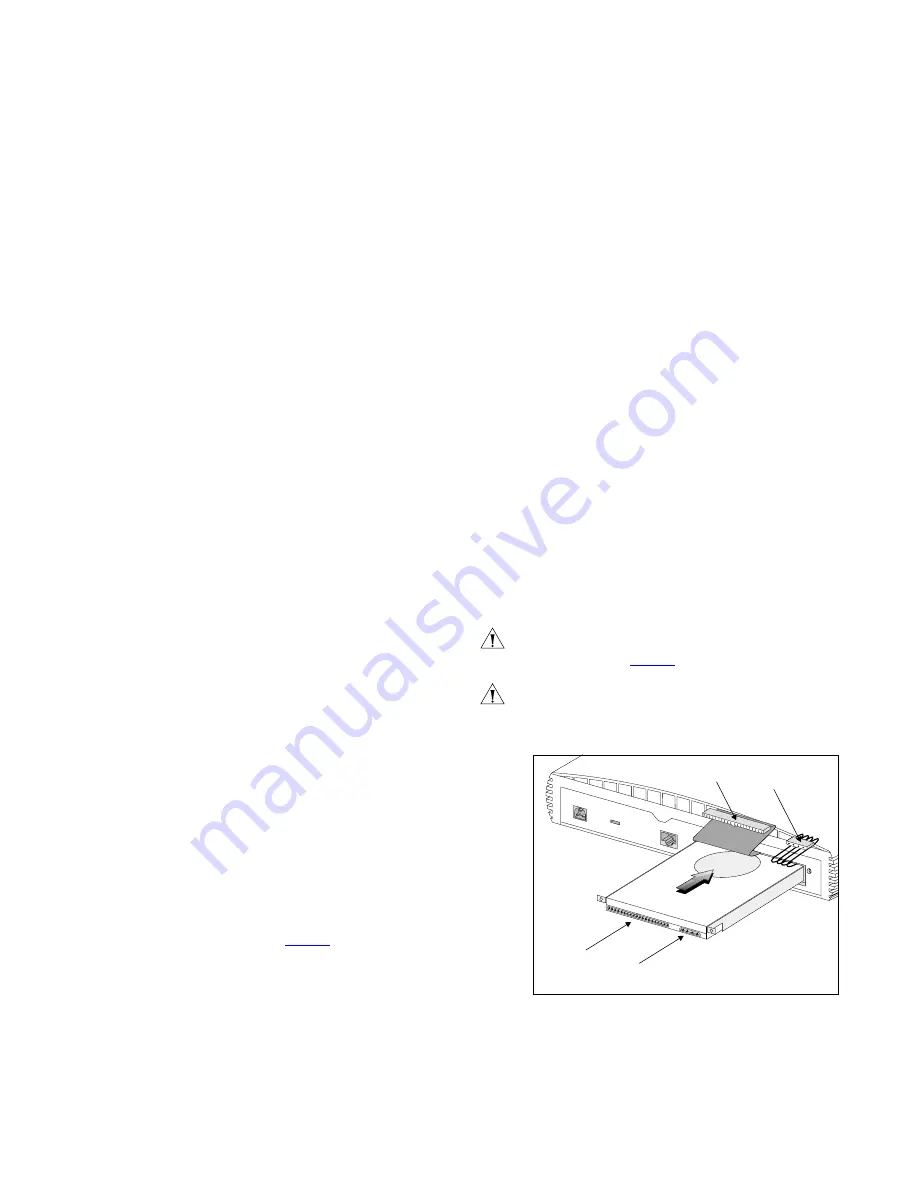
Position the Hard Disk as shown in
Figure 6
.
3
Push the Hard Disk into the Network Storage Server.
4
Tighten the four screws that secure the supporting
tray and the
Hard Disk to the Network Storage Server on the underside of the
Network Storage Server.
5
Reconnect the IDE cable and the internal power supply cable to
the back of the Hard Disk.
6
Secure the blanking plate and the Hard Disk by first positioning
the screws over the screw apertures and then tighten the two
captive screws with a suitable tool screwdriver.
CAUTION:
Keep the IDE cable and the internal power supply
cable away from the Hard Disk as you insert it into the Network
Storage Server (see
Figure 6
).
CAUTION:
After replacing the Hard Disk, you must replace the
blanking plate.
Figure 6
Inserting The Hard Disk
12V DC
2A M
AX
12V DC
2A M
AX
LOCK
LAN
IDE Port
Internal Power Supply Socket
IDE Cable
Internal
Power Supply
Connector
Internal
Power Supply
Connector


