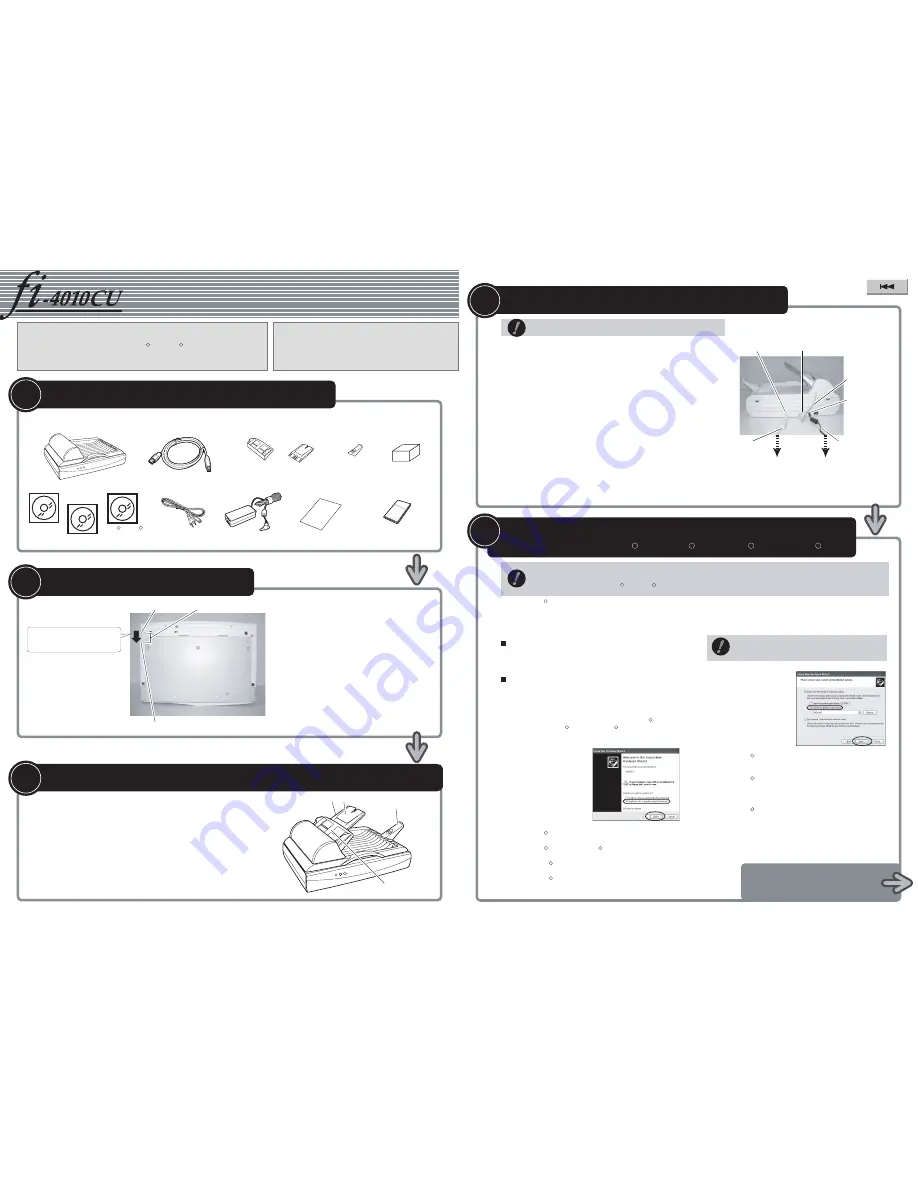
Release the Shipping Lock
2
Check the scanner and accessories
1
Confirm that all of the following items are included.
Scanner
AC cable
fi-4010CU Quick Installation Guide
USB cable
AC adapter
Pad ASY
ADF paper chute A
ADF paper chute B
Document stopper
Lock
Shipping Lock
Unlock
Slide the Shipping Lock to "Unlock"
position.
ADF paper chute B
ADF paper chute A
Document stopper
Flip out part
Continued on next page
Carefully read the "fi-4010CU Image Scanner
Operator's Guide" before using this product.
Particularly read and understand the "Safety Precautions"
before using this product.
Quick Installation Guide
Attach the ADF paper chute and Document stopper
3
1.
Attach the ADF paper chute A to the ADF unit so that the side guide of the
ADF paper chute faces up.
2.
Attach the ADF paper chute B to the ADF paper chute A so that the flip out of
part of the ADF paper chute B faces up.
3.
Insert the clows of the document stopper into the slots of the scanner. Slide the
document stopper in the direction of the arrow marked on it to fix the stopper.
Connect the USB cable, ADF cable, and power cable
4
1.
Insert smaller connector of the USB cable(the one with a core) to the USB conector
on the back side of the scanner.
2.
Connect the other end of the USB cable to the PC.
3.
Connect the ADF cable to the ADF cable connector of the scanner, and fix the thumb
screws of the ADF cable connector.
4.
Connect the power cable to the AC adapter and connect the AC adapter to the AC
adapter connector of the scanner.
5.
Insert the power cable to the power outlet.
Caution
Before connecting the scanner, be sure to turn off the PC and
the scanner.
P3PC-E117-01EN
Install FUJITSU TWAIN32 Scanner driver
5
Windows
R
98, Windows
R
Me, Windows
R
2000, Windows
R
XP
Be sure to install the TWAIN data source after installing the mini-driver.
If the old version of FUJITSU TWAIN32 Scanner driver has been installed on your personal computer, refer to the
"Scanner Utility for Microsoft
R
Windows
R
User's Guide" on the Scanner driver CD-ROM, and update the mini-driver.
Caution
The
Windows
R
XP
screen samples are shown below. The screen
and operations will differ slightly depending on the OS that is being
used.
Preparation
Confirm that the Scanner is connected to your personal computer
with the USB cable.
Installing the mini-driver
1.
Turn on the power by pushing the power switch in the back of the
scanner.
The power lamp lights.
2.
Turn on your personal computer and log on to
Windows
R
.
When using
Windows
R
2000
or
Windows
R
XP
log on as an
administrator . The "Found New Hardware Wizard" dialog box is
displayed.
3.
Check "Install from list or
specified location", then click
[Next].
For
Windows
R
Me
check "Specify the driver location", then click
[Next].
For
Windows
R
2000
and
Windows
R
98
, clicking on [Next] the select
search method screen is displayed.
• For
Windows
R
98
select "Find the most suitable driver for the
device being used" then click [Next].
• For
Windows
R
2000
select "Find the most suitable driver for the
device" then click [Next].
4.
Insert the Scanner driver CD-ROM
5.
Select "Find the most suitable
driver in the next location".
Check "Include the next
location" then specify
D:\Driver2 (When your CD-
ROM is the D drive). After that
click [Next].
For
Windows
R
98
, just check "Specify search location" then specify
D:\Driver2 (When your CD-ROM is the D drive). After that click
[Next].
For
Windows
R
Me
, select "Find the most suitable driver for the
device being used" then click [Next]. Check "Specify search location"
then specify D:\Driver2 (When your CD-ROM is the D drive). After
that click [Next].
For
Windows
R
2000
, just check "Specify location" and then in the
next screen specify "Copy source for origination file" then specify
D:\Driver2 (When your CD-ROM is the D drive), then click [OK].
Refer to the "fi-4010CU Image Scanner Operator's Guide" when you would
like to know more about the scanner.
Refer to the "Scanner Utility for Microsoft
R
Windows
R
User's Guide" on the
Scanner driver CD-ROM when you would like to know more detailed information
about the FUJITSU TWAIN32 Scanner driver installation.
fi-4010CU Image Scanner
Operator's Guide
fi-X
XXX XXX
XXXXX
X
Scanner driver CD-ROM
Manual CD-ROM
Adobe
R
Acrobat
R
5.0
CD-ROM
ADF cable connector
USB connector
Connect to your PC.
Connect to the power outlet.
ADF cable
AC adaptor connector
Power cable
USB cable
1.
Raise the scanner carefully upward so that bottom side of
the scanner faces towards you.
2.
Slide the lock switch to "Unlock" position to release the
lock.
Caution
When automatic start has been set, the "SETUP DISK
START UP SCREEN" is displayed. To close this screen,
click the [Exit] button on this screen.