Epson Perfection V100 Photo
7/06
Epson Perfection V100 Photo - 1
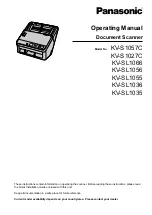
Scanner Parts
Scanner Specifications
General
Mechanical
Electrical
Note:
Check the label on the AC adapter or on the back of the scanner for
voltage information.
Scanner
a
c
b
a
b
a
b
d
c
e
]
Start button
a
Scan to PDF
button
Status light
{
Copy button
|
Scan to E-mail button
Document mat
Document
table glass
Carriage
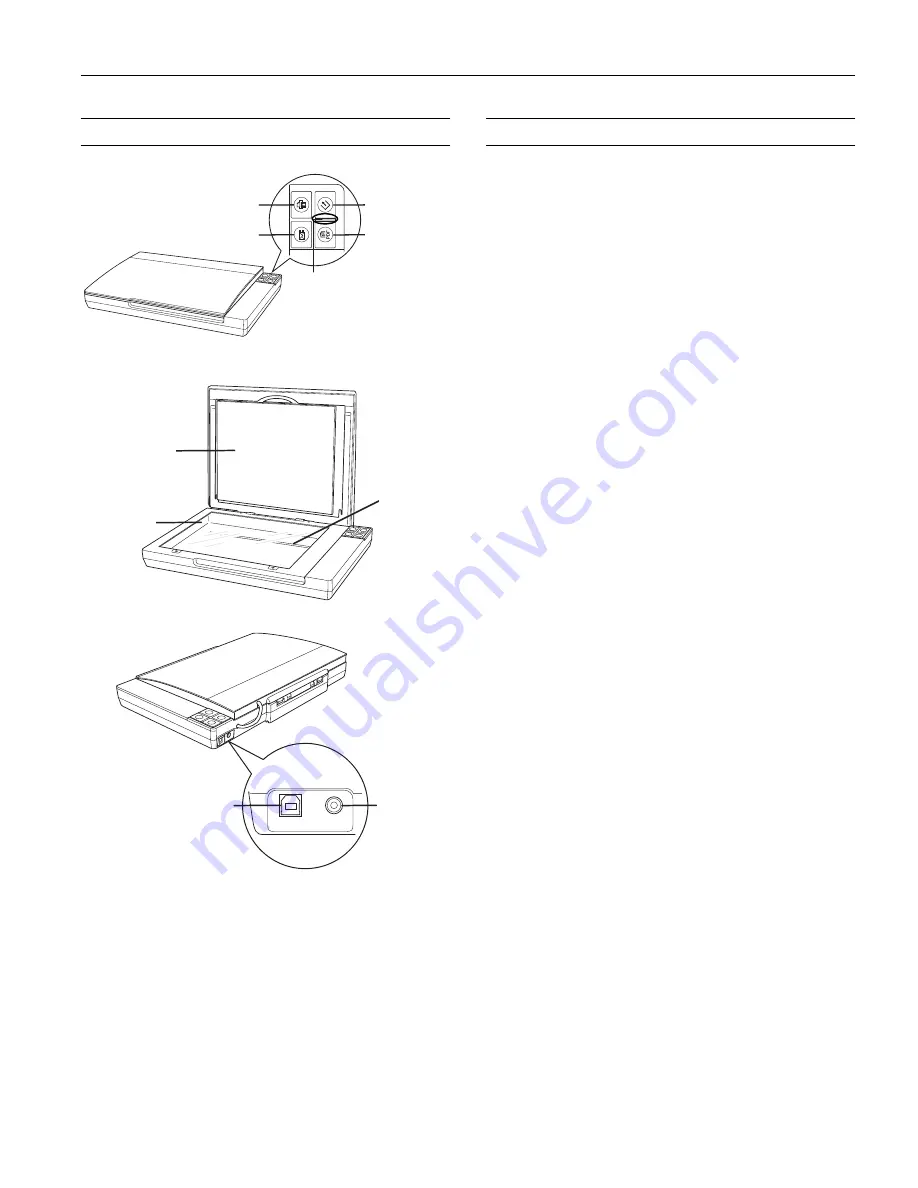
DC power
inlet
USB interface
connector
Scanner type
Flatbed color
Photoelectric device
Color CCD line sensor
Effective pixels
27,200
×
37,440 pixels at 3200 dpi
Document size
Documents or photos:
8.5
×
11.7 inches (216
×
297 mm)
US letter or A4 size
Film or slides:
35mm film strips (6 frames at a time);
35mm slides (4 slides at a time)
Scanning resolution
3200 dpi (main scan)
9600 dpi with Micro Step Drive
™
(sub scan)
Output resolution
50 to 6400, 9600, and 12800 dpi
(50 to 6400 dpi in 1 dpi increments)
Scanning speed
(reflective)
Approximately 4.0 msec per line at
600 dpi
Approximately 14.6 msec per line at
3200 dpi
Image data
16 bits per pixel per color internal
16 bits per pixel per color external
(maximum)
Interface
One USB 2.0 Hi-speed port
Light source
White cold cathode fluorescent lamp
Dimensions
Width: 16.9 inches (430 mm)
Depth: 11 inches (280 mm)
Height: 2.2 inches (57 mm)
Weight
Approx. 5.7 lb (2.6 kg)
Rated voltage
DC 13.5 V
Rated current
1.5 A
Power consumption
16 W operating
13 W stand-by mode
3.5 W sleep mode